Customer Replaceable Units Oven Door Gasket
Page 177
© Copyright 2020 Stratasys. All rights reserved.
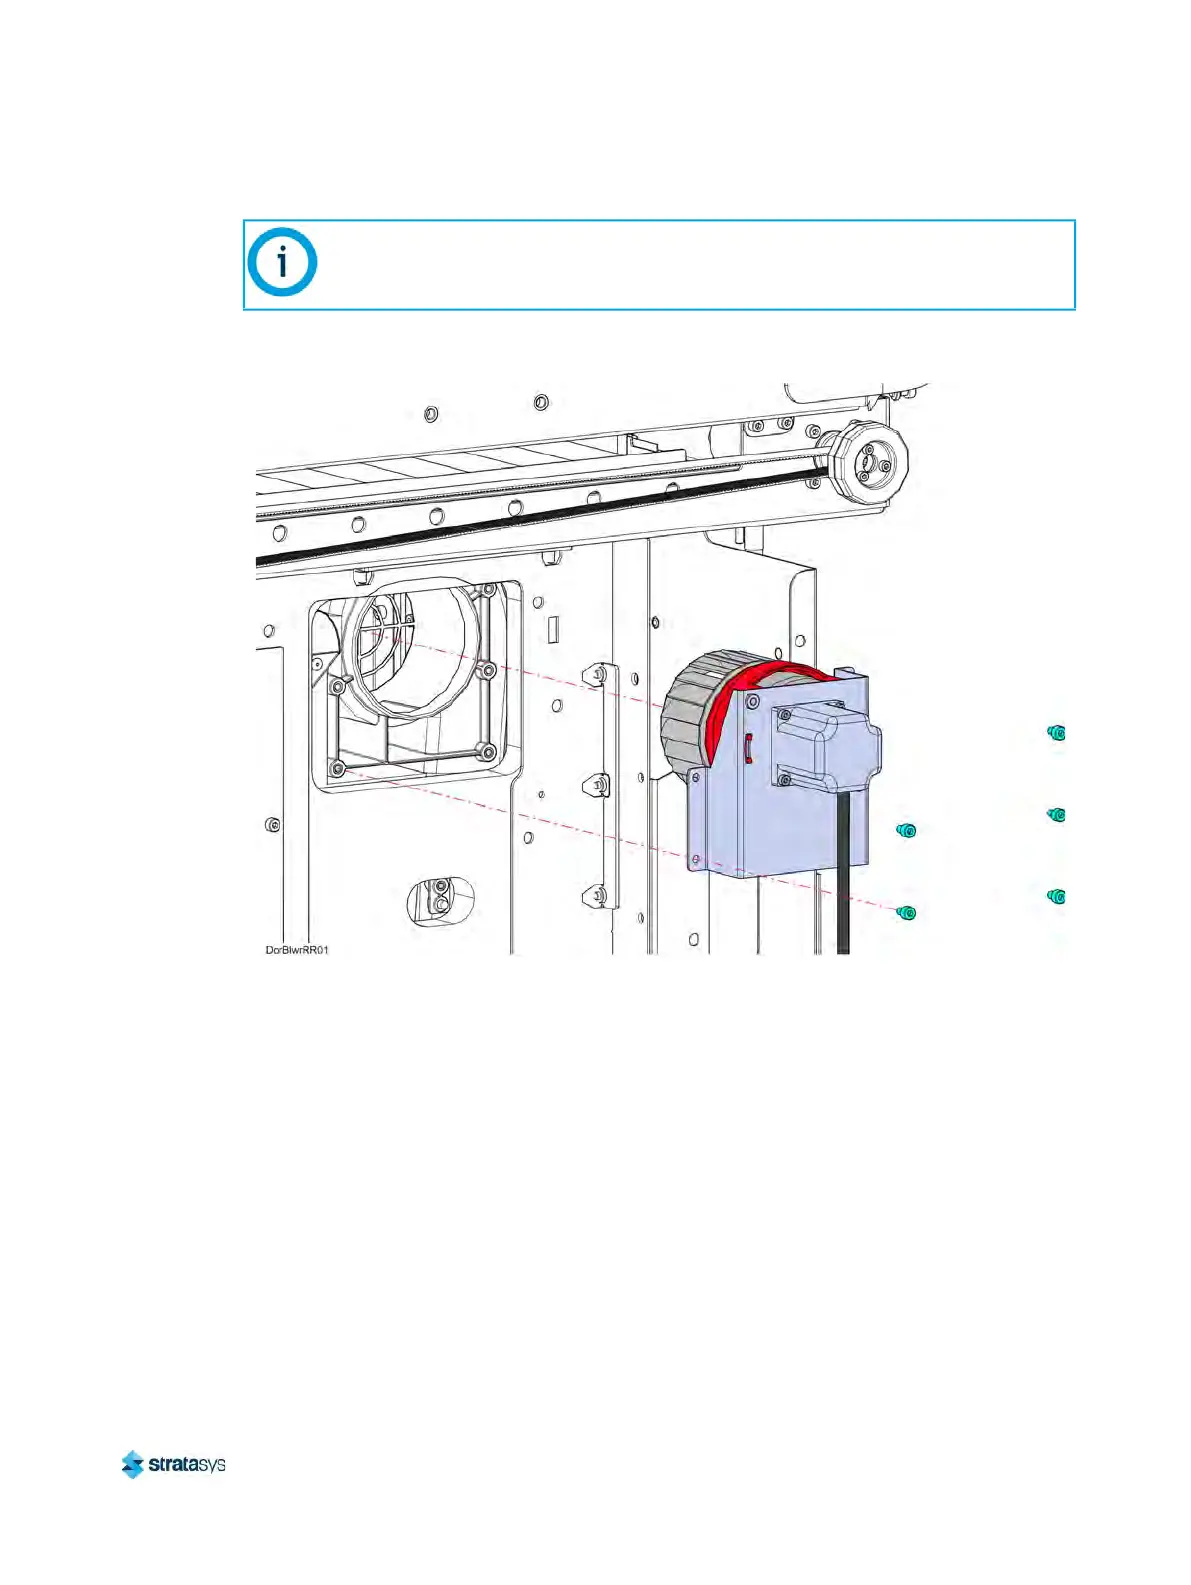
6. Remove the blower assembly from the printer. See Figure 30 (page 177).
Figure 30: Right side blower assembly mounting screw locations
Installing Oven Blower Assembly
1. Using a 3 mm hex wrench, reinstall the blower assembly mounting screws (5). Torque to 13
in-lbs. See Figure 30 (page 177).
2. Make sure the blower motor cable is routed properly and secured with tie wraps.
3
. Reconnect the fan blower motor cable connector to the I/O board (J39 - right blower, J37 -
l
eft blower).
4. Reinstall the side panels. See “
Installing the Side Panels” (page 164).
5. Reinstall the rear panel. See “
Installing the Rear Panel” (page 161).
Oven Door Gasket
Required Tools
• Screwdriver or similar instrument
Note:
Right side oven blower shown only. The left side blower procedure is identical to the
right.





 To Next Page