128
S
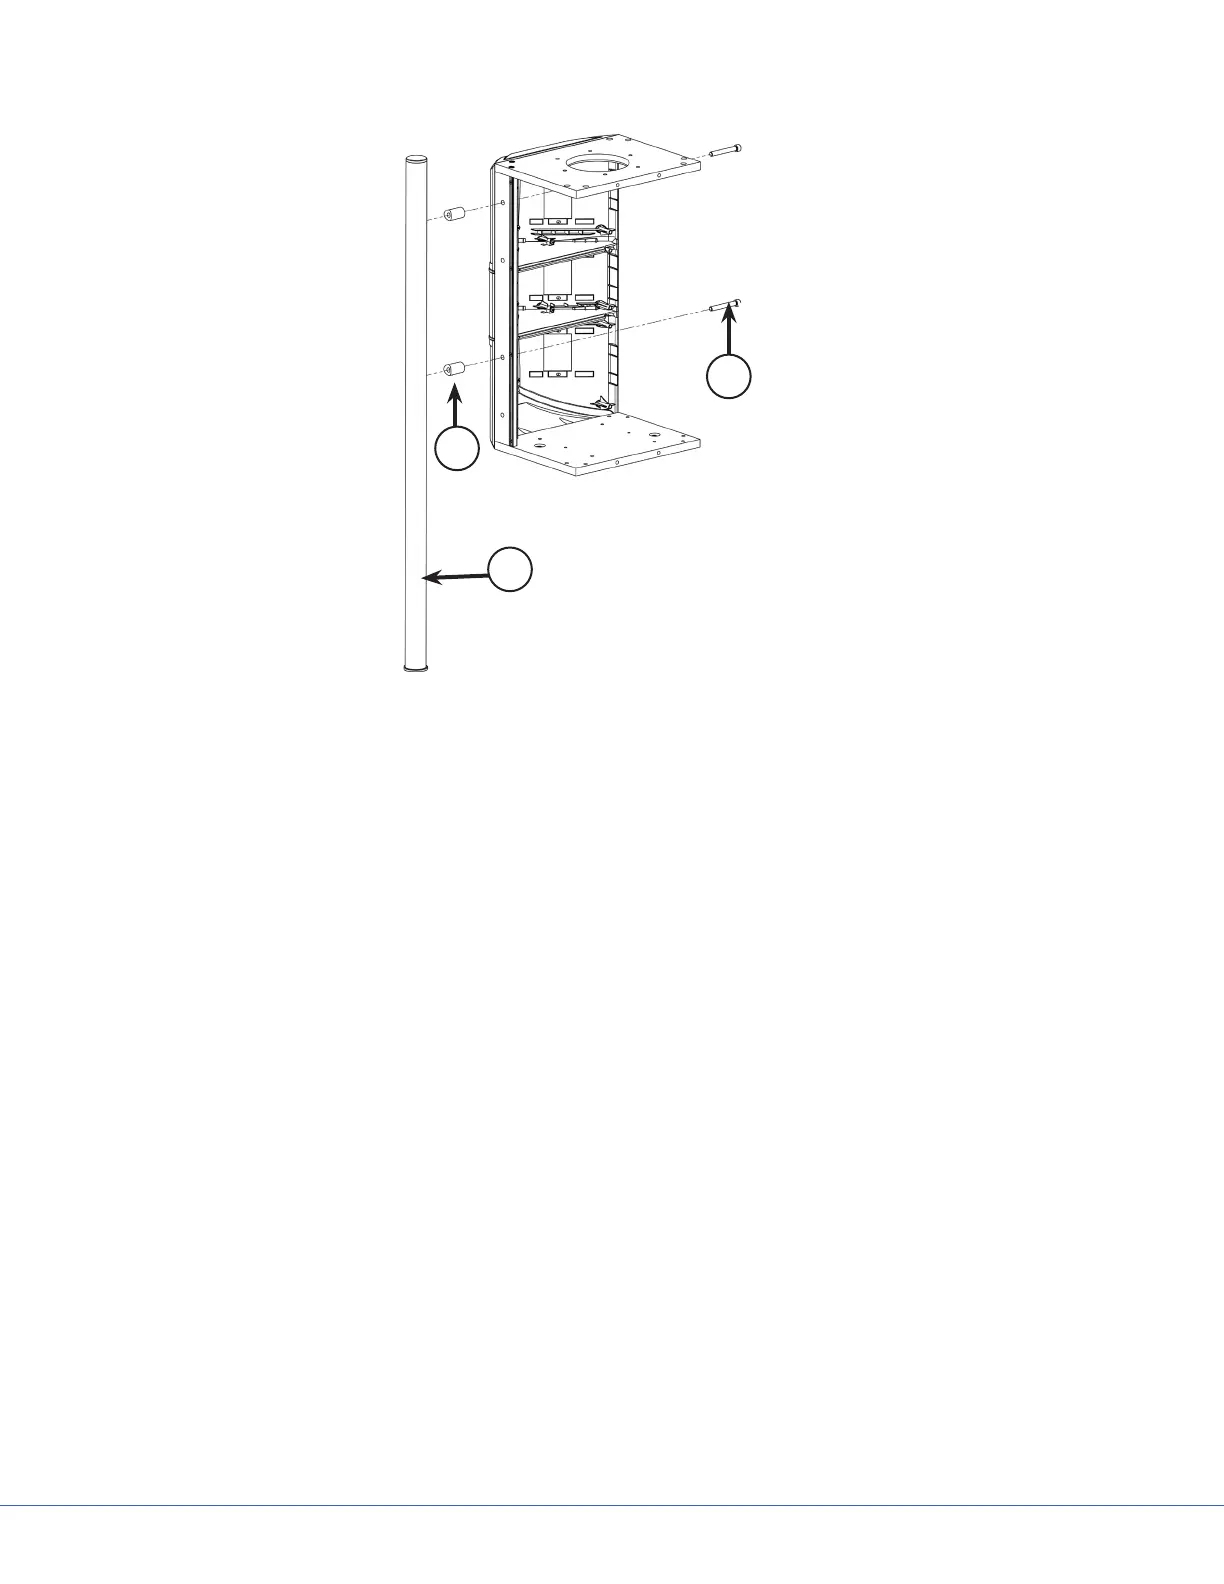
17.7.2 Removing and Attaching the MFR
3
2
1
To remove the MFR:
1. Remove the two M8x3060 screws using an M6 Allen wrench (Item 3 in the gure above).
2. Catch the MFR support spacer (Item 2), to prevent it from falling once the screws have been
removed from the assembly.
3. Do not remove the end stop on the lower end of the MFR.
To attach the MFR:
1. Position the MFR with the screw holes towards the top. e rail will hang lower than the service
head. Replace MFR’s in the same orientation as the original.
2. read one of the M8x30 M8x60 screws through the spacer and into the rail. Do not tighten.
3. read the second M8x30 M8x60 screw through the spacer and into the rail.
4. Tighten all screws.