72
S
12. Installing Covers
12.1 Lights and Flat Panel Suspension
1. Loosen the reducing ring and lower it until it rests on the upper Suspension Arm.
2. Assemble the two halves of the ceiling cover around the down tube above the reducing ring.
3. Install the ceiling gasket cover and around the top edge of the ceiling cover
4. Raise the ceiling cover and secure to the four threaded rods with the supplied screws.
5. Slide the reducing ring up to the ceiling cover and tighten.
Warning Failure to properly attach the ceiling cover may result in the ceiling cover
falling during use!
12.2 Booms
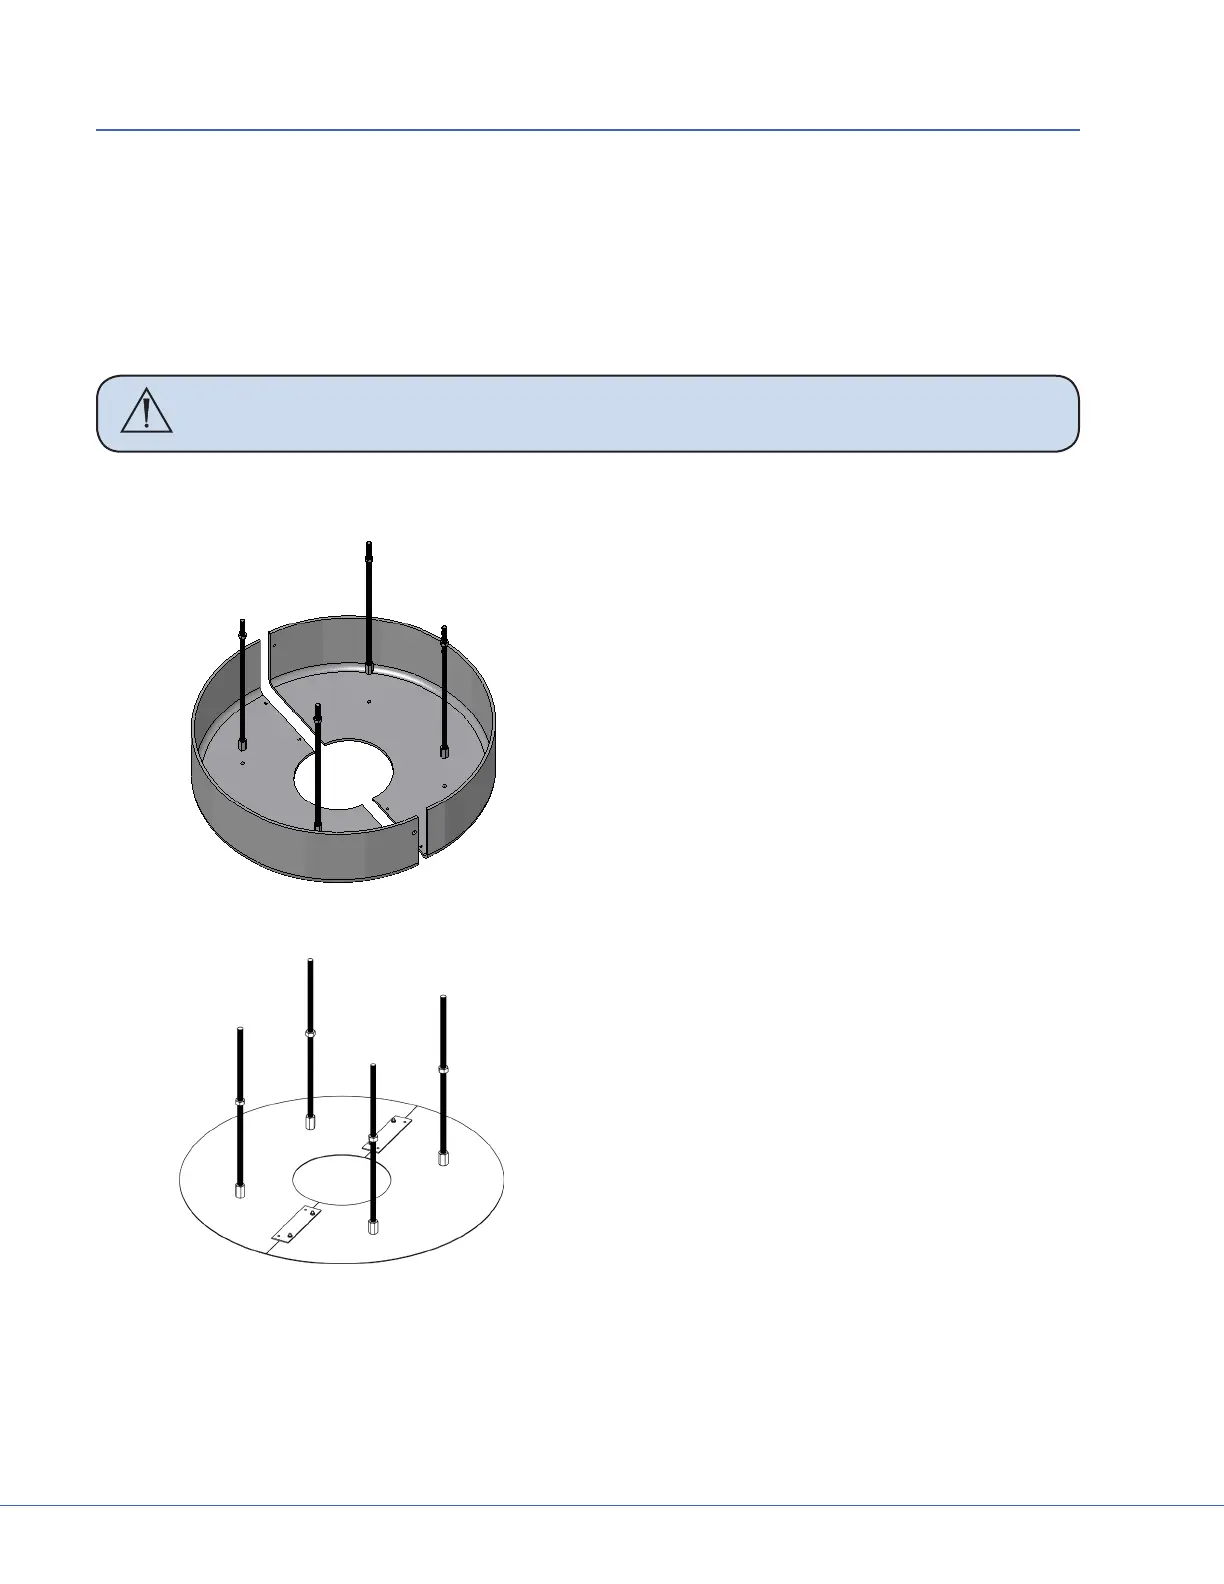
Round, Single Suspension Ceiling Cover
1. Install the four threaded rods into the
Mounting (Interface) Plate
2. Use one-half of the ceiling cover as a guide
to adjust the height of the four threaded
rods. Tighten jam nuts against ceiling plate
to secure rods in place.
3. Attach the ceiling cover to the four thread-
ed rods with the supplied cosmetic screws.
4. Assemble two halves of the ceiling cover
with remaining cosmetic screws.
Low Prole Single Suspension Ceiling Cover