135
S
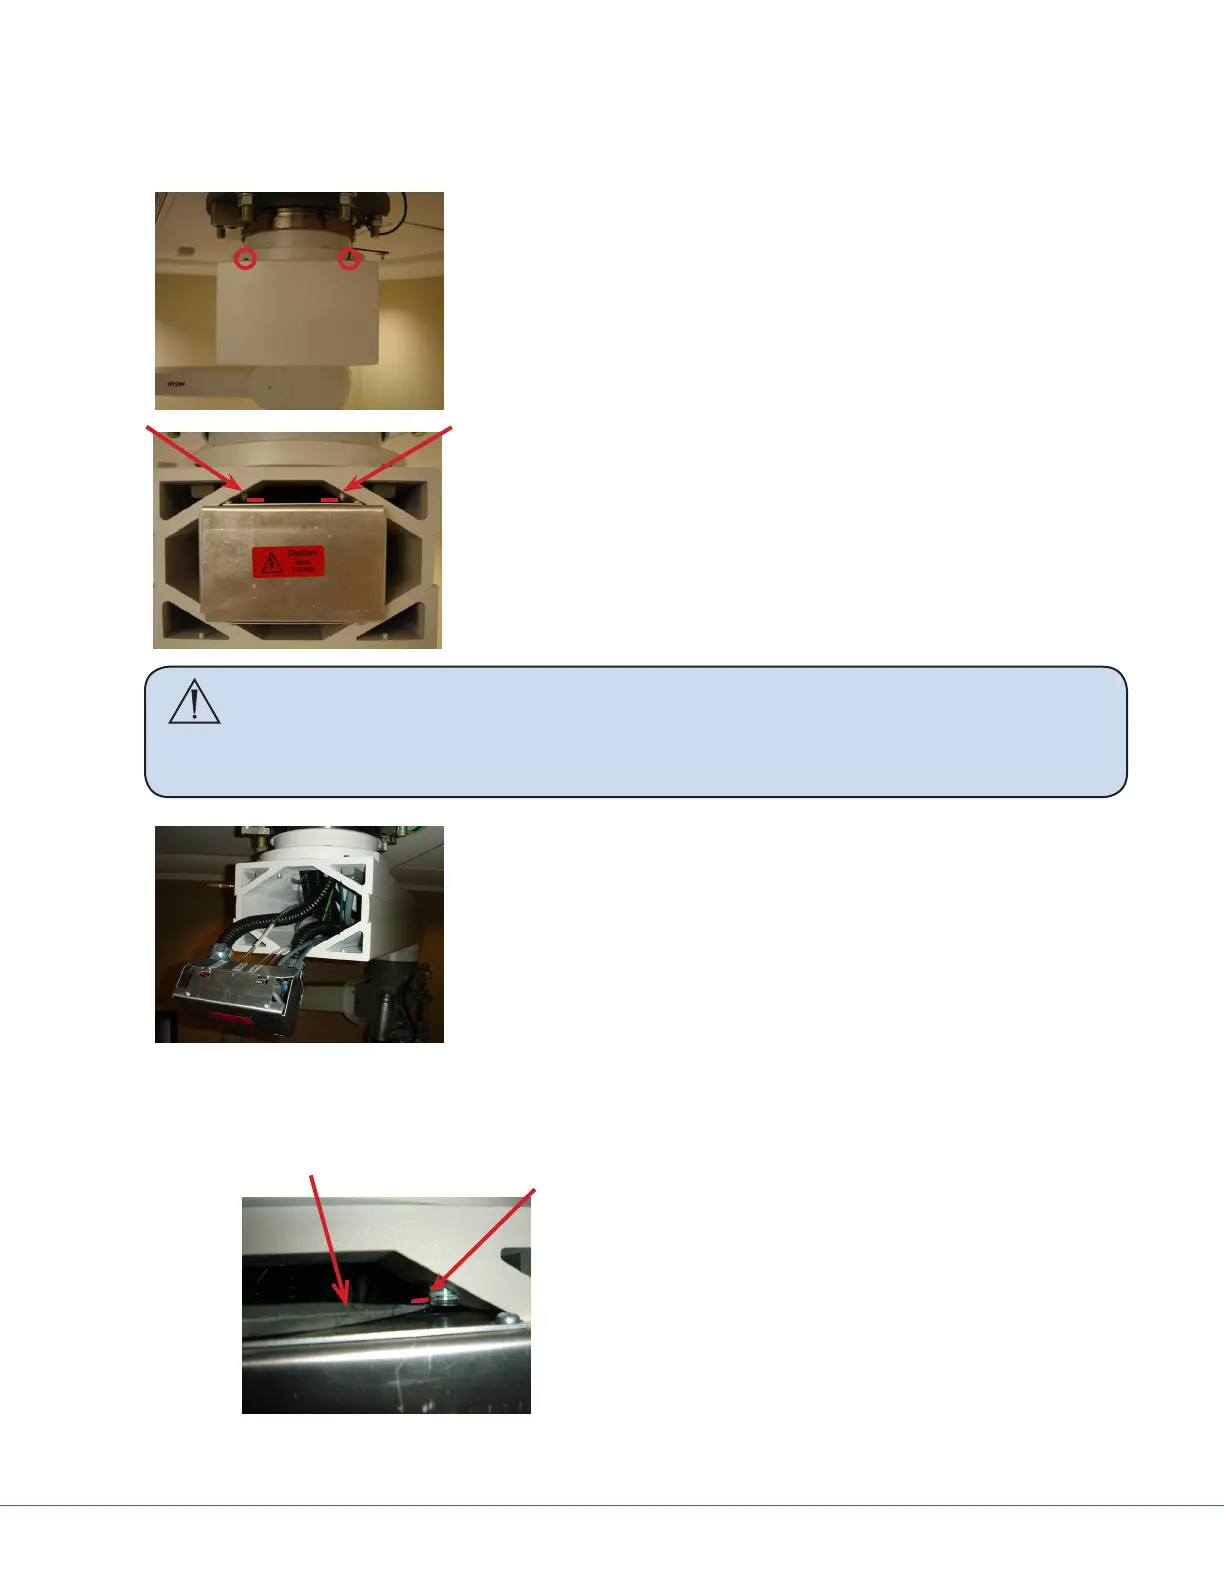
17.9 Electro-Pneumatic (EP) Module
17.9.1 Removing the Electro-Pneumatic (EP) Module
1. Remove the end cap by unscrewing the two (2) screws attach-
ing the top portion of the end cap.
2. With a at head screwdriver, gently press down on the two
tabs keeping the EP Module in place.
3. Extract the EP Module by carefully pulling the module away
from the boom arm.
Caution Be very careful as high voltage may be present inside of the EP module.
ere are also low voltage cables as well as gas hoses attached to this mod-
ule. If it is dicult to extract the EP Module, ensure there is sucient
slack in the control cables, brake hosing and electrical conduits.
4. Rest the EP Module to the side so that you may work in the
arm set.
5. Articulate the boom arm to ensure the EP module was cor-
rectly replaced.
17.9.2 Installing an Electro-Pneumatic (EP) Module
Flat Head
Screwdriver
1. Insert the EP module into the arm set
opening. Pay close attention to the slots
allocated in the arm set to t the EP Mod-
ule box.
2. Ensure the tabs on the top of the EP mod-
ule are securing it in place. In some cases,
you may need to insert a at head screw-
driver to push the tabs up.
3. Reinstall the end cap where the open tabs
are located on the bottom.