21
S
6.2.3 Alternate Light Installation Instructions
1. Load the suspension shipping box onto a heavy machinery li device.
2. Cut cardboard 9 inches from the top of the box to facilitate hanging suspension. Be careful not
to cut cables or scratch the suspension.
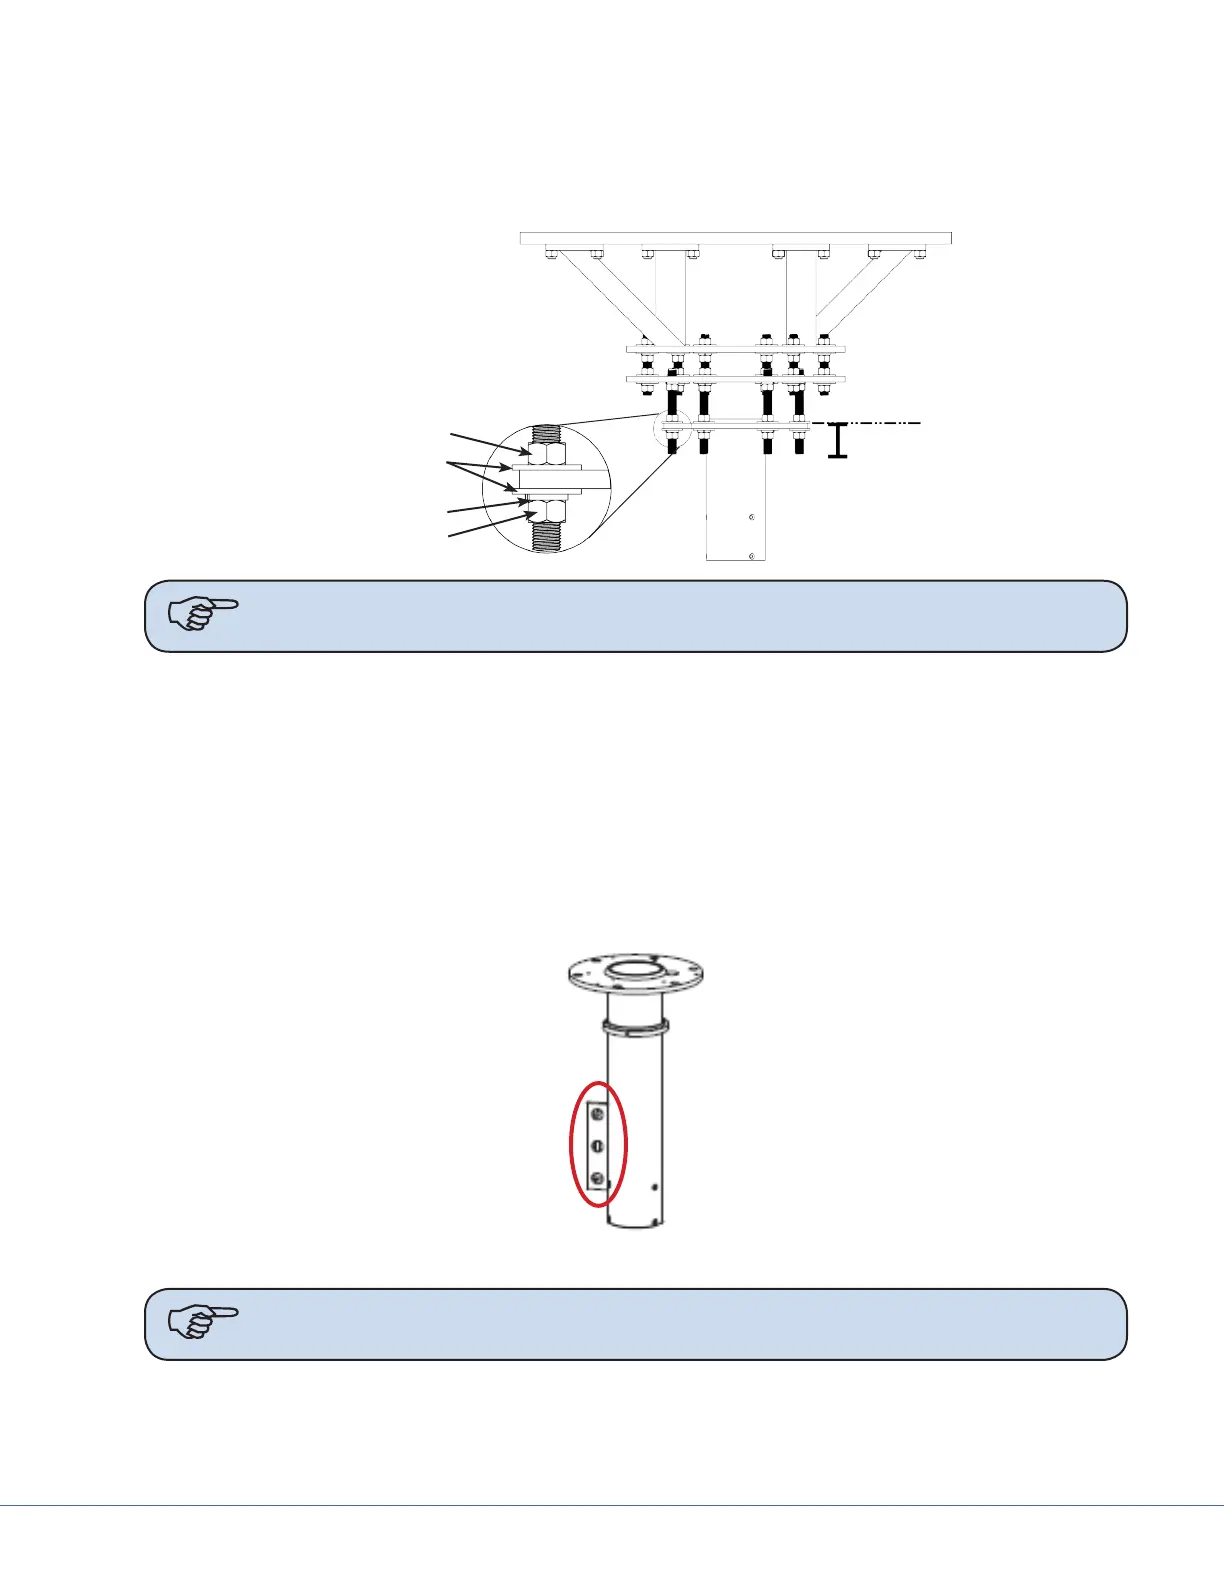
Hex Nut
Flat Washer
Hex Nut
Lock Washer
Note When necessary, Plastic Isolation Discs surround the mounting plate, but are only
required in Europe.
3. Raise the down tube toward the mount site.
4. Guide the all-thread rods through the holes located on the down tube ange.
e down tube ange must press lightly against the hardware assembly.
5. Place a at washer on alternating all-thread rods followed by a hex nut; tighten the hex nut.
6. Use a Torpedo Level to verify the down tube ange is level across three horizontal planes. If the
ange is not level, adjust the hex nuts until the Torpedo Level indicates the down tube ange
is level across three horizontal planes. Conrm that the down tube is also level by placing the
Torpedo Level on the down tube at three, evenly-spaced locations.
7. Install a at washer, lock washer, and hex nut on the remaining all-thread rods.
Note Plastic Isolation Discs are only required in Europe.
8. Tighten the hex nuts to 75 -lbs. Ensure the lock washers are fully compressed.
9. Remove the hex nuts from the all-thread rods applied in step 5 and install a lock washer and hex
nut.