121
S
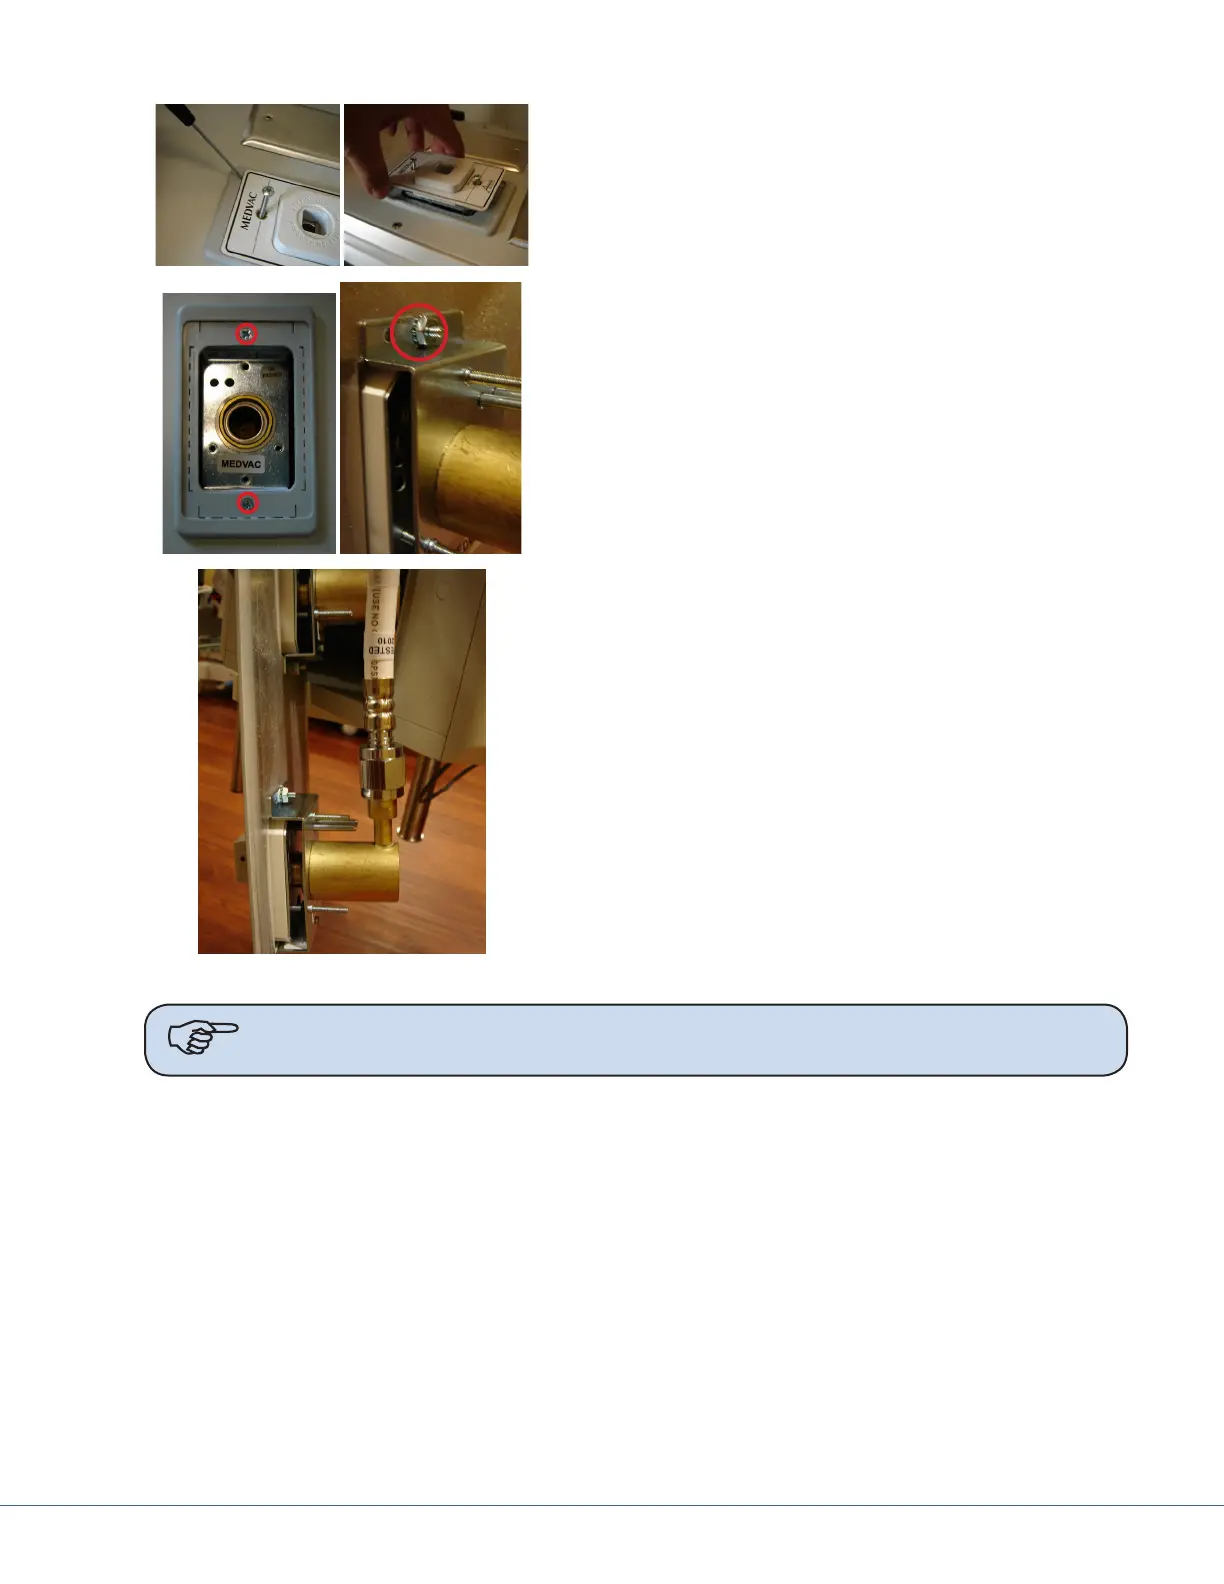
3. Using a thin, at head screwdriver, carefully pry the
gas plate away from the plastic frame and back body.
4. With the gas plate removed, you will see two addi-
tional screws holding the back body onto the service
head face plate. Remove these screws by holding
onto the nut in the back. Save these for re-installa-
tion.
5. With a crescent wrench, remove the gas hose from
the back body.
6. Replace (pull) new gas hose.
7. Connect the [new] gas hose to the [new] gas back
body.
8. Tighten the gas hose onto the corresponding back
body until hand tight. Continue tightening with a
wrench for an additional ¼ turn. Tightening any
further may cause damage to the tting and result in
a gas leak.
9. Attach the back body to the service head face plate
by inserting and tightening the respective screws.
10. Insert the gas plate into the back body and tighten
with the two screws.
Note It is at the discretion of the hospital to determine whether they will need to re-
certify the new gas assembly.
17.6 Replacing the Brake Bladder
is section applies to replacing the Bearing 2 brake bladder and plastic protective collar in an OSC400
Non-Articulating boom.