62
S
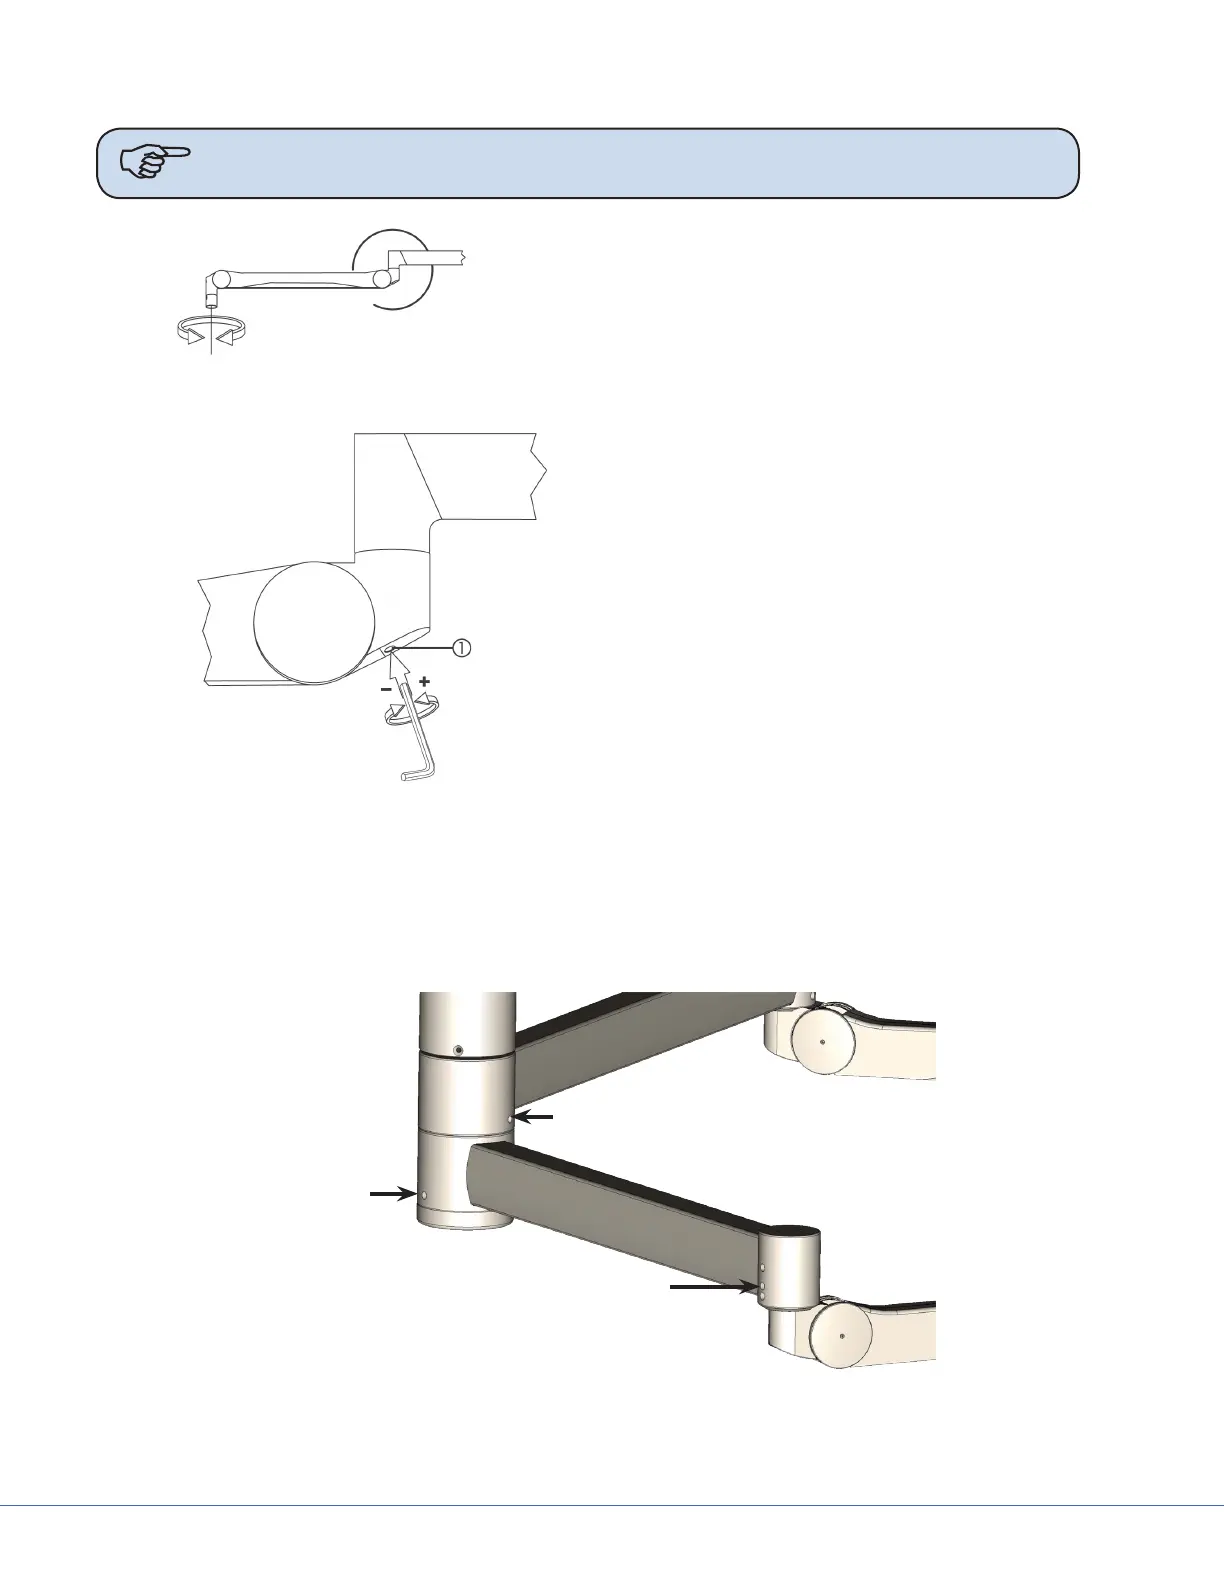
11.2.2 Tension Adjustment
Note e Horizontal Arm and Spring Arm should always be parallel to the oor while
adjusting the tension.
>360º
Wrench size 5
Adjusting Spring Arm
Push the light head toward the ceiling and release
it. If the light head dris down, insert a 5mm Hex
key in the Spring Arm and turn the key counter-
clockwise to increase the tension.
Pull the light head down to the oor and release
it. If the light rises, insert a 5mm Hex key in the
Spring Arm and turn the key clockwise to de-
crease the tension.
11.2.3 Adjusting the Friction Brakes
Friction brakes hold the suspension in place and prevent driing. If the brakes are too loose, the
suspension may dri during use, but if they are too tight, the suspension may be dicult to move. For
each arm, there are two brake screws at the central axis and one at the Spring Arm.
Brake Screw
Brake Screw
Brake Screw
Horizontal Arm Brake Screws
(SHA Only)