61
S
Note e light should not contact any objects near or stationed on the ceiling, includ-
ing the ceiling.
11.2.1.2 Low Ceiling Spring Arms
1. Remove the covers from the Spring Arm.
• Remove the Phillips screws on the side of the Spring Arm.
• Separate the covers while carefully avoiding breaking the plastic clips.
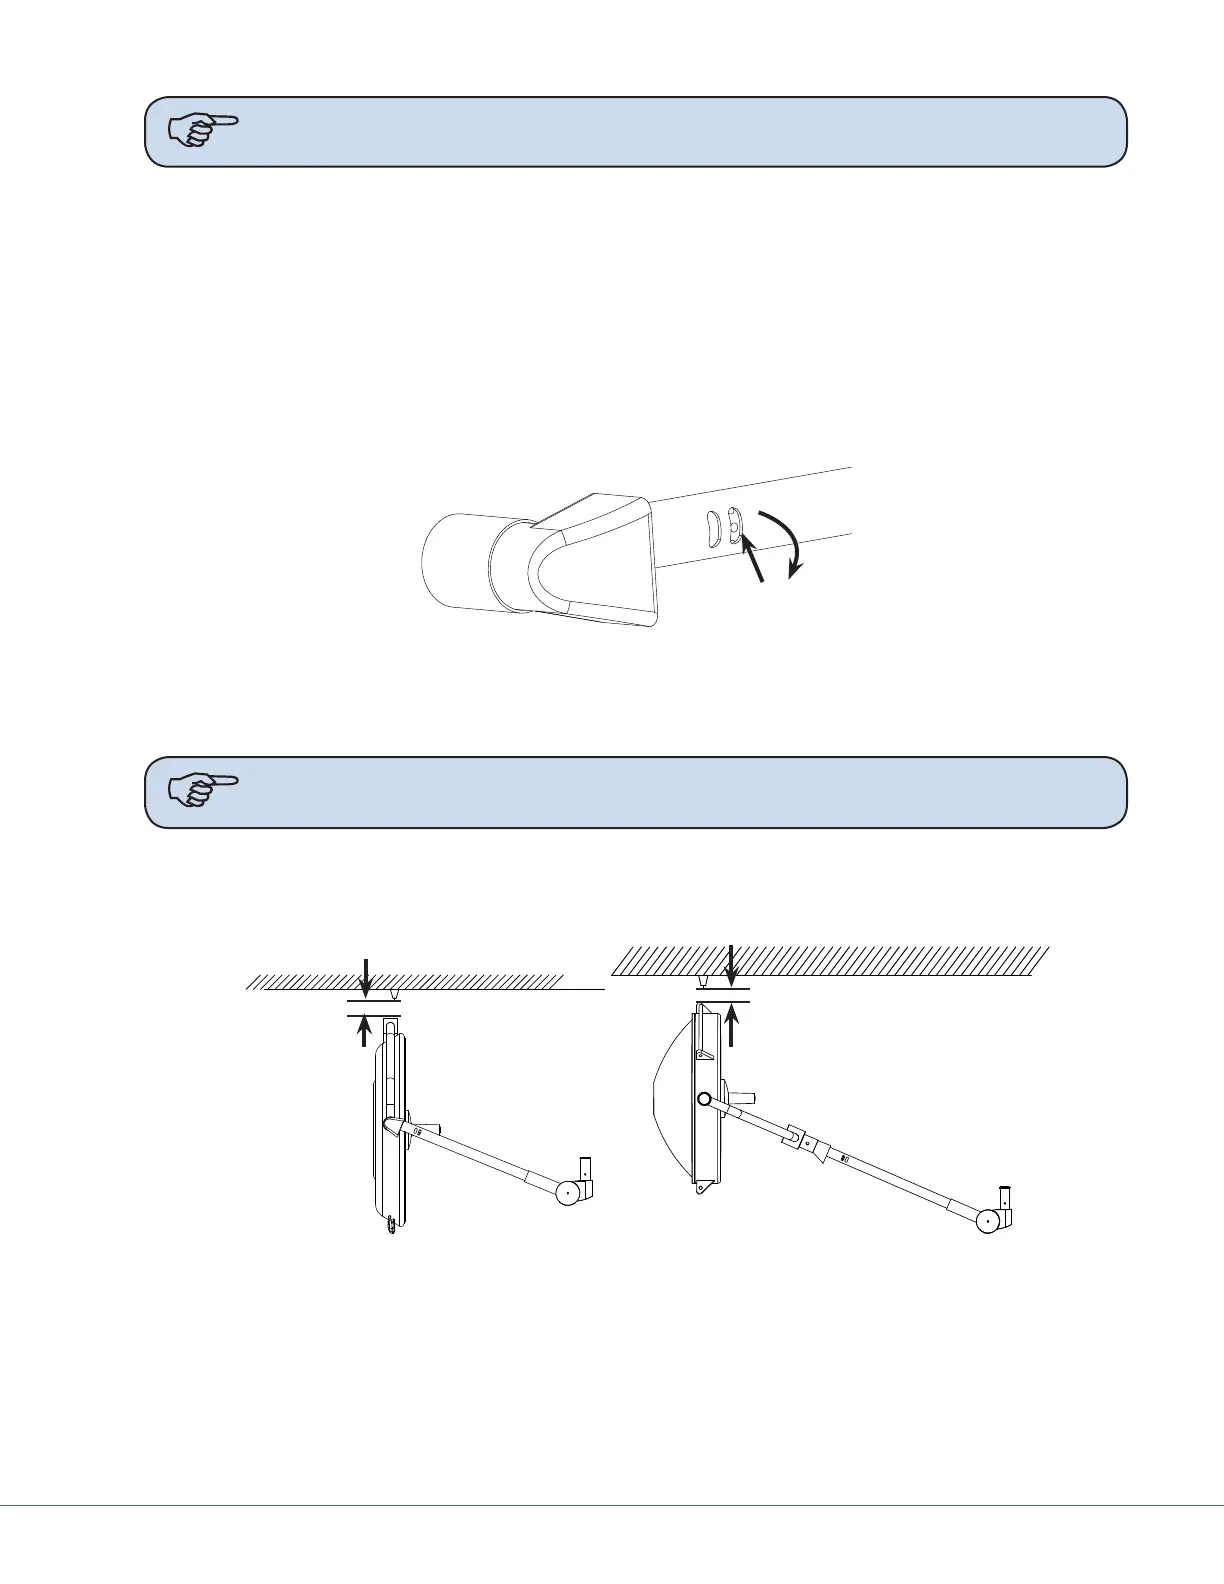
2. Locate the two oval shaped cutouts on the side of the Spring arm.
Spring Arm Cutouts
3. Insert a 3mm Allen wrench into the opening shown and pull down to raise the limit of the arm,
and pull up to lower the limit.
Note You may have to push the Spring Arm down to see the Vertical Adjust Wheel
through the oval shaped cutouts.
4. Turn the light head so that the Cardanic is pointed toward the ceiling. Set the upper limit of the
Spring Arm to the point that the Cardanic is 2” (50.8mm) below the lowest structure in the ceil-
ing (e.g., sprinkler head).
2” (50.8mm)
2” (50.8mm)
Ceiling Clearance
5. Once the limit is set, place the covers back onto the Spring Arm.