20
S
6.2 Surgical Lights
6.2.1 Standard Horizontal Arm
1. Load the suspension shipping box onto a heavy machinery li device.
2. Cut cardboard 9 inches from the top of the box to facilitate hanging suspension. Be careful not
to cut cables or scratch the suspension.
3. Mount down tube onto suspension. Use the six at head socket cap screws (taped to down tube)
to attach the down tube to the central axis spindle. Tighten all screws with a torque wrench set
to 100 lb-in (8.33 lb-, 11.3 Nm). Once all screws have been tightened, retighten each screw to
ensure correct torque is set.
If you are installing a at panel along with a dual light suspension, verify that the at panel cable
kit is routed through the opening in the down tube.
4. Position the suspension assembly directly below the mount site.
5. Go to Section 7, “Installing the Suspension” to complete installation.
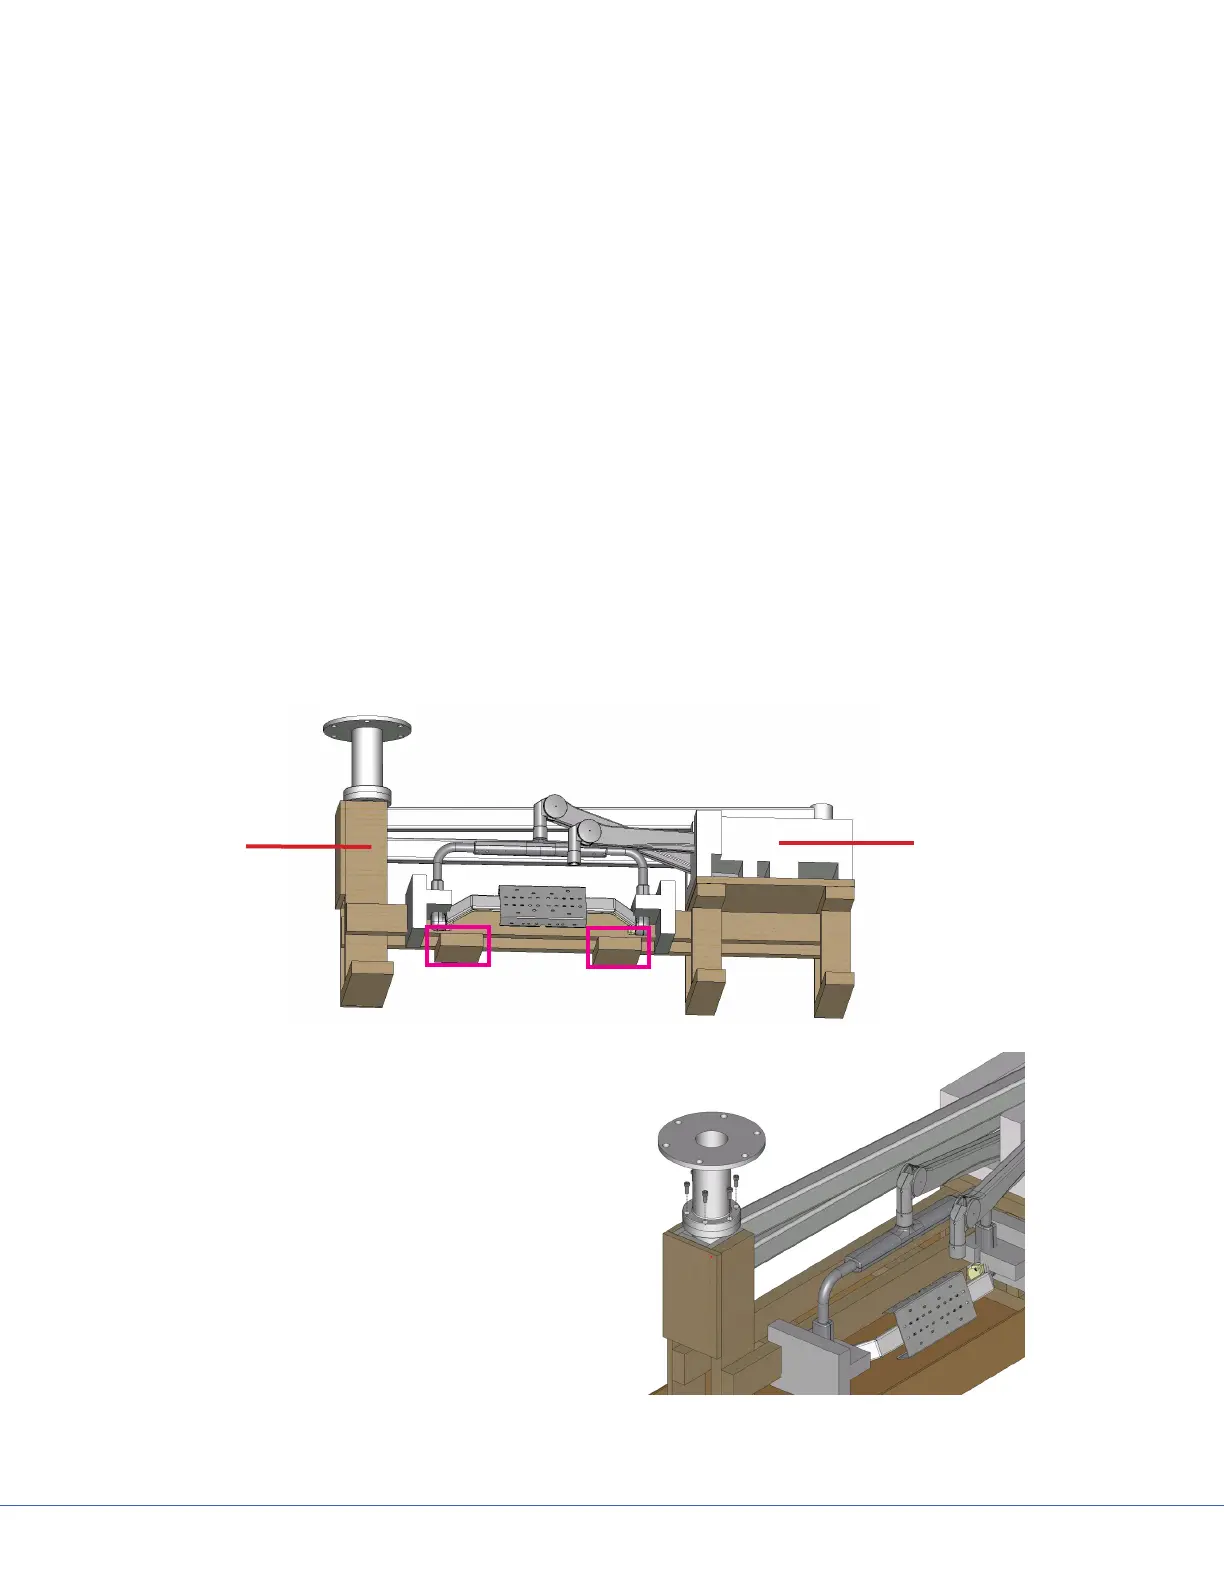
6.2.2 Extended Horizontal Arm
1. Remove all accessories and the cardboard box.
2. Position Genie Life so that forks are underneath the highlighted areas shown in the following
gure.
Brown
packaging is
wood
White
packaging is
styrofoam
3. Mount down tube onto suspension. Use
the six socket cap screws to attach the
down tube to the central axis spindle.
Tighten all screws with a torque wrench
set to 354 lb-in (29.5 lb-, 40 N-m). Once
all screws have been tightened, retighten
each screw to ensure correct torque is set.
If you are installing a at panel along with
a dual light suspension, verify that the at
panel cable kit is routed through the open-
ing in the down tube.
4. Position the suspension assembly directly
below the mount site.