88
S
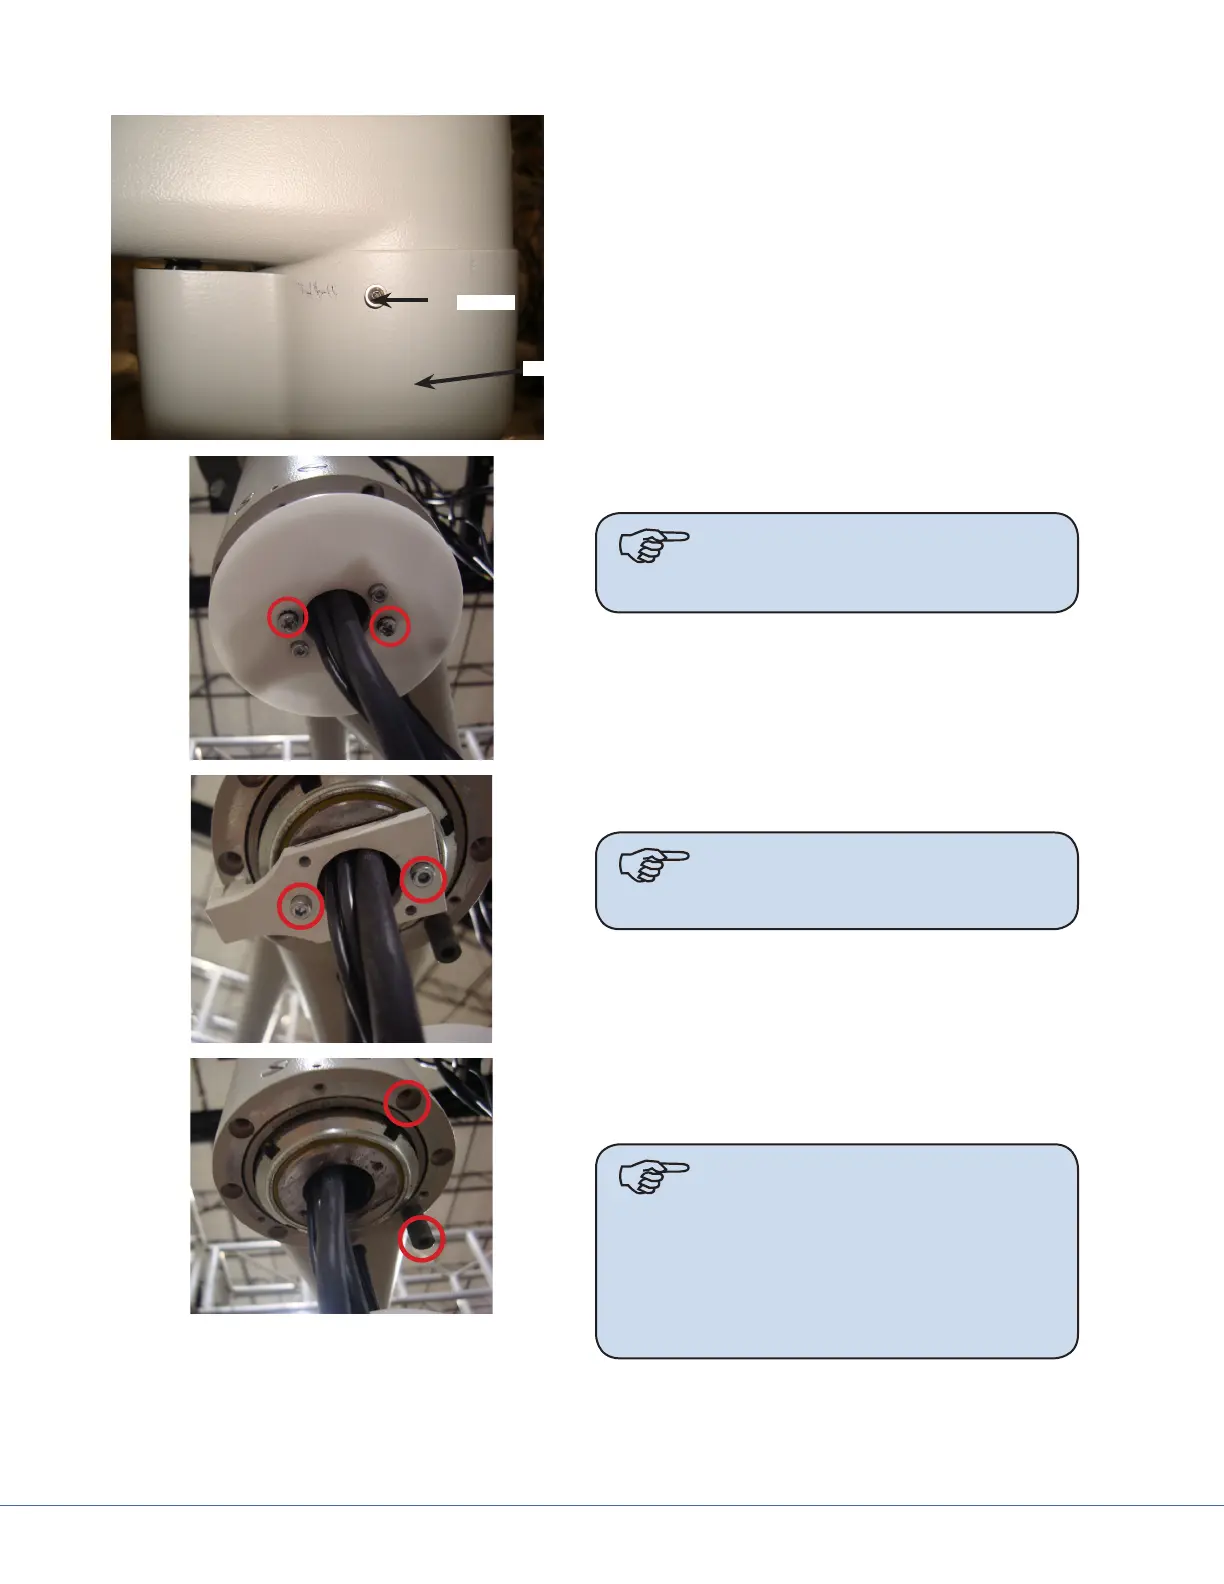
Screws
Cover
1. Remove the three screws and cover.
2. Remove two Phillips screws and white
disc.
Note
If white disc needs to be
replaced, back pull bale
through center hole in disc.
3. Remove the two Allen screws and white
stop block.
Note
If stop block needs to be
replaced, back pull cable
through center hole in disc.
4. Place the stop pin in any existing stop
placement that is suitable to customer
needs.
Note
If existing stop pin has been
sheared, leave the sheared
pin in existing hole and
place a new stop pin in any
existing stop placement
that is suitable to customer
needs.
5. Perform the above steps in reverse to complete the installation.