132 SPARCstation 20 Service Manual • July 1996
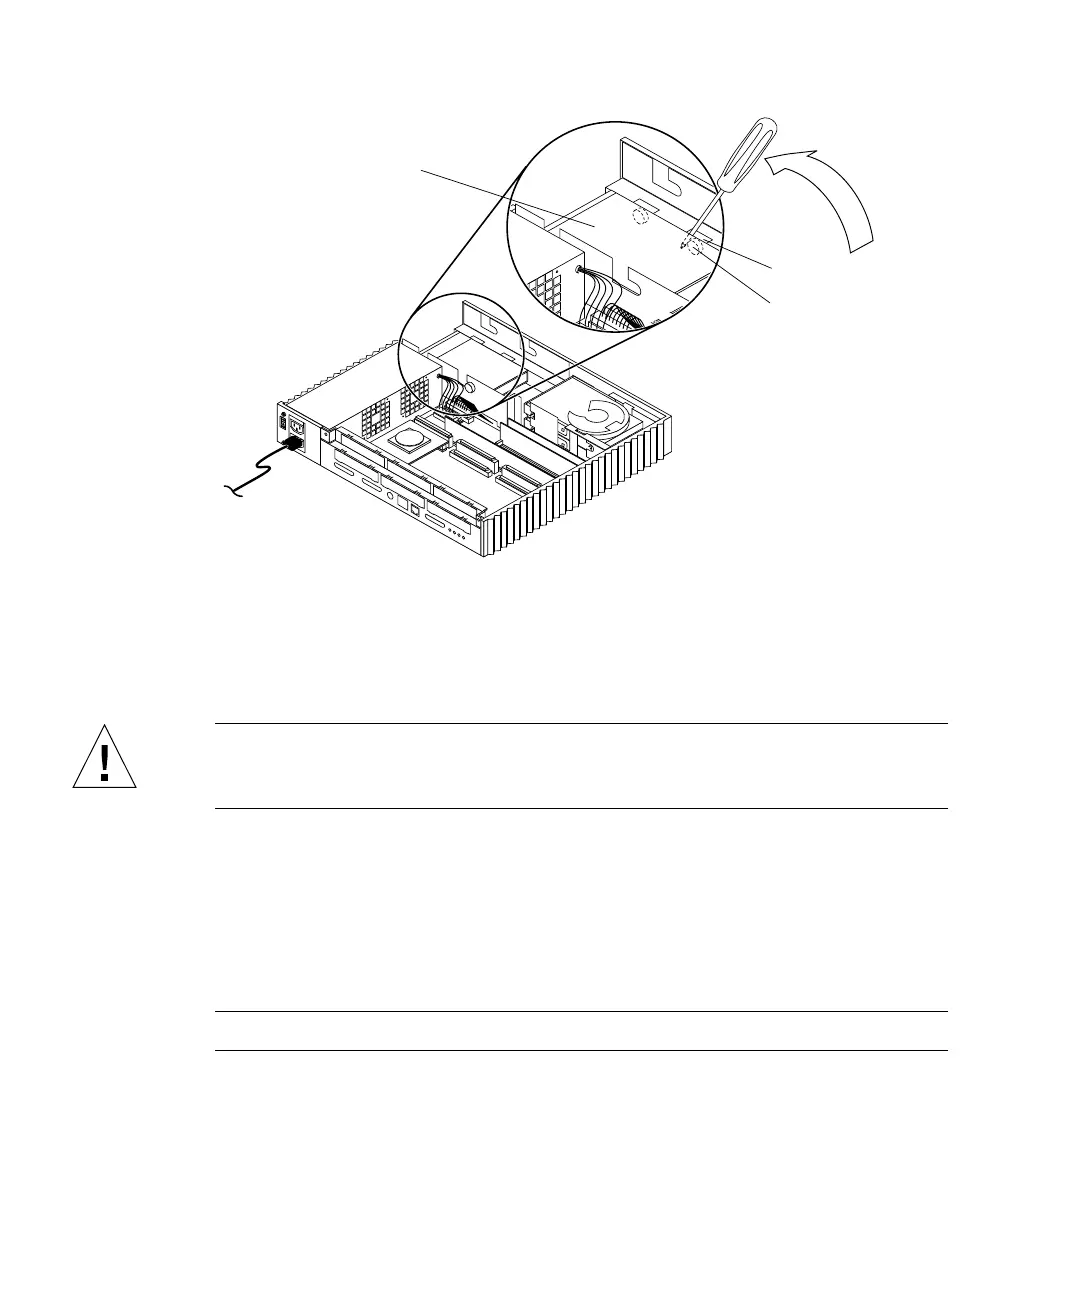
FIGURE 9-15 Unseating the Diskette Drive Grommets
Installing a Diskette Drive
Caution – Use proper ESD grounding techniques when handling components. Wear
an antistatic wrist strap and use an ESD-protected mat. Store ESD-sensitive
components in antistatic bags before placing it on any surface.
1. Install the grommets and Phillips screws that were set aside in Step 4 of
“Removing a Diskette Drive” on page 127”.
2. Set the diskette drive switch; perform either Step 3a or Step 3b.
a. If the diskette drive has a switch on the side of the drive, set the diskette drive
switch all the way to the rear (
FIGURE 9-16).
Note – This switch is not present on all models.
b. If the diskette drive does not have a switch on the side of the drive, it has a
microswitch (SW4) on the printed circuit board (PCB) side of the drive. Set
SW4 to the 0 position by pressing it towards the rear of the diskette drive
(
FIGURE 9-16).
Diskette drive
Grommet
Drive bracket slot