G10 Hardware Maintenance Guide 7.13.2 136
5
Maintenance Guidelines
Rev. 002-140228
Installing the Controller Module
Prior to replacing a controller module, you MUST power down the probe. See the Power
Down Procedure for details on powering down the probe.
If you are replacing both controllers, special commands must be performed before and after
hardware replacement. Contact Tektronix Communications Customer Support for
assistance.
Be sure to review Storage Array Maintenance Guidelines before proceeding to ensure
component compatibility.
Step Action
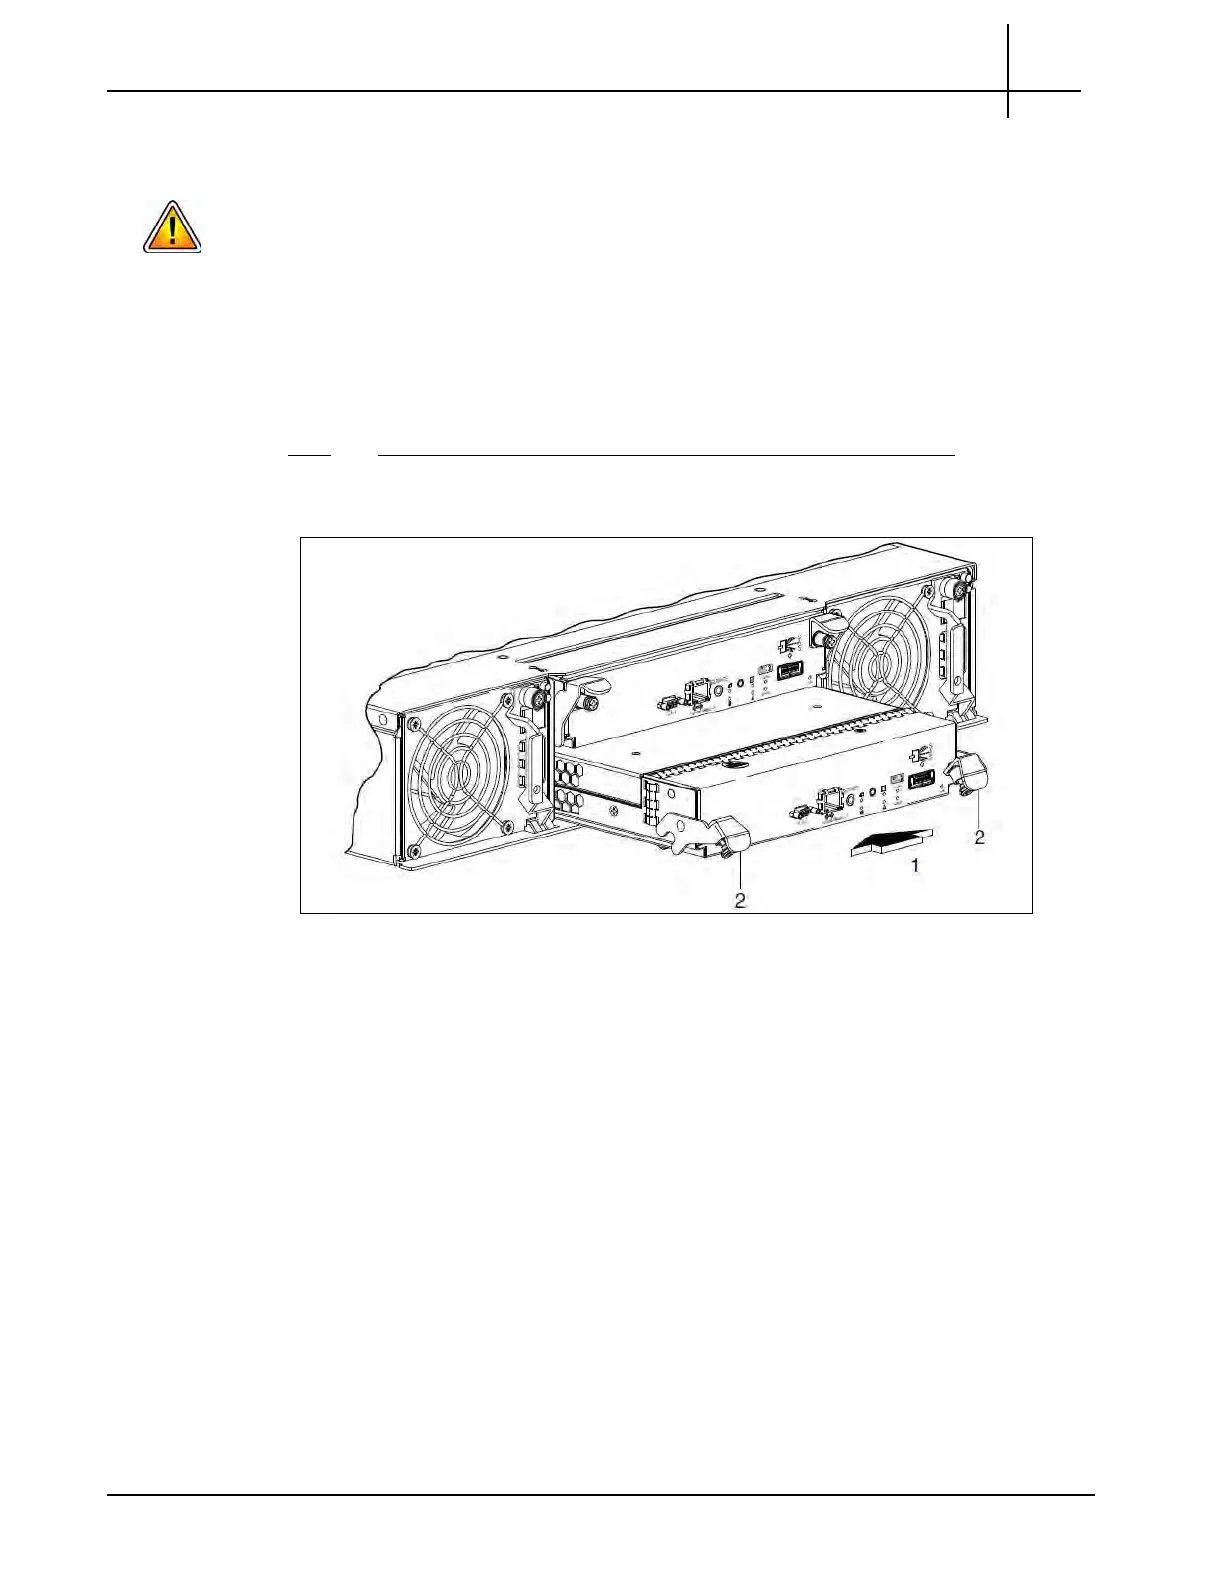
1. Loosen the thumbscrews and press the latches downward (Figure 5.49).
Figure 5.49 - Inserting a Controller Module
2. Slide the controller module into the enclosure
as far as it will go. See (1) in
Figure 5.49.
3. Press the latches upward to engage the controller module. See (2) in
Figure 5.49. Turn the thumbscrews clockwise until finger tight.
4. Reconnect the cables.
5. Power on the probe. See the probe start up procedure for details on powering
u
p th
e probe.
6. Check that the FRU OK LED (back) is green, indicating that the controller has
completed initializ
ing, is
online, and is operating normally.
7. Contact Tektronix Communications Customer Support
to complete the
contr
oller/expansion module installation.
Tektronix Communications | For Licensed Users | Unauthorized Duplication and Distribution Prohibited
 Loading...