Chapter 6
71
UM10372_PCNC440_Manual_0221A
PATHPilOT iNTERFACE
6.7.1.1 Tool Measuring Techniques
Dierent tool measuring techniques may be used, but the
three most common methods are:
• Oine measurement with a height gauge
• Automated measurement with an electronic tool seer
• Touching o tool to a reference surface
Oine Measurement with Height Gauge
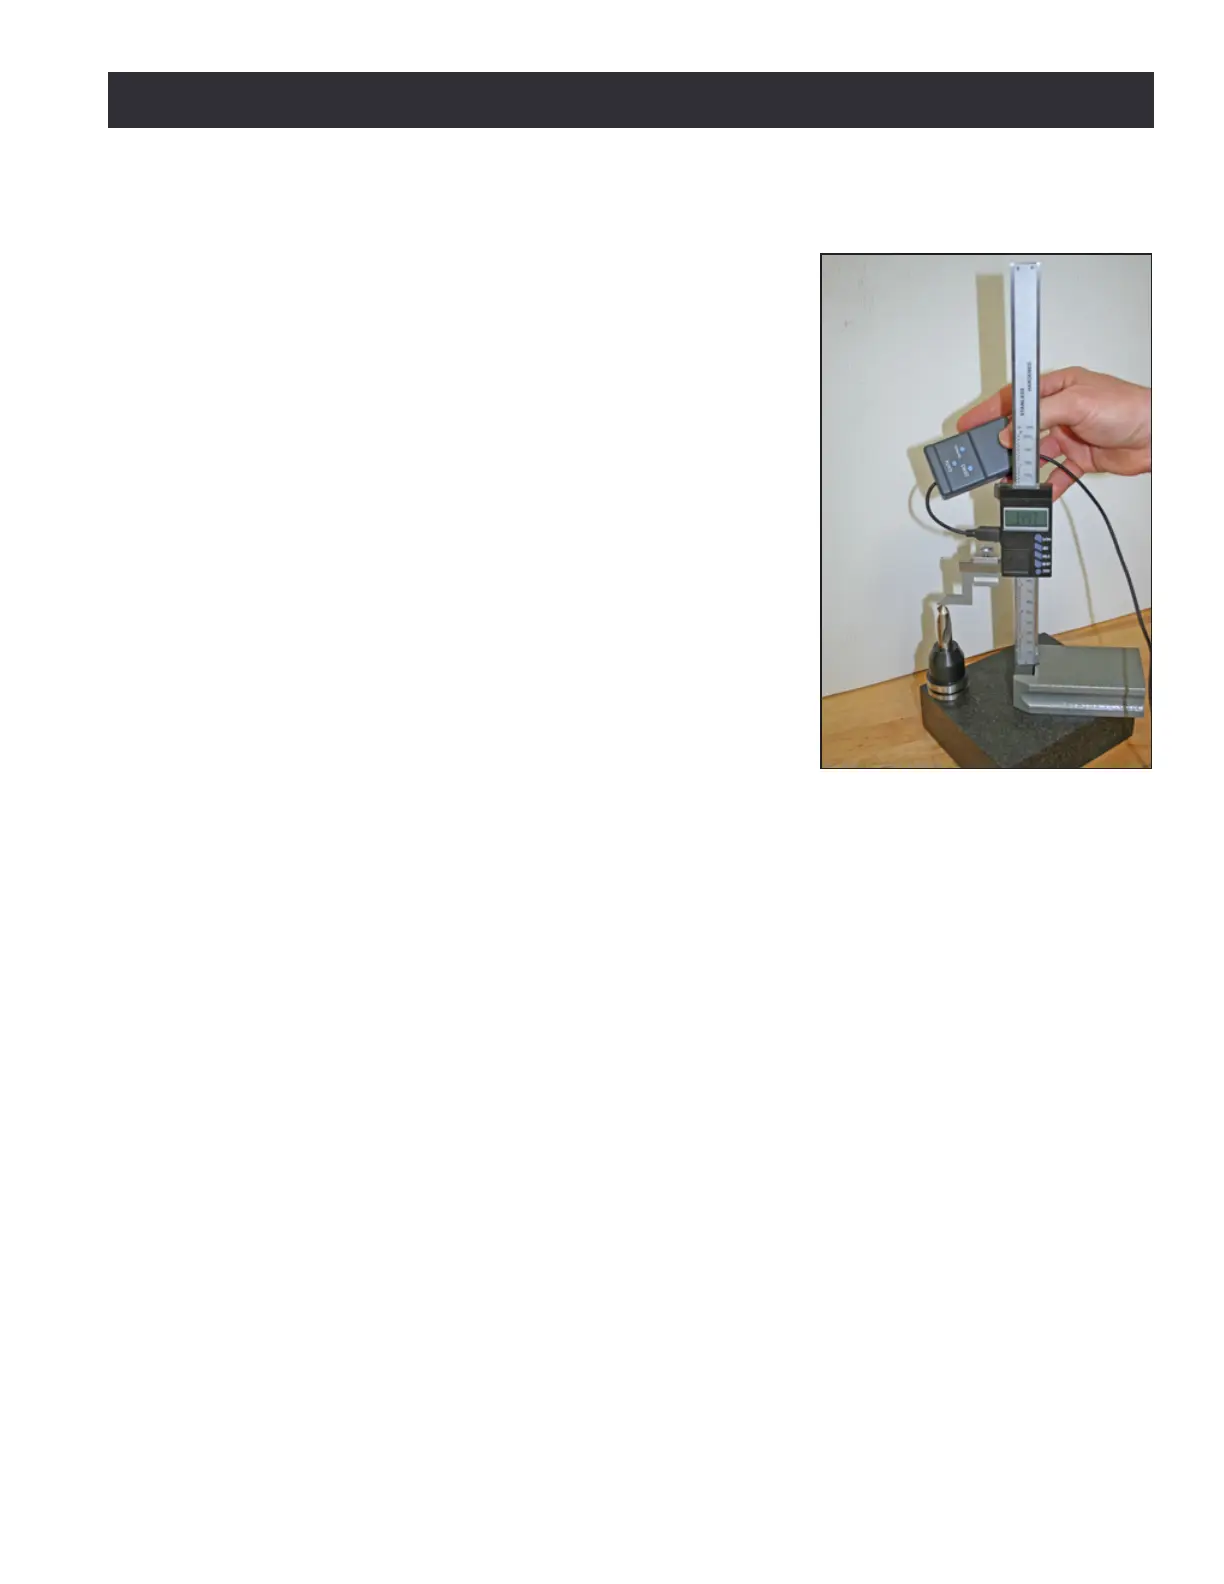
The Tormach Tool Assistant Set (PN 31988) includes an 8”
digital height gauge and a USB interface cable with touch
trigger (see Figure 6.20).
1. Connect USB interface cable to any available USB port
on the controller.
2. Move the digial height gauge to a block and press the
Zero buon on the touch trigger. The device is zeroed.
NOTE: Granite Surface Plate with Integrated Tool Hole (PN 31713),
as shown in Figure 6.20, helps accurately measure tool length.
3. To measure tool height, mount the tool in a TTS tool
holder and place on a block (see Figure 6.20). The tool height measurement is the distance
from the block surface to the end of the tool p.
4. Click on the appropriate line in the tool table (see Figure 6.19); the line is highlighted.
5. Press Data buon on the USB interface cable to transfer measurement informaon to the
Length eld in the tool table (see Figure 6.19).
Automated Measurement with an Electronic Tool Seer
Setup: Before using an electronic tool seer, set the work oset such that the surface upon which
the electronic tool seer sits is Z zero. A quick way to do this is to use the Move And Set Work Oset
buon on the Osets screen’s Work tab, with either a tool of known length in the spindle or with
no tool in the spindle (and Tool Zero in the tool DRO). By doing this setup step, you are measuring
the true tool lengths, and can interchange tools measured in the height gauge with tools measured
with the electronic tool seer. Aer compleng the setup, measuring a tool with the electronic
tool seer is easy. Put the tool in the spindle, tell the control which tool is in the mill (type the tool
number in the tool DRO), and then, with the tool centered over the electronic tool seer, click the
Move And Set Tool Length buon on the Osets screen’s Tool tab.
Measurement by Touching O Tool
Refer to chapter 5, Intro to PathPilot. It is not as accurate, but works in many situaons.
Figure 6.20