Chapter 3
28
UM10372_PCNC440_Manual_0221A
iNSTAllATiON
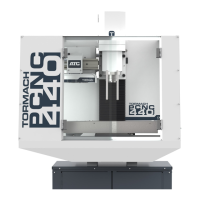
3.3.9 Install the Monitor
The PathPilot controller mount allows you to install the PathPilot controller behind the monitor
(which is aached to the Controller Arm).
Note: If you’re using a Touch Screen Kit (PN 35575), you must rst remove the stock mounng bracket
from the back of the monitor.
1. Put the PathPilot controller mount
against the monitor mounng plate.
Then, put the monitor on the other
side of the PathPilot controller
mount, and align the holes on the
three components.
2. Aach the monitor, PathPilot
controller mount, and monitor
mounng plate together with
four M4 × 12 mm socket head cap
screws (provided with the PathPilot
controller mount).
3. Adjust the posion of the monitor and the keyboard tray with an 8 mm hex wrench and a 16
mm wrench. Once complete, securely ghten the pivot screws.
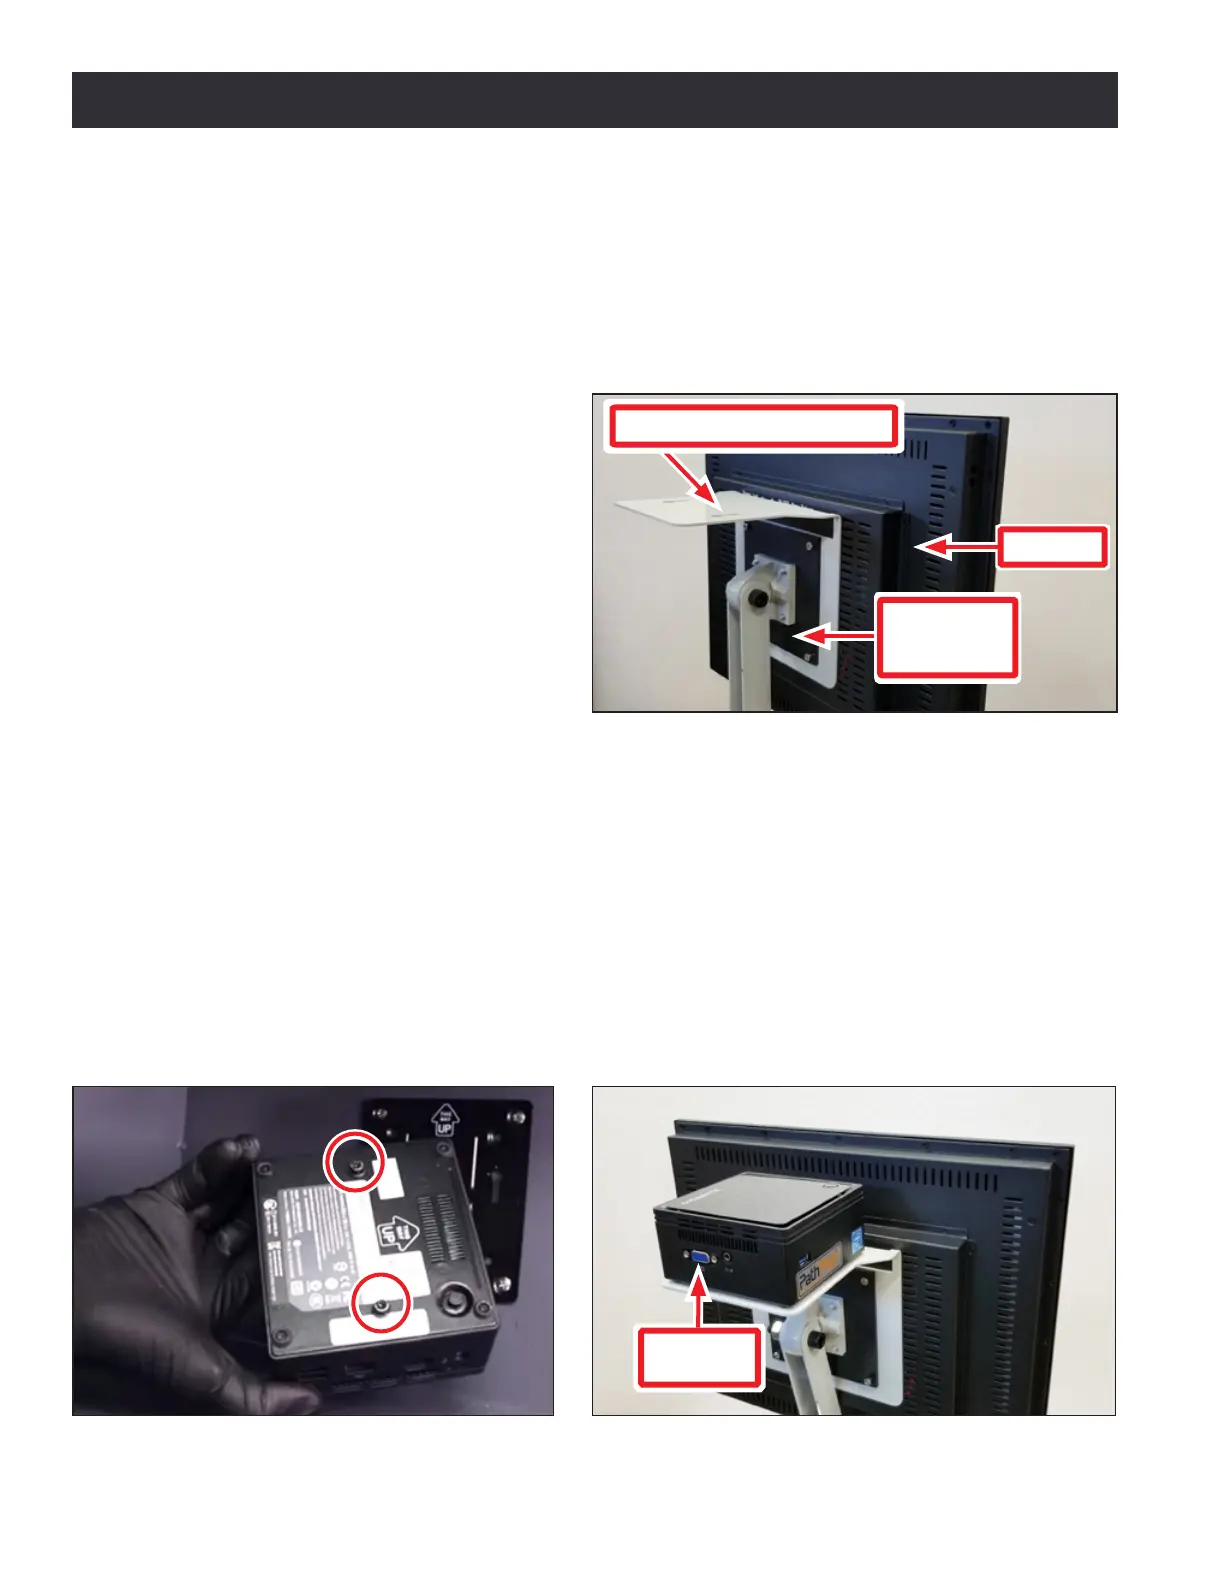
3.3.10 Install the PathPilot Controller
The PathPilot controller aaches to the top of the PathPilot controller mount and behind the
monitor.
1. Put two standos into the Brix PathPilot Controller and ghten them by hand (see Figure 3.8).
2. Aach the Brix PathPilot Controller to its mount by sliding the standos through the key slots
(see Figure 3.9). Verify that the controller is oriented so that the monitor’s video port is facing
away from the monitor.
Figure 3.7
PathPilot Controller Mount
Monitor
Monitor
Mounting
Plate
Figure 3.8 Figure 3.9
Monitor
Video Port