Chapter 5
44
UM10350_PCNC770_Manual_0916A
Intro to PathPilot
5. Intro to PathPilot
5.1 Making Your First Part
This chapter outlines how to make your rst
part with a Tormach mill. It assumes that
you have no prior experience running a part
program on a CNC (computer numerically
controlled) mill. Even if you have previous
CNC experience, following this tutorial
gives you an introducon to the controls
of the mill. Aer reading this chapter,
read chapters 6 and 7 for details on the
PathPilot
®
operang system. This chapter is
only intended to be an introducon to the
PathPilot interface and several basic tasks.
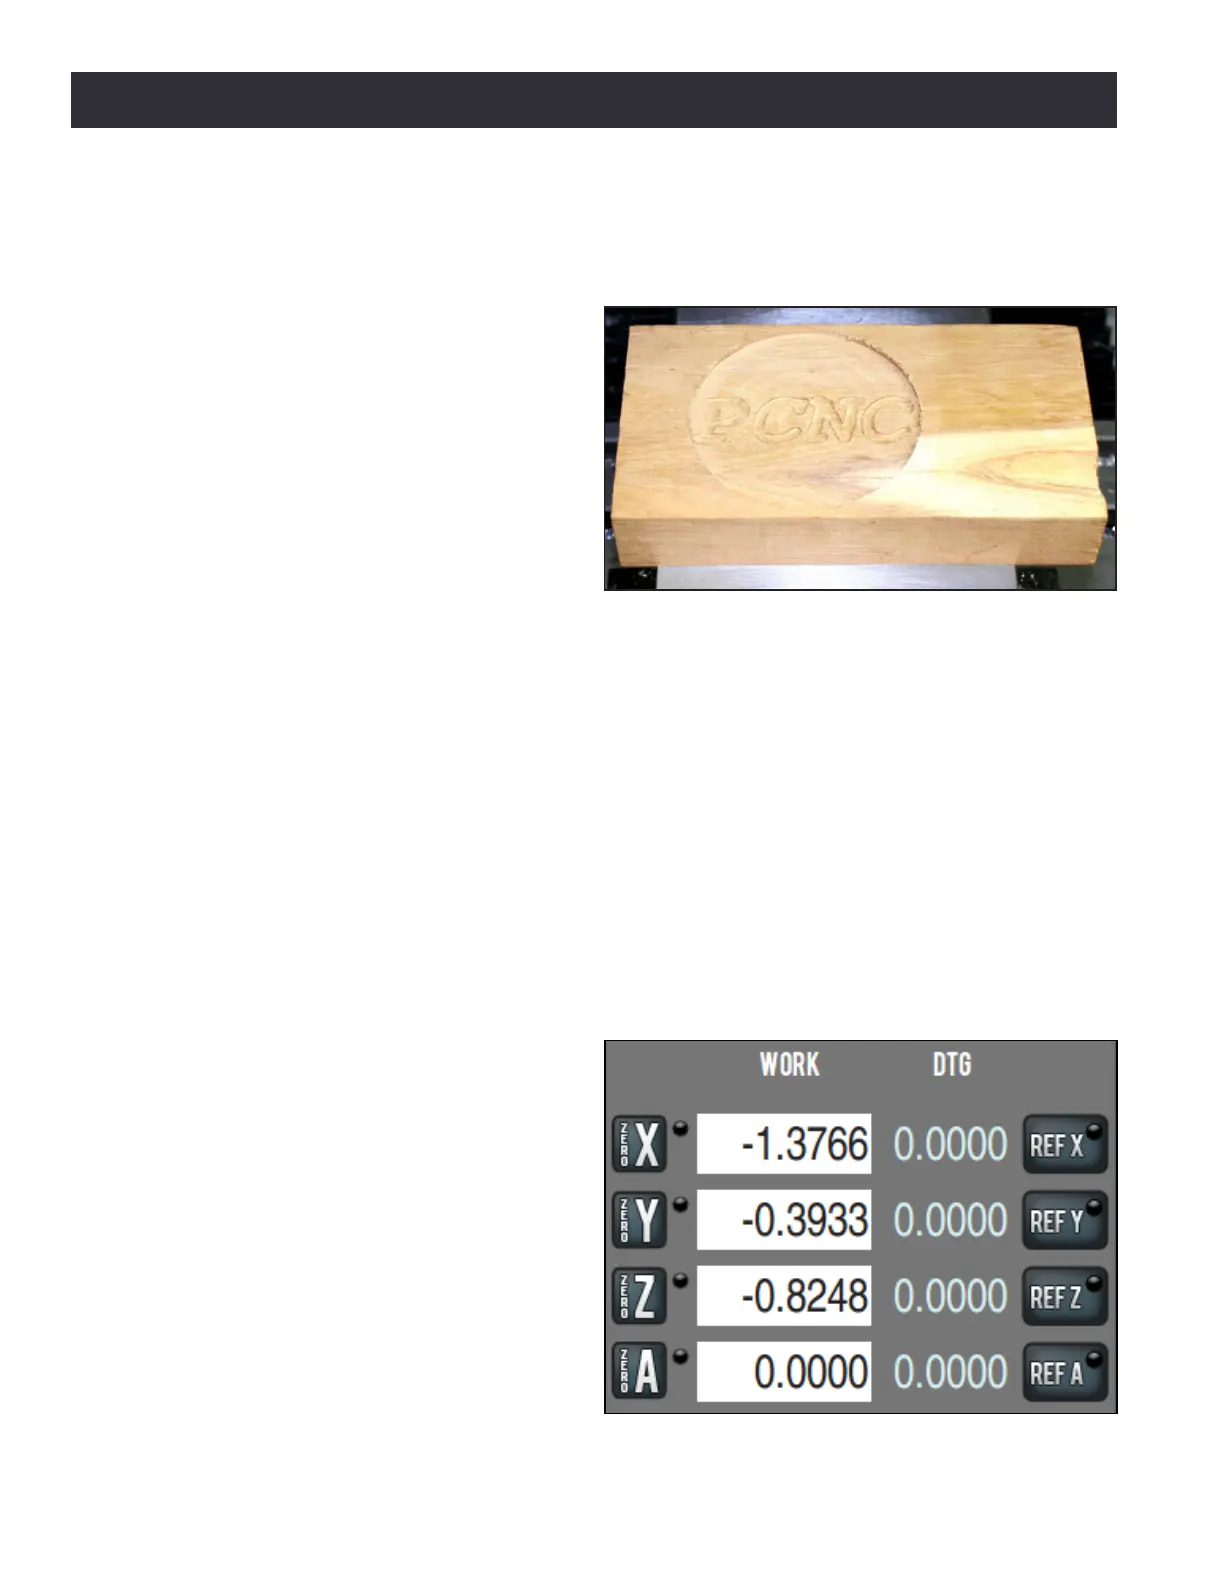
The rst part program uses two tools – a 3/8” end mill and a 1/8” end mill – to make a shallow
circular pocket and engrave the text PCNC in a wood 2” x 4” (see Figure 5.1). Two tools are used to
give you an introducon to tool changes and the dierence between work osets and tool length
osets. For operators with the oponal automac tool changer (ATC), we recommend using manual
tool changes for this rst part to keep things simple.
5.1.1 Referencing the Mill
Follow the power o/on procedure in chapter 3, Installaon, to turn the PathPilot controller and
mill on. Aer clicking the ashing Reset buon, you can reference the X-, Y-, and Z-axes. You should
reference the Z-axis rst to help avert a crash as it moves the tooling as far as possible from a
workpiece or vise. All three axes can be referenced simultaneously by pressing the Ref buons in
rapid succession (see Figure 5.2).
The axes should be referenced before
operang the mill to establish so limits
to protect the mill from over travel and to
give meaning to work oset values. Aer
referencing the axes, the LEDs on the Ref X,
Ref Y, and Ref Z buons turn green, indicang
that the mill has been referenced. While
you can jog the mill before referencing, you
should not run parts unl the mill has been
referenced. Should a home or limit switch
fail to work, manually reference the mill as
discussed in chapter 10, Troubleshoong.
Figure 5.1
Figure 5.2