7. Pour the grout around the sensor head and along the length of the slot to the surface.
Use the trowel to move the grout in and around the slot. Overfill the slot to ensure that
there are no cracks between the hole and the road pavement.
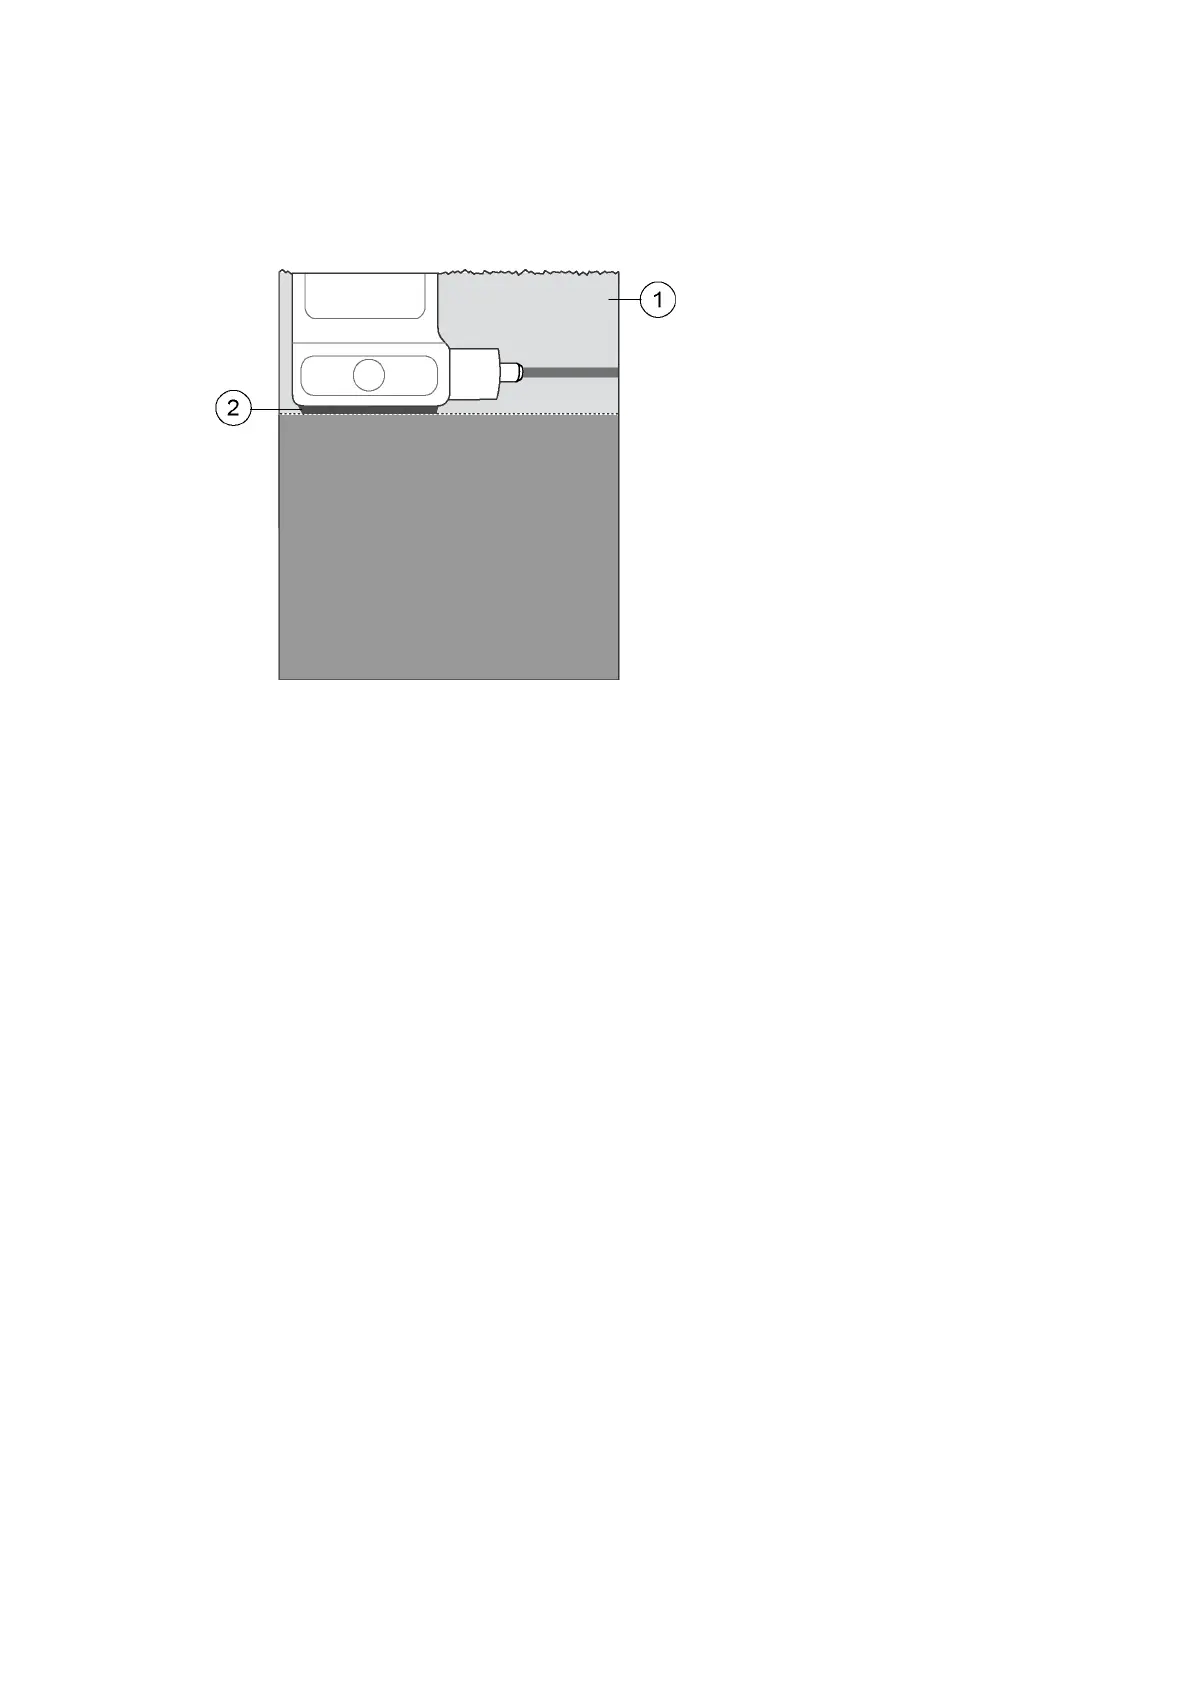
1 Epoxy/Polyester grout
2 Putty
8. Ensure that the filling in the hole around the sensor is slanted towards the sensor so
that moisture is able to accumulate on top of the sensor.
This is needed for determining salt concentration.
9. Allow to cure.
The cure time depends on the air temperature as well as the
filling material used. As the
final curing takes place, use a wire brush to remove any excess filling material from
around the sensor head as well as to roughen the surface. This will best
reflect the
surface tension of the surrounding road or runway.
10. Clean DRS511.
a. Remove the protective tape from the sensor head.
b. Clean the tape residue from the sensor head with sanding paper (grade 800).
c. Finalize by cleaning the sensor with a wet wipe.
11. Lead the sensor cable to the enclosure.
a. Pull the cable through the plastic protective ducting.
b. Place the duct into the trench that leads to the enclosure.
The cable is cut to length, but if you have a manhole available, you can leave tooling
allowance in the cable and bury the excess in the hole.
c.
Backfill the trench.
More Information
‣
Connecting Sensor and Device Cables (page 218)
Chapter 15 – Subsurface Sensor Installation
193