Installing the machine
11
Original instructions: N4 Impression
Document version: H – 05/2019
4 Installing the machine
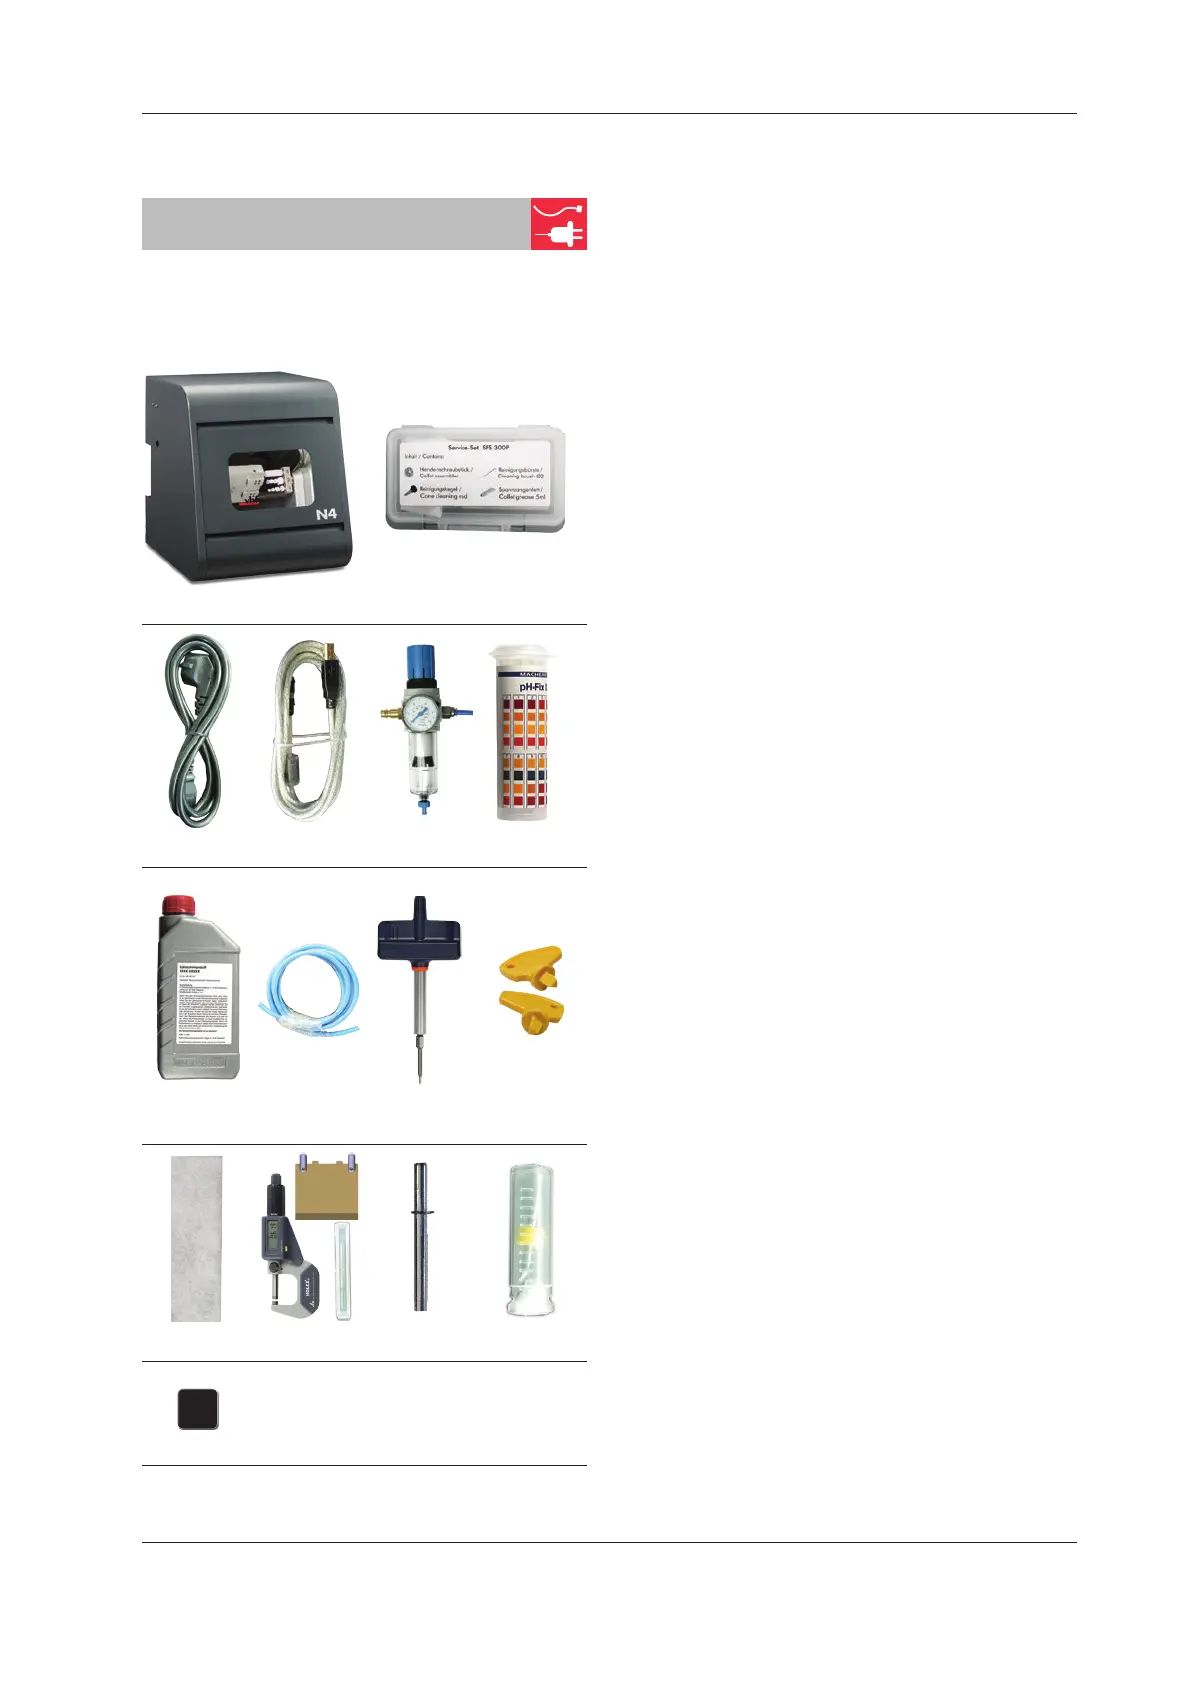
4.1 Checking the scope of delivery
M Unpack the machine and ensure that you have received
the following items:
1 2
3 4 5 6
7 8 9 10
11 12 13 14
15
[1] 1 machine N4 Impression
[2] 1 spindle service set
[3] 1 power supply cord
[4] 1 USB cable
[5] 1 service unit for compressed air
[6] 1 tank of pH testing strips
[7] 1 bottle of cooling lubricant
[8] 1 pneumatic hose
[9] 1 torque wrench (1.8 Nm)
[10] 2 keys for the emergency release of the working cham
-
ber door
[11]
2coarseltermats(1installed,1asasparepart)
[12] 1 calibration set: 1 micrometer, 4 blanks, 2 pins (al-
ready screwed into a blank), 1 calibration tool
[13]
1 measuring pin
[14] 1 drill 2.8 mm for tool positions
[15] 2 tool magazine inserts (as spare parts)
Without illustrations:
This document
1 supplement about removing the transport lock
3 screws for the blank holder as spare parts
1 measuring cup (250 ml)
h Please keep the machine packaging for possible further
service shipments.
4.2 Choosing the installation site
h Choose the installation site according to the following
criteria:
Firm and even surface, has to carry the weight of the
machine
Ambient temperature (storage / transport): between
-20°C(-4°F)and60°C(140°F)
Ambient temperature (operation): between 10 °C
(50°F)and 32 °C (90°F)
Relative air moisture maximum 80 %, non-condensing
Machine location must be dust-free
Alternating current source with 100 – 240 V and 50/60
Hz
Incoming air pressure: maximum of 8 bar
Compressed air supply that meets the requirements of
the machine (
chapter 3.7, page 10)
Sucientspaceatthesidesofthemachine(
chap-
ter
4.3, page 12)