Machine maintenance and cleaning
32
Original instructions: N4 Impression
Document version: H – 05/2019
6.14 Calibrating the axes
Deterioration of machining results caused by an
incorrect calibration
The machine is already calibrated at delivery. As long as your
machiningresultsarewithoutaw,anewcalibrationisnot
necessary. A calibration takes much time and can deteriorate
the machining results in the worst case if it is not done cor
-
rectly.
h In case of inaccurate machining results, try adjusting the
workingconditionsrst:checkthexationoftheblank,
the state of the tool or of the processing material.
h Before calibrating the machine, contact customer ser
-
vice.
h Be very careful when measuring and entering data
during calibration. When in doubt, stop the calibration.
b
The documentation for the manufacturing software
contains all information on calibrating the machine.
Therefore, you only nd information specic to the
N4 Impression in this document.
Mounting a calibration / test specimen in the
machine
Your N4 Impression is delivered with a calibration set. It con-
tains the following parts:
Calibration blanks which you use to mill calibration and
test specimens
Pins for immobilizing the blanks in the blank holder
A tool for milling the calibration or test specimen
A micrometre for measuring the machining precision
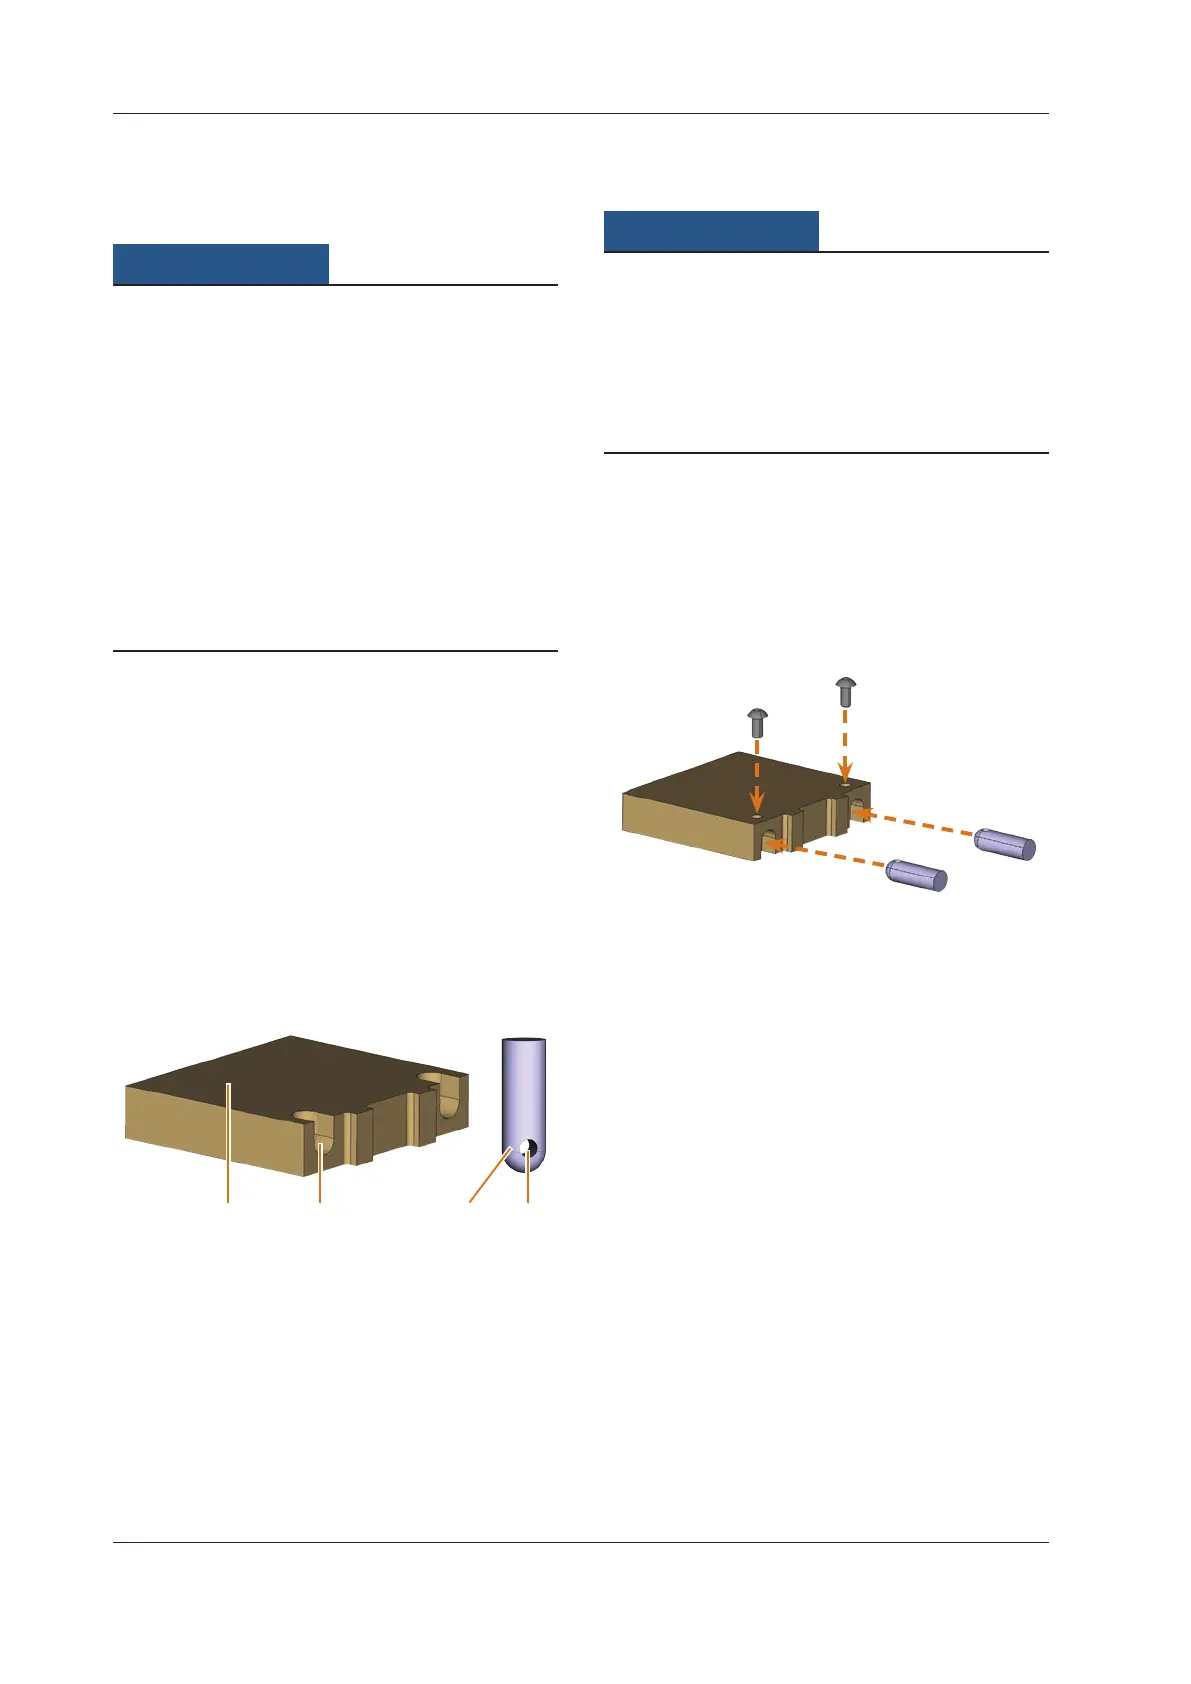
Fig. 39:
1 2 43
Blank and pins from the calibration set
[1] Blank
[2] Recess for pin
[3] Pin for chucking the blank into the blank holder
[4] Openingforthescrewusedtoxatethepin
b
At delivery the pins are already screwed into one of the
blanks.Usethisblankrstand,inthiscase,skipthe
rsttwosteps.
Tool breakage or incorrect results caused by
loose screws
If the blank is not properly seated in the blank holder, the
measurement results may become incorrect or the tool may
break when calibrating.
h Screw the pins tightly into the blanks.
h Screw the blanks tightly into the blank holder.
The machine is in default position. There are no blanks
mounted onto the blank holder.
M1. Insert the pins into the recesses [2] in the blank. Make
sure that the openings for the screws [4] are visible af
-
ter the insertion.
M2.
Insert the screws into the openings of the pins and
screw the pins tightly into the blank.
Fig. 40:
1.
2.
Inserting pins and screwing them in tightly