Machine maintenance and cleaning
33
Original instructions: N4 Impression
Document version: H – 05/2019
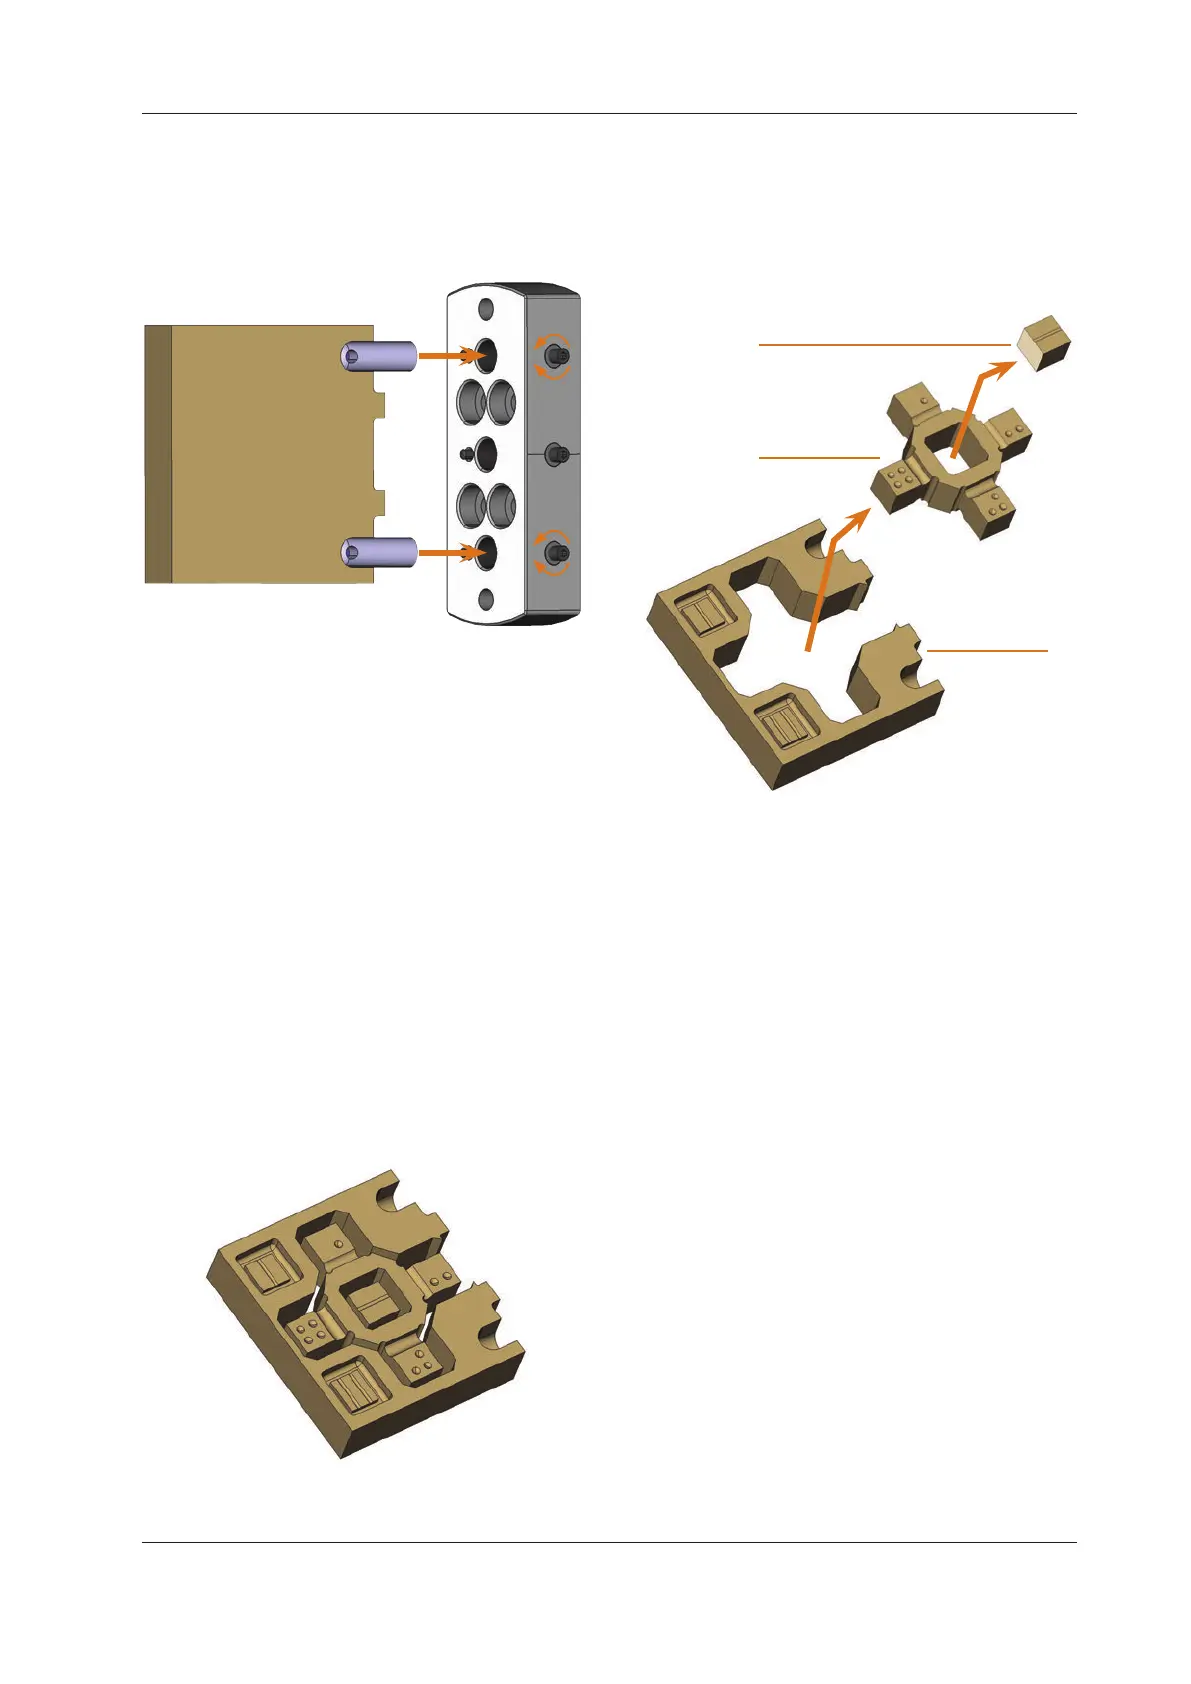
M3. Using the pins, mount the blank onto the blank holder
in the working chamber of the machine.
Fig. 41:
2.
1.
3.
Mounting a blank from the calibration set into the blank
holder
S4. Mill the calibration / test specimen as described in the
documentation for the manufacturing software.
n
Calibration / test specimen are always machined dry.
This does not indicate that the machine does not work
correctly.
M5. Remove the calibration / test specimen and the calibra
-
tion tool from the machine.
M6. Untighten the screws and remove the pins from the
blank. Store the pins, screws and the calibration tool
together for further usage.
M7. Break the blank apart to measure it (see below) and
follow the steps in the documentation for the CNC soft
-
ware.
Breaking the calibration / test specimen apart to
measure it
After milling the calibration / test specimen looks as follows:
Fig. 42: A milled calibration / test specimen for the N4 Impression
M Break the blank into the following three pieces by
pushingouttheinnergurerespectivelythecubein
the centre with your thumb:
Fig. 43:
1
2
3
The individual parts of the test and calibration specimen
[1] Cube in the centre
[2] Innergure
[3] Outer frame