Machine maintenance and cleaning
30
Original instructions: N4 Impression
Document version: H – 05/2019
6.10 Exchanging the pump
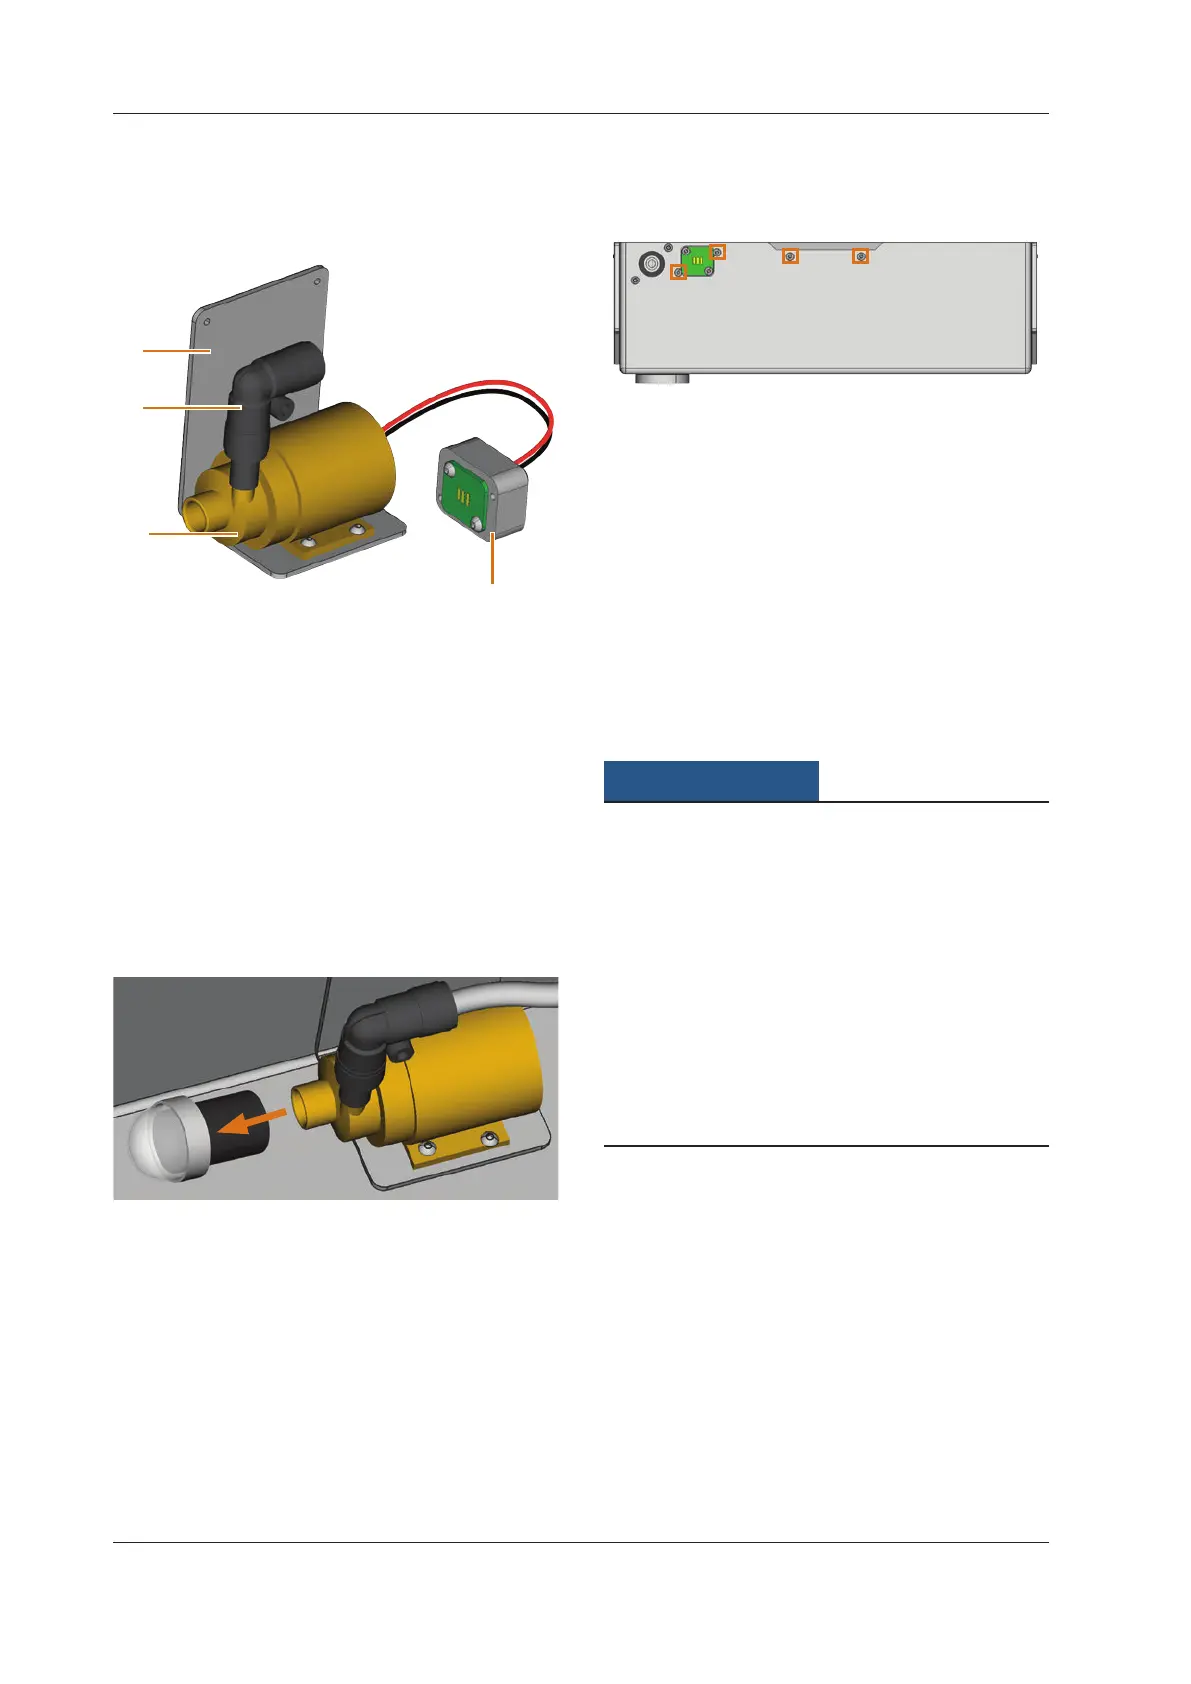
Fig. 34:
1
2
3
4
Spare part Pump
[1] Angle plate
[2] Angle piece, permanently attached to pump
[3] Pump
[4] Contact plug
M1. Remove the cooling liquid tank completely (
chap-
ter
6.7, page 28).
M2. Empty and clean the cooling liquid tank completely (
chapter 6.9).
M3. Putthecoolingliquidtankontoarmandevensurface
withsucientlighting.
M4. Pullthepumplterfromthedefectivepump.
Fig. 35: Remove pump filter
M5. Cleanthepumplterandpushitontothenewpump
up to the stop.
M6. Loosen the 4 screws of the angle plate and the contact
plug at the backside of the cooling liquid tank.
Fig. 36: Backside of the cooling liquid tank
M7. Pull the cooling liquid hose out of the angle piece at
thepump andletwaterthatmayleak ow into the
cooling liquid tank.
M8. Remove the pump including the angle plate and the
contact plug.
M9. Insert the cooling liquid hose into the angle piece of
the new pump until it is properly seated.
M10. Screw the angle plate of the new pump and the contact
plug with the 4 screws to the backside of the cooling
liquid tank.
6.11 Cleaning the housing
Damaging of the housing when choosing a non-
recommended cleaner
If you use an unsuitable cleaner for cleaning the machine
housing, the surface or the adhesive foil can get damaged.
h Avoid contact of the powder coating with alkaline or acid
substances. Especially metallic powders show a high sen
-
sitive reaction.
h Take care of the glued symbols so that they do not peel
o.Theadhesivefoilisespeciallysensitivetorubbing
and strong detergents.
h If the usage of a special cleaner is necessary to eliminate
certain dirt, we recommend checking the suitability of
thecleaneratahiddenplaceofthepartrst.
M1. First, clean the powder coated surface with a soft, dry
cloth.
M2. If some dirt cannot be removed this way, moisten the
cloth. Use a pH neutral cleaner if necessary.