Installing the machine
16
Original instructions: N4 Impression
Document version: H – 05/2019
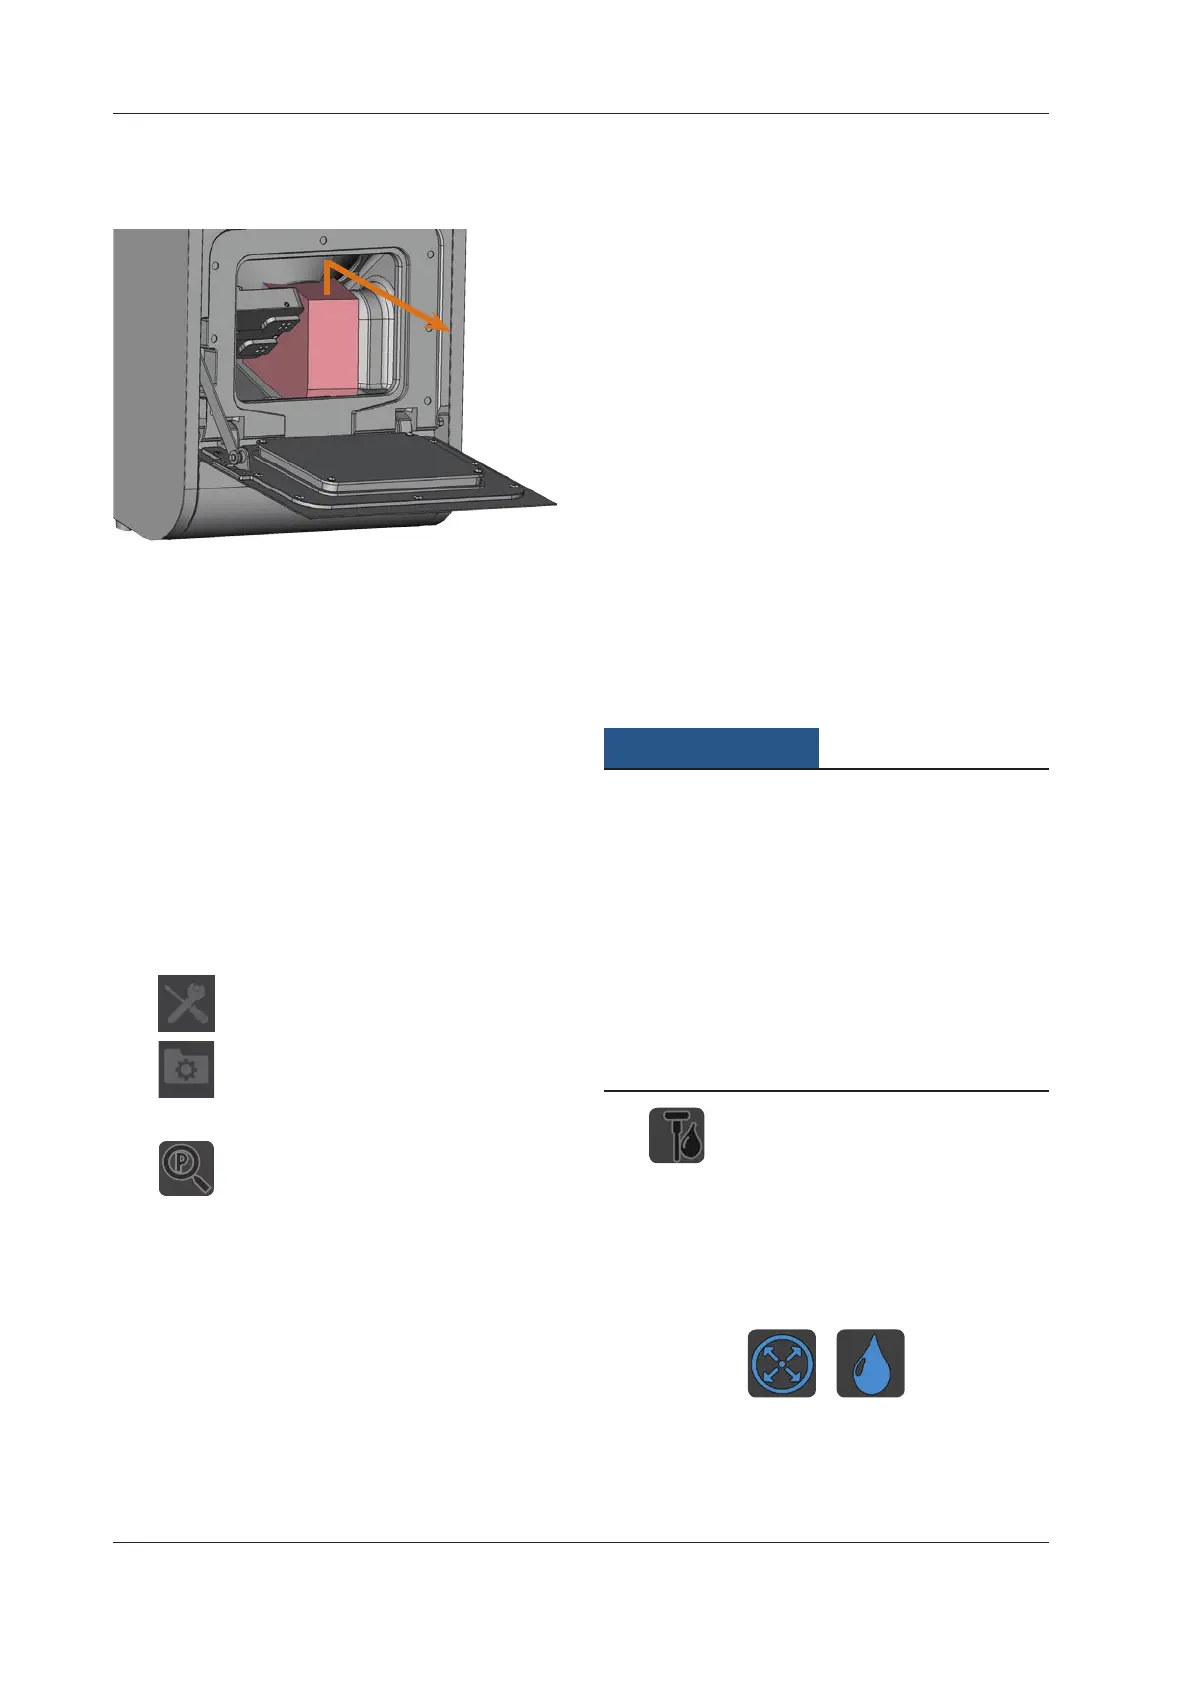
Fig. 12:
Removing the transport lock
4.8 Connecting the CAM computer
n
The transport lock must not be installed when you
connect the CAM computer to the machine (
chap-
ter
4.7, page 15).
M1. Switch on the machine.
M2. Close the working chamber door.
M3. Start the CAM computer.
M4. Use the provided USB cable to connect a USB port of
your computer or docking station with the connection
panel of your machine.
S5. Install the newest version of DentalCAM and DentalCNC
that is released for the machine. For more information
on this, read the documentation for the applications.
S6.
Start DentalCNC and click on the depicted icon
in the icon bar.
S7.
Click on the depicted icon in the lower icon
bar.
The application settings view displays.
S8.
Click on the depicted icon beside the text Port
number.
DentalCNC will try to establish a connection to the ma
-
chine. If this is successful, the application will display
the port number beside t
he icon and the machine ref-
erences.
n
The machine will not reference if the working chamber
door is open.
M9. If the working chamber door was open at step S8, close
it. If the machine does not reference as a result, quit
DentalCNC and restart the application.
M10. If DentalCNC did not determine the port number, read
how to determine the port number manually in the
documentation for the application.
4.9 Testing the machine
After the rst installation or a re-installation, for example
after a transport, you should test the basic functions of the
machine.
You installed the machine, the CAM computer and the
manufacturing software completely. The machine is
supplied with compressed air.
M1. Start the machine.
The working chamber is illuminated in white.
S2. Start DentalCNC.
S3. Enter the USB port number in the application settings
or have the program detect the port. For more informa
-
tion, read the documentation for DentalCNC.
The machine references. After that, the working cham-
ber is illuminated in green. The machine is now in de-
fault position.
S4.
Switch to the machine control view.
M5. Make sure that enough cooling liquid is in the cooling
liquid tank.
Damaging of the pump when operated without
cooling liquid
If the pump is operated without cooling liquid, the pump mo-
tor may overheat and get damaged.
h Before you activate the cooling liquid supply system,
checkifthereisasucientamountofcoolingliquidin
the cooling liquid tank.
h If no cooling liquid is sprayed into the working chamber
within a few seconds, deactivate the cooling liquid sup
-
ply system at once.
h Do not use the machine for wet machining until the cool-
ing liquid supply system is operational again.
S6.
Activate the cooling liquid supply system by
clicking on the depicted icon.
Cooling liquid sprays into the working chamber.
S7. Use the depicted icons to verify that the compressed air
andthecoolingliquidowratearesucient.
The icons display in blue when the compressed air and
thecoolingliquidowratearesucient.
Fig. 13: Left: icon for compressed air
Right: icon for flow rate