P
r
o
t
e
c
t
e
d
b
y
c
o
p
y
r
i
g
h
t
.
C
o
p
y
i
n
g
f
o
r
p
r
i
v
a
t
e
o
r
c
o
m
m
e
r
c
i
a
l
p
u
r
p
o
s
e
s
,
i
n
p
a
r
t
o
r
i
n
w
h
o
l
e
,
i
s
n
o
t
p
e
r
m
i
t
t
e
d
u
n
l
e
s
s
a
u
t
h
o
r
i
s
e
d
b
y
V
o
l
k
s
w
a
g
e
n
A
G
.
V
o
l
k
s
w
a
g
e
n
A
G
d
o
e
s
n
o
t
g
u
a
r
a
n
t
e
e
o
r
a
c
c
e
p
t
a
n
y
l
i
a
b
i
l
i
t
y
w
i
t
h
r
e
s
p
e
c
t
t
o
t
h
e
c
o
r
r
e
c
t
n
e
s
s
o
f
i
n
f
o
r
m
a
t
i
o
n
i
n
t
h
i
s
d
o
c
u
m
e
n
t
.
C
o
p
y
r
i
g
h
t
b
y
V
o
l
k
s
w
a
g
e
n
A
G
.
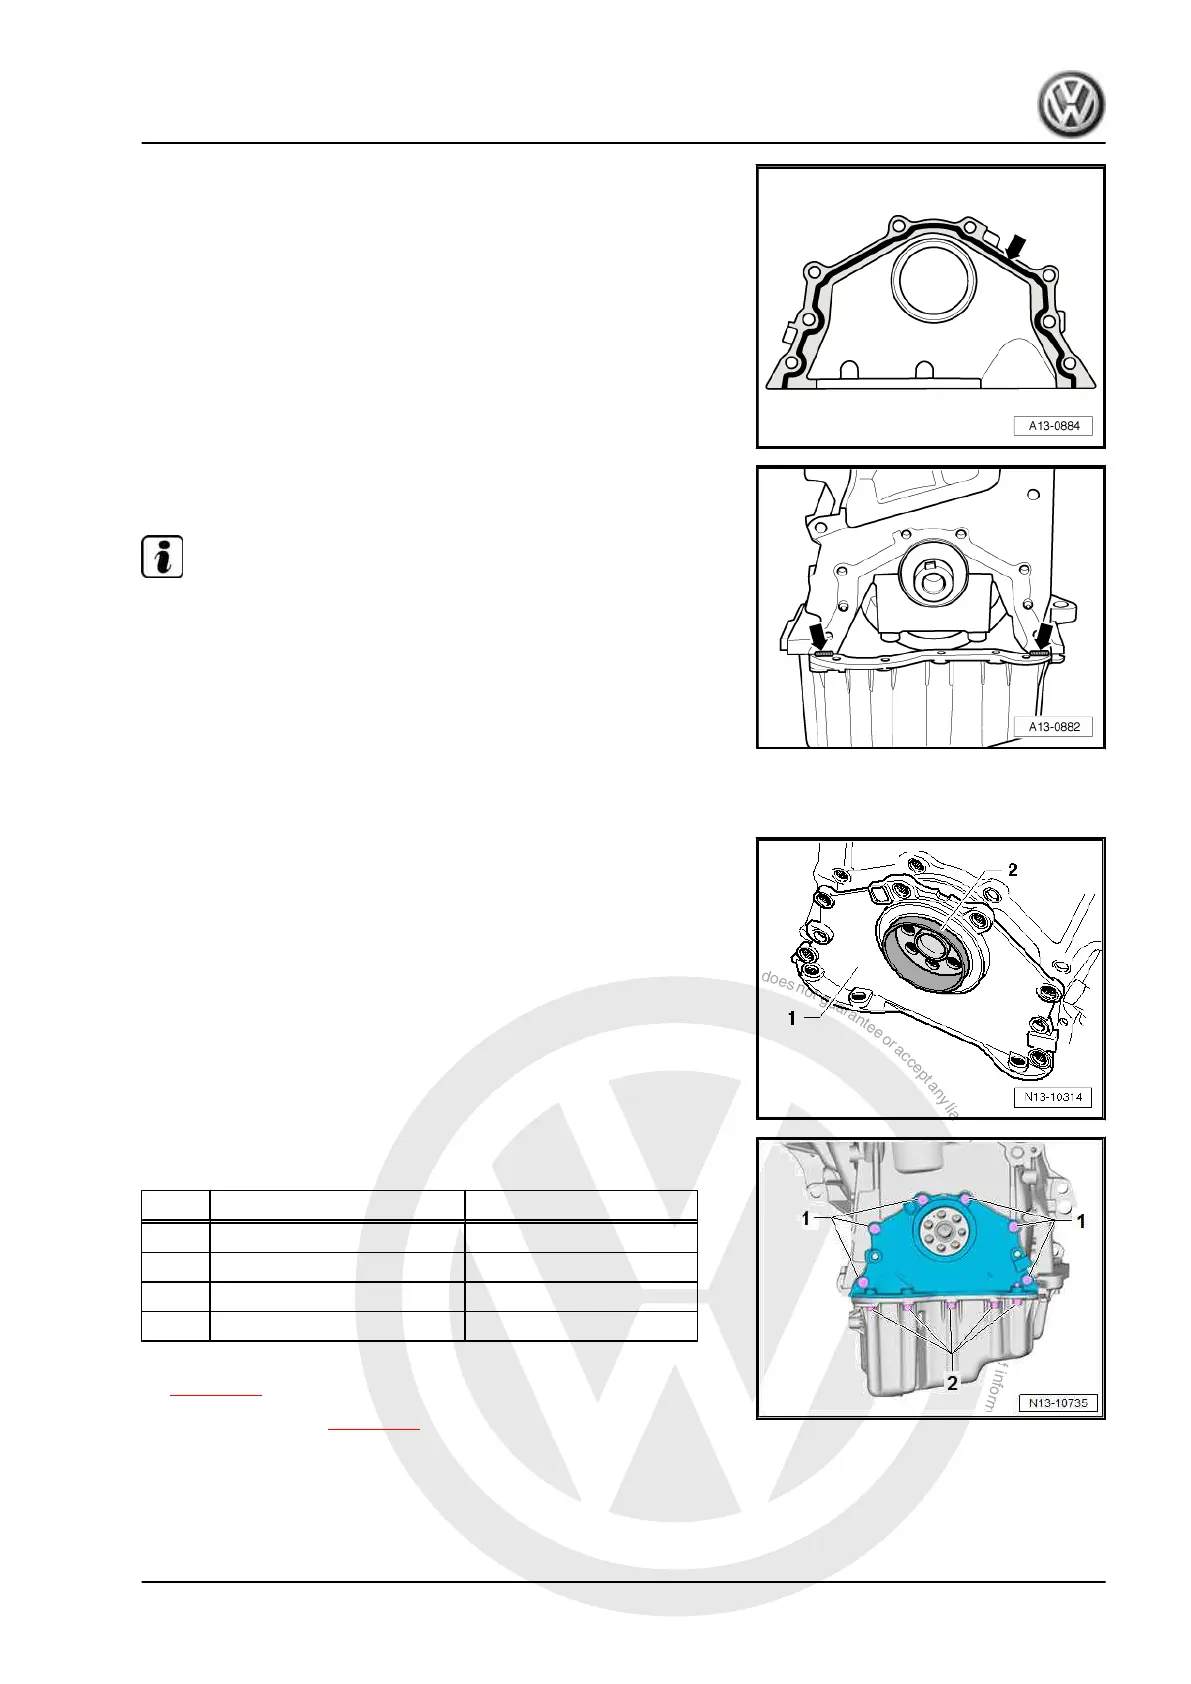
– Apply sealant bead of about 2 to 3 mm as shown -arrow- to
clean sealing surface of sealing flange.
– Apply a thin bead of sealant at the edge of the joint between
the cylinder block and the sump -arrows-.
Note
♦
Before applying sealant bead, cover sealing ring with a clean
cloth.
♦
The sealing compound bead must not be thicker than 2 to
3 mm. Otherwise excessive sealing compound will enter the
sump and may block the oil suction pipe strainer.
♦
Observe use-by-date of sealant.
♦
The sealing flange must be installed within 5 minutes after ap‐
plying the silicone sealant.
– Slide sealing flange -1- over guide sleeve -2- provided and
carefully onto crankshaft journal.
– Insert bolts for sealing flange with locking fluid - D 154 100 A1-
and tighten as follows:
Stage Bolts Specified torque
1. -1- hand-tight
2. -2- hand-tight
3. -1- 10 Nm
4. -2- 10 Nm
– Install vibration damper and tighten securing bolts
⇒ page 35 .
– Install poly V-belt ⇒ page 34 .
2.6 Removing and installing drive plate
Special tools and workshop equipment required
Touareg 2010 ➤ , Touareg 2015 ➤
6-cylinder direct-injection engine (3.6 l engine, 4V) - Edition 12.2019
2. Sealing flanges and drive plate 45