HANDLEBARS
4-80
6. Install:
• Handlebar bolts “1”
(temporarily)
• Handlebar nuts “2”
(temporarily)
7. Tighten:
• Handlebar bolts
• Handlebar nuts
First tighten the bolts, then tighten the nuts.
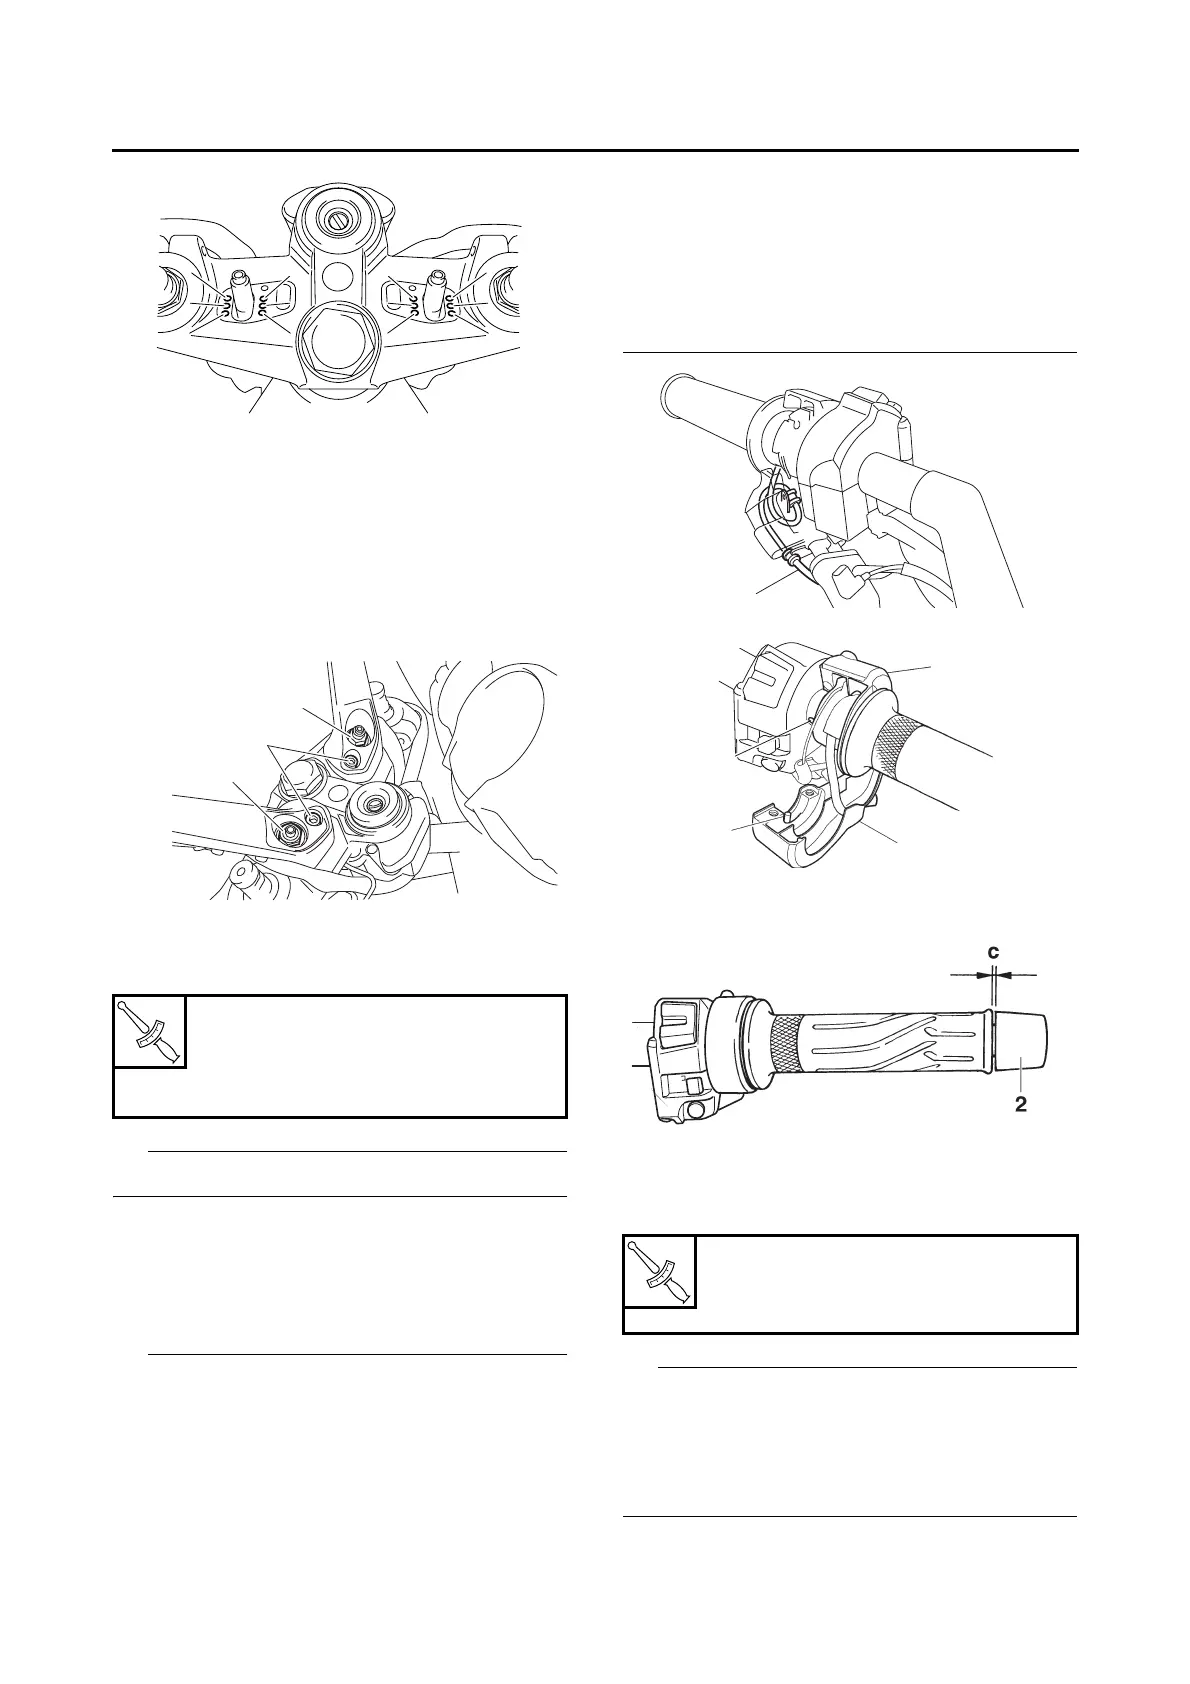
8. Install:
• Throttle grip
• Throttle cables
• Throttle cable housings “1”
• Grip end “2”
• Route the right grip warmer lead “3” through
the throttle cable housing so that it forms a loop
as shown in the illustration. Make sure that the
loop is formed so that the section of the lead
from the handlebar grip to the first molded
grommet is routed above the section which ex-
its the throttle cable housing.
• When installing the throttle cable housing,
align the projection “a” on the housing with the
hole “b” in the right handlebar and be sure not
to pinch the right grip warmer lead.
• There should be 1–3 mm (0.04–0.12 in) of
clearance “c” between the throttle grip and the
grip end.
9. Install:
• Front brake master cylinder assembly
• Front brake master cylinder holder “1”
• Install the brake master cylinder holder with the
“UP” mark facing up.
• Align the projection “a” on the front brake mas-
ter cylinder with hole “b” on the right handlebar.
• First, tighten the upper bolt, then the lower bolt.
a. Front position
b. Standard position
c. Rear position
Handlebar bolt
23 Nm (2.3 m·kg, 17 ft·lb)
Handlebar nut
65 Nm (6.5 m·kg, 47 ft·lb)
Front brake master cylinder hold-
er bolt
10 Nm (1.0 m·kg, 7.2 ft·lb)
3