4-41
CLUTCH
ENG
*****************************************************
NOTE:
NOTE:
8 Nm (0.8 mSkg)
NOTE:
*****************************************************
*****************************************************
D Apply engine oil onto the friction plates.
D Align the two slots
a
on the friction plates
with the two punch marks
b
on the clutch
housing.
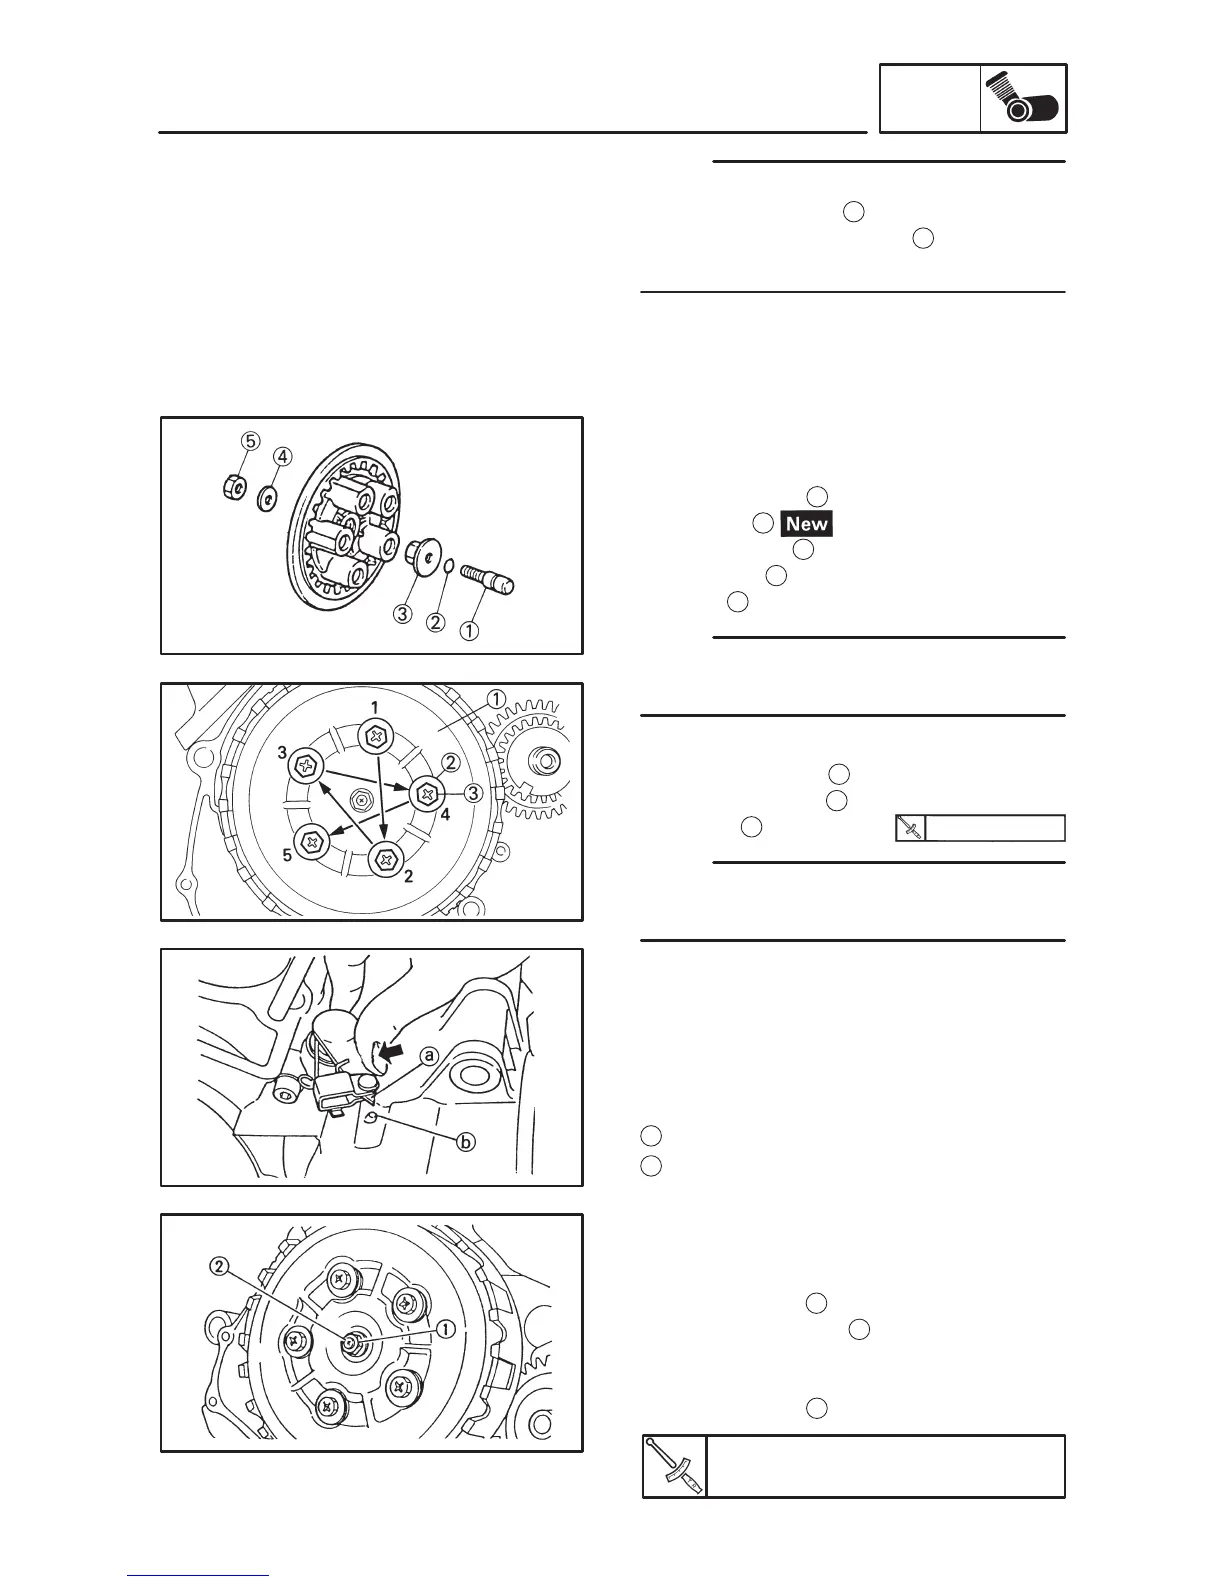
4. Install:
S Push rod #2
S Ball
S Push rod #1
1
S O-ring
2
S Push plate
3
S Washer
4
S Nut
5
Apply lithium soap base grease onto the push
rod and the ball.
5. Install:
S Pressure plate
1
S Clutch springs
2
S Bolts
3
Tighten the pressure plate bolts in stages, using
a crisscross pattern.
6. Check:
S Push lever position
S Push the push lever assembly in the direc-
tion of the arrow and make sure that the
match marks are aligned.
Match marks not aligned. Adjust.
a
Match mark on the push lever assembly
b
Match mark on the crankcase
7. Adjust:
S Push lever position
Adjustment steps:
D Loosen the nut
1
.
D Turn the push rod #1
2
clockwise or counter-
clockwise so that the match marks are
aligned.
D Tighten the nut
1
.
Nut (clutch adjuster):
8 Nm (0.8 mSkg)










 To Next Page