4-63
CRANKSHAFT AND CONNECTING RODS
ENG
NOTE:
36 Nm (3.6 mkg)
NOTE:
CAUTION:
NOTE:
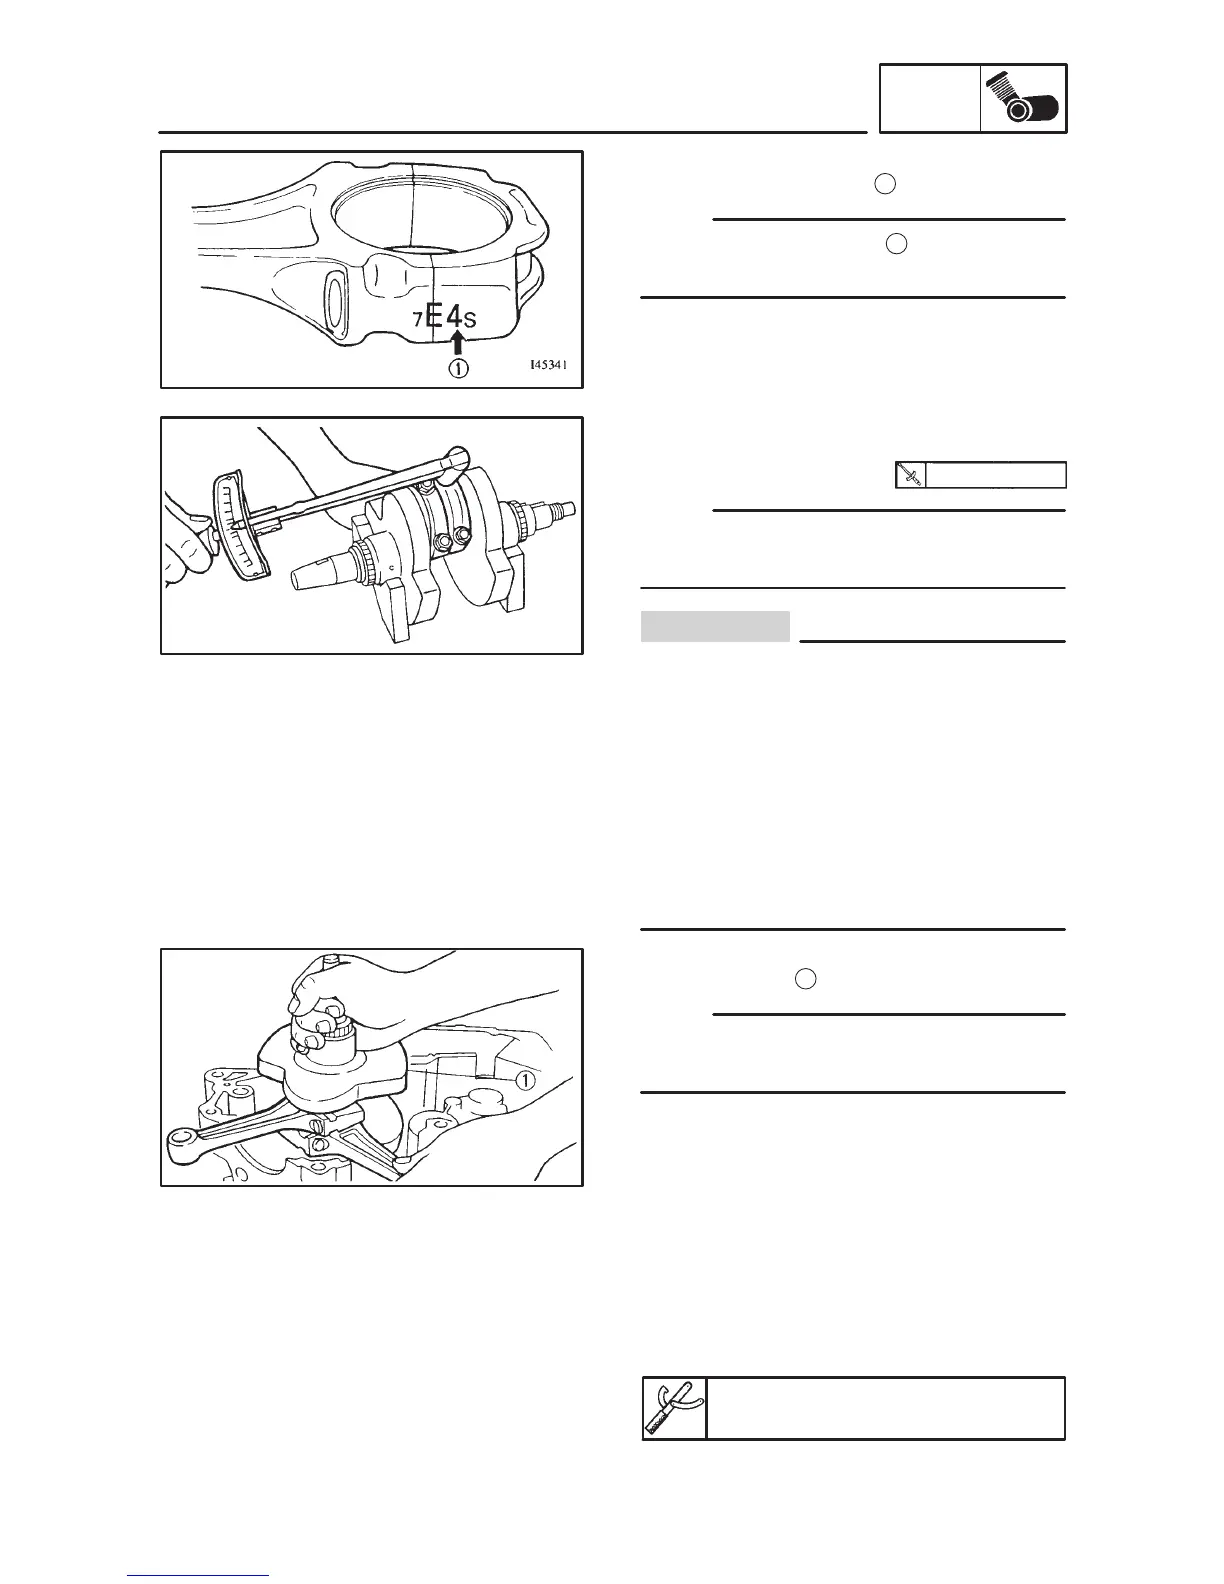
5. Install:
Connecting rod cap
1
Be sure that the characters
a
on the side of the
cap and connecting rod are aligned.
6. Tighten:
Nuts (connecting rod cap)
Apply molybdenum disulfide grease to the rod
cap bolt threads and nut surfaces.
When tightening the nuts be sure to use
an F-type torque wrench.
Without pausing tighten to full torque
specification. Apply continuous torque
between 3.0 and 3.6 mkg. Once you reach
3.0 mkg DO NOT STOP TIGHTENING un-
til final torque is reached. If the tightening
is interrupted between 3.0 and 3.6 mkg,
loosen the nut to less than 3.0 mkg and
start again.
7. Install:
Crankshaft
1
Align the left connecting rod with the rear cylin-
der sleeve hole.
CRANKCASE ASSEMBLY
1. Apply:
Engine oil
(onto the main journal bearings)
Sealant
(onto the crankcase mating surfaces)
Yamaha Bond No.1215:
90890-85505