ptg
161
#62: Redacting Content
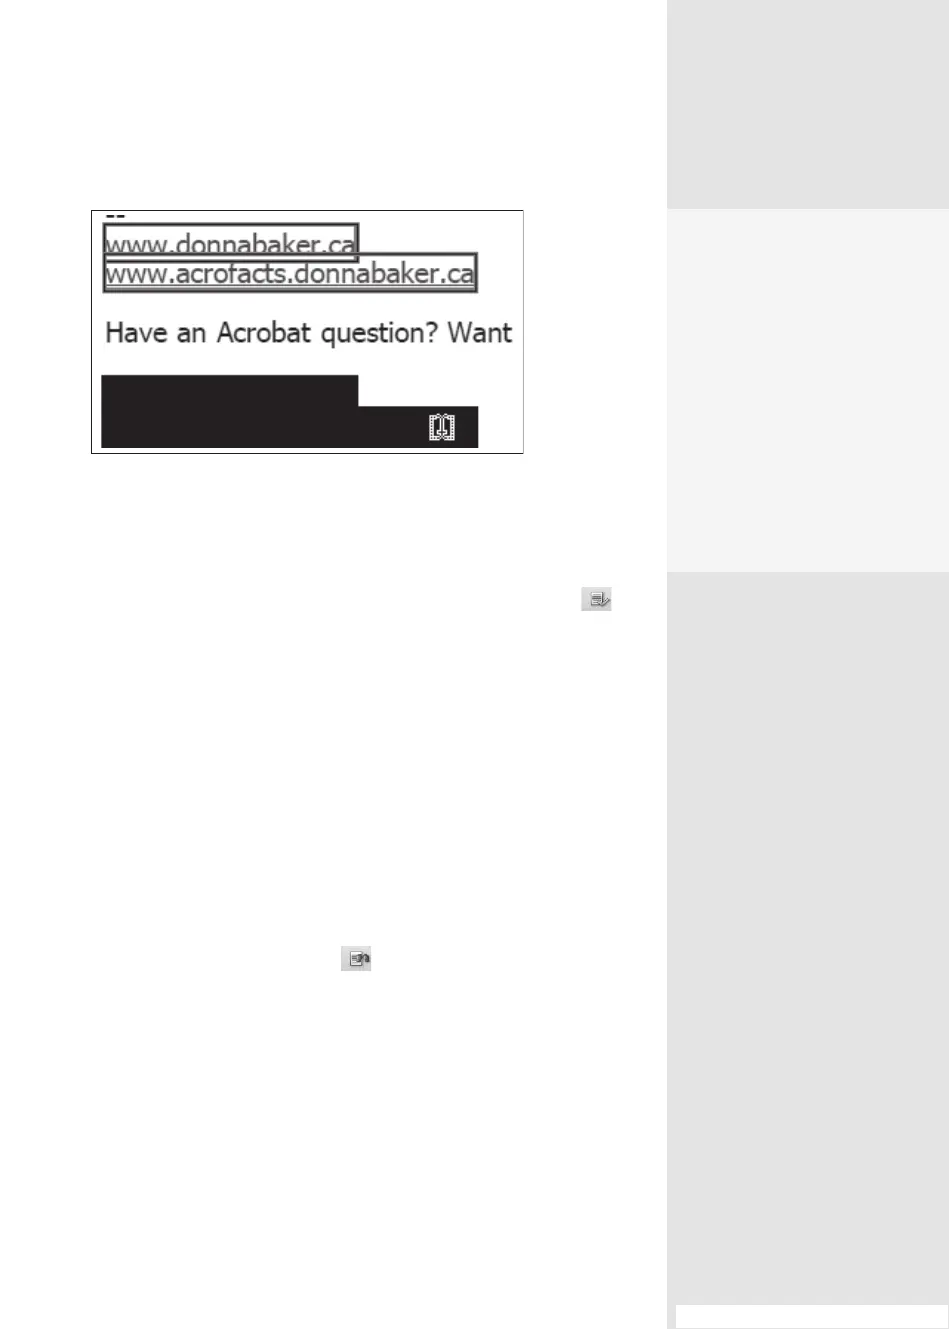
Figure 62b Select and preview content for redaction on the page.
4. Move the pointer over a selected object on the page to see how it will
look after redaction, like the lower paragraph in Figure 62b.
5. When you have nished your selections, click Apply Redactions . A
conrmation dialog opens; click OK to apply the redactions to the le.
Note
A second information dialog opens asking if you would also like to
examine the document for other content that can be removed. Click Yes
to proceed with the document examination as described in #31, “Finding
Information about Your Document.” If you need to check the redacted les
for other content regularly, select “Always perform the selected action” to
save a mouse click in the future.
Suppose you have to locate many similar items in a very long
document—how tedious! Acrobat 9 oers a new Search tool that lets you
track down single words, phrases, or patterns. Read about searching for
content using phrases in the sidebar “The Correct Phrase Is …”
Click the Search and Redact tool
on the Redaction toolbar to open
the Search window, and follow these steps to search for a pattern:
1. Specify the locations for searching from the “Where would you like to
search?” options.
2. Click Patterns to activate a eld, and choose an option from the pop-
up menu, such as Dates.
Preserve Your Files to
Preserve Your Sanity
In many workflows, it’s
important to have both
redacted and full versions
of a document. Once the
redacted file is saved, the
original content can’t be
restored. If you apply redac-
tion and change your mind,
choose File > Revert to
return to the file’s status
prior to the redaction.
(continued on next page)
From the Library of Daniel Dadian