50
ADVANCED SETUP "IMPLEMENT"
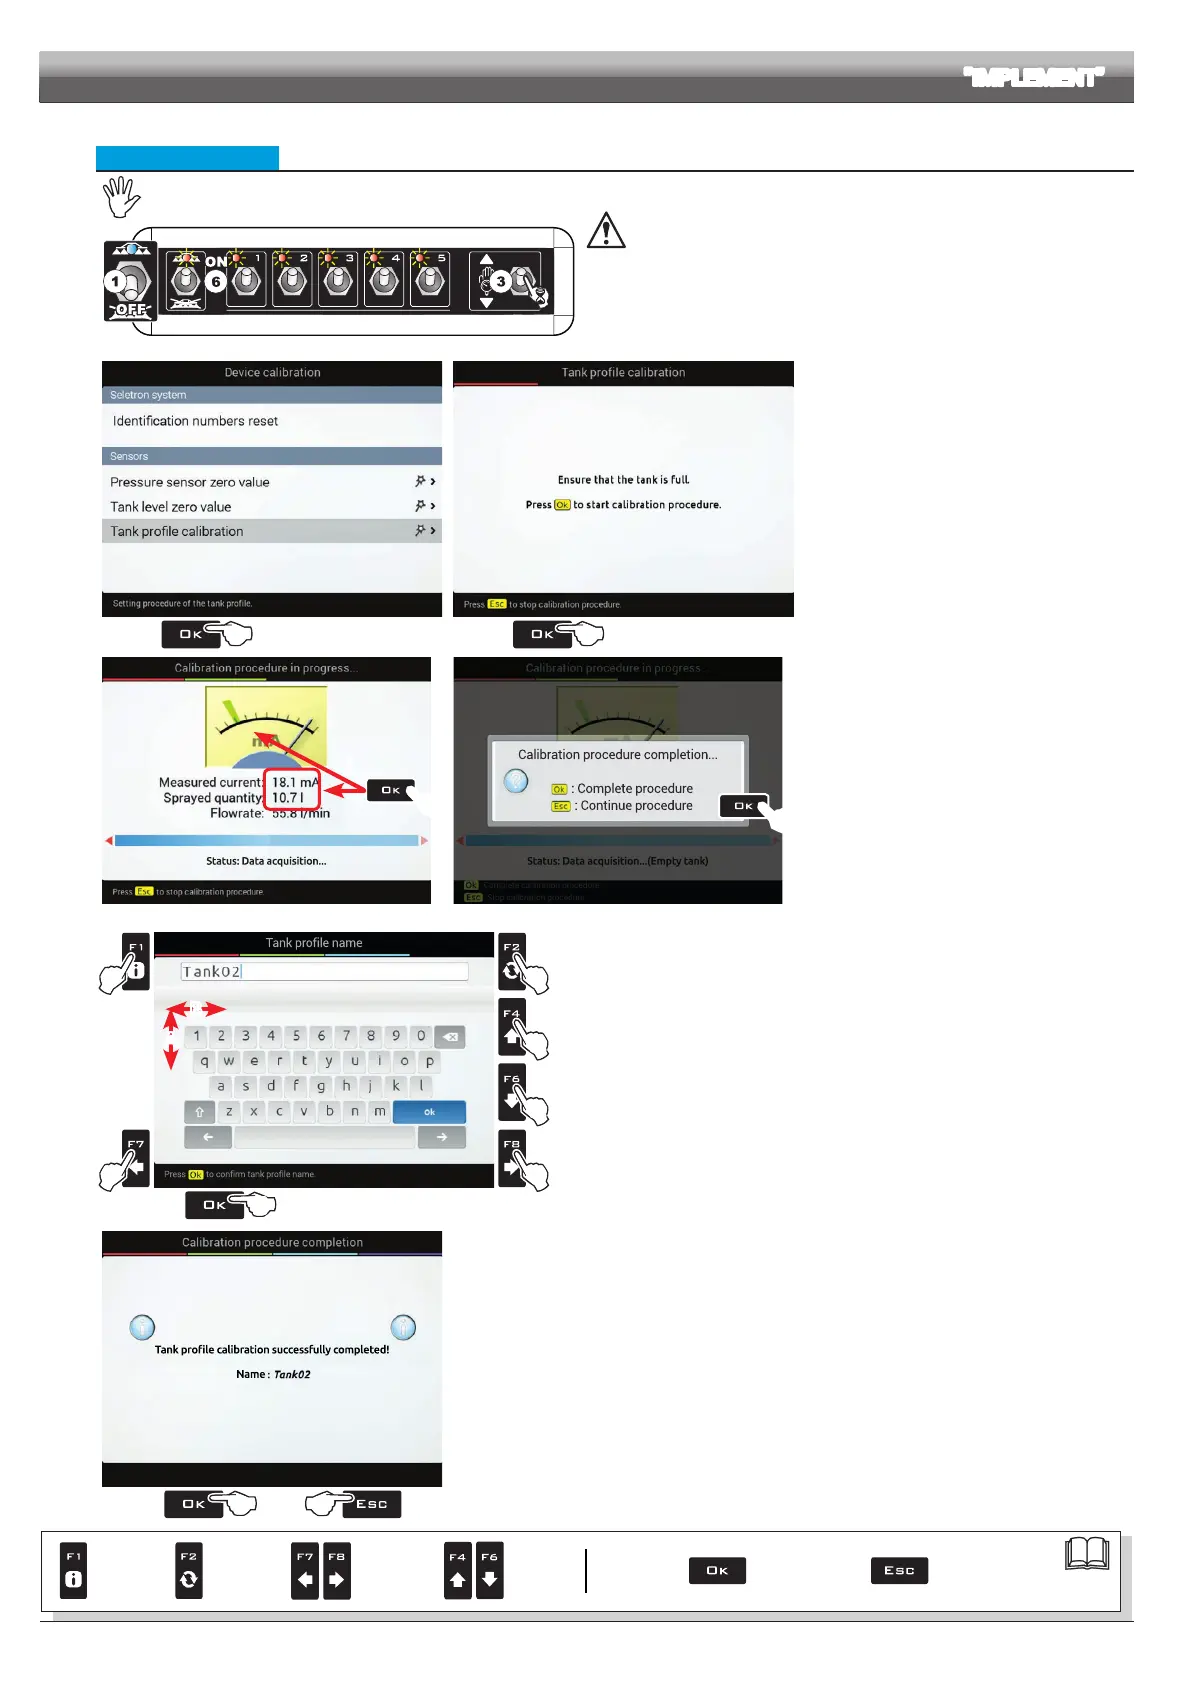
• Tank prole calibration
The calibration of the tank prole is ONLY possible if a owmeter is installed on the system (par. 10.1.3).
Fig. 157
Before starting the procedure carry out the following operations:
1 Make sure the main switch is in position OFF (Fig. 157).
2 Fill the tank with clean water WITHOUT ADDING CHEMICAL SUBSTANCES. The
tank must be full.
Visually check the reached level.
3 Set the output to the maximum value by keeping the control valve switch pressed
(Fig. 157, nearly 7 s).
4
Fig. 158
5
Fig. 159
4 Select
Tank profile calibration (Fig. 158) and
press
OK.
The calibration starts.
5 The message in Fig. 159 is displayed: follow the
instructions, then start the procedure by pressing
OK.
6 Start the spraying system: open, in succession,
all section valves and the main control (Fig. 157,
switches in position ON).
7
!
Fig. 160
8
Fig. 161
The display will show in real time the quantity of
sprayed water and the calibration status (Fig. 160).
7 When the tank is empty press
OK to end the
procedure:
the value read by the level sensor must be lower
than 4.5 mA and at least 10 liters must have been
sprayed.
8 Press again
OK again to save the tank prole: the
name edit screen is displayed (Fig. 162).
C
B
D
A
A
B
E
B
A
Fig. 162
9 Type in the name:
A Press in succession to select the character you wish to type (UP / DOWN).
B Press in succession to select the character you wish to type (RIGHT / LEFT).
C Press to conrm the selected character
D Press to delete the character before the cursor
E Press OK to save the name.
1111
Fig. 163
11 A conrmation message is displayed once the process is completed (Fig. 163).
Press
OK or ESC.
The calibration is completed.
Par.
7. 4
Conrm access
or data change
Exit the function or
data change
Delete
selected
character
Scroll
(LEFT /
RIGHT)
Data
increase /
decrease
Scroll
(UP /
DOWN)
Enter
selected
character