22
9 BASIC SETTINGS
FIRST SWITCH-ON - SETUP
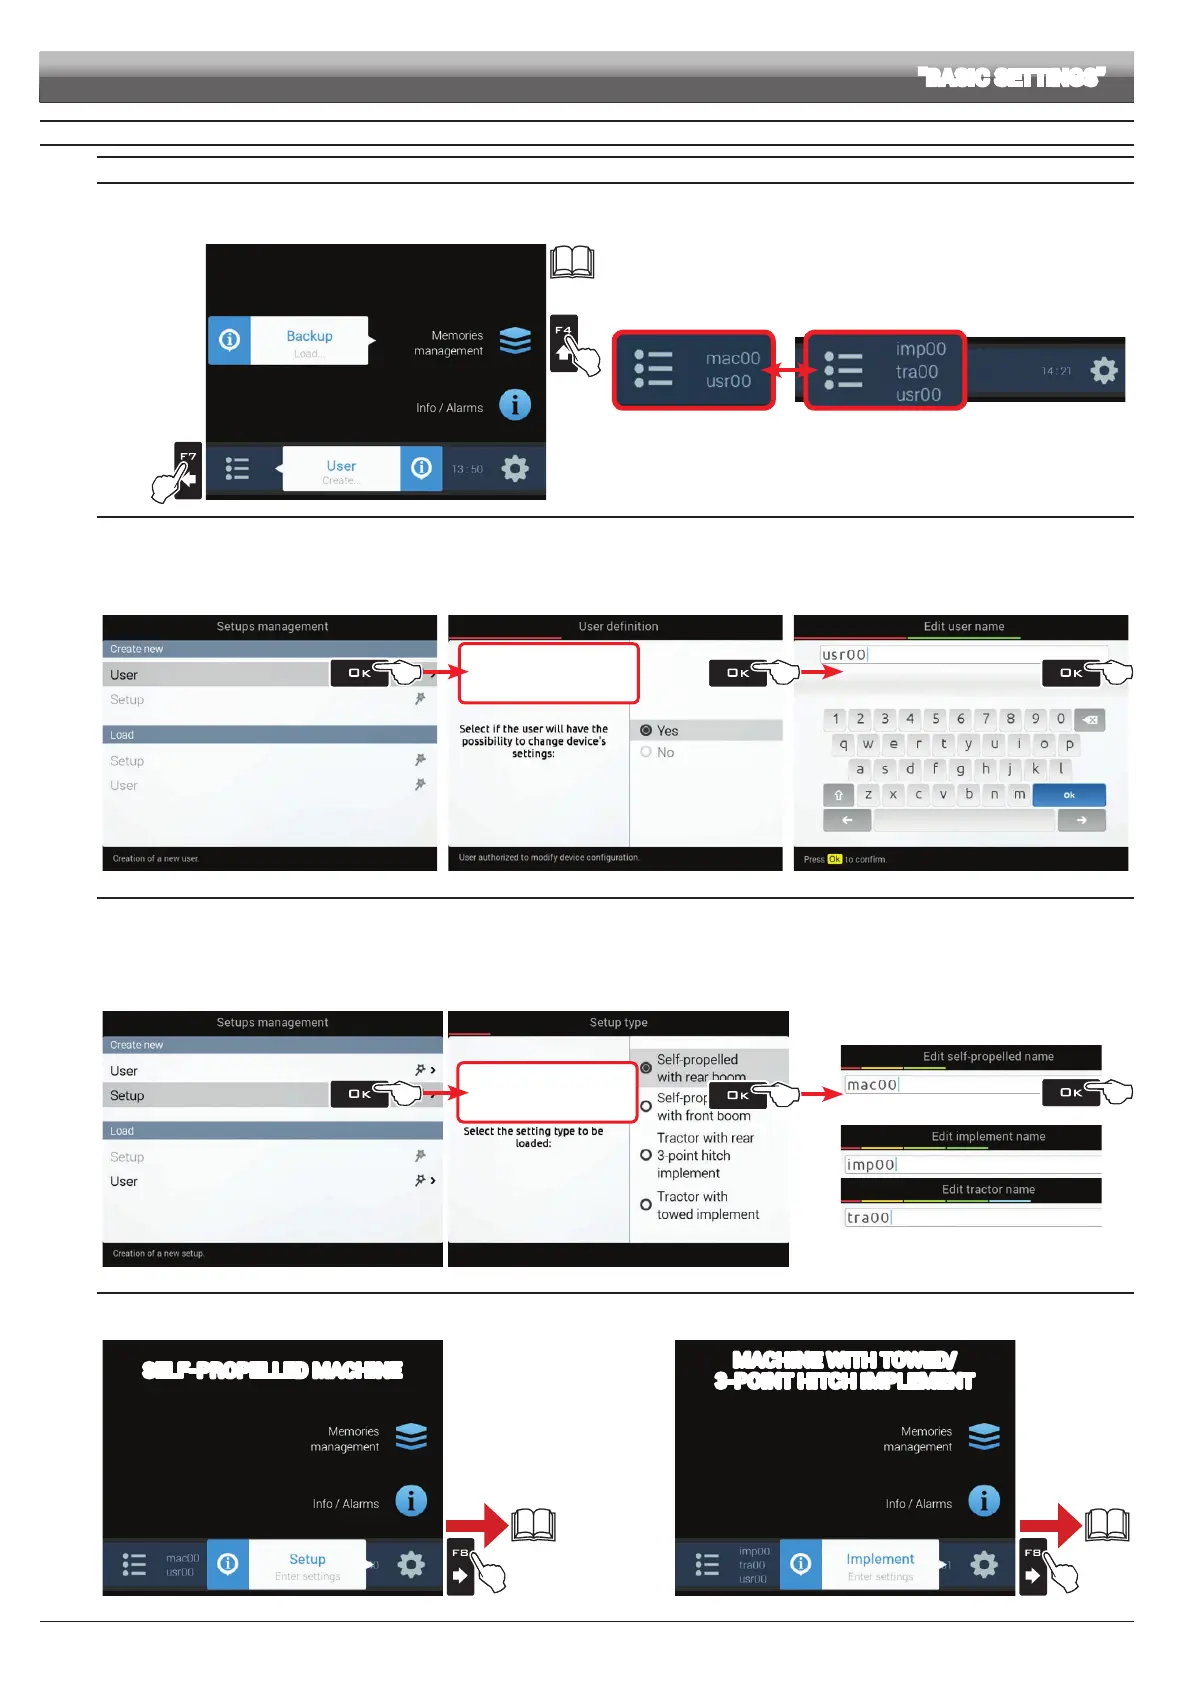
If you have a setup le (Backup), duly stored in a pendrive, press
F4 (A in Fig. 38) and follow the procedure described under par. 14.4.2.
IN ANY OTHER CASE, PRESS F7 (B): SAVE USER AND MACHINE CONFIGURATION (STEPS 1 AND 2);
START GUIDED SETUP PROCEDURE BY MEANS OF F8 (STEP 3).
PAR.
14.4.2
B
A
Fig. 38
ACTIVE SETTINGS AT END
OF GUIDED SETUP PROCEDURE
self-propelled
machine
machine
with towed/3-point hitch
implement
Fig. 39
1 CREATING A NEW USER
- Select User (Fig. 40): follow the suggested steps and select the required options (Fig. 41).
OK: next step ESC: previous step.
- Type the name (Fig. 42) and press OK twice: new user is now active on the computer (usr00).
- Go to step 2.
Fig. 40
OK Next step
ESC Previous step
Fig. 41
Fig. 42
2 SAVING THE MACHINE CONFIGURATION
- Select Configuration (Fig. 43): follow the suggested steps and select the required options (Fig. 44).
OK: next step ESC: previous step.
- Type the name (Fig. 45) and press OK twice: machine conguration is now active on the computer.
"macxx"= self-propelled machines; or "impxx" and "traxx"= machines with towed or 3-point hitch implement ("impxx" for implement, "traxx" for the tractor).
- Go to step 3.
Fig. 43
OK Next step
ESC Previous step
Fig. 44
or
Fig. 45
3 GUIDED SETUP PROCEDURE
- From the "Home" page (Fig. 46 or Fig. 47) press F8. You can do the following:
4A
SELF-PROPELLED MACHINE
page
23
Fig. 46
page
25
4B
MACHINE WITH TOWED/
3-POINT HITCH IMPLEMENT
Fig. 47
SETUP "BASIC SETTINGS"
x2
x2