Brake System Argo Service Manual
BR-36
Ontario Drive & Gear Limited www.odg.com
PH.(519)- 662-2840 FAX (519)- 662-2421
Removing a Brake Disc
When servicing a left side brake disc, you will need to remove the driven clutch from the
transmission. Refer to Removing the Driven Clutch in section CS of this service guide.
BR-63
BR-64
1. Perform the servicing procedure, Removing the Firewall, in section VB.
On 6x6 vehicles manufactured prior to S8131 locate and loosen off the four 1/2"-
20x1.5" power pack frame mounting bolts. Refer to Section 4.0 Power Pack As-
sembly in the appropriate parts manual. There are two located in front of the idler
axles, and two visibly located, behind the idler axles. These bolts are threaded into
nuts welded to the lower frame assem-
bly.
2. Loosen off the power pack frame
On ARGOS manufactured from
SN7841, S8131 and all RB, CB, BF
& C vehicles, locate the two 3/8"-
16x3" bolts threaded into the lower
frame channel beneath the rear power
pack mounting bolt. Turn each of
these clockwise to lower the rear of
the power pack frame assembly.
Photo BR-64
On 6x6 models produced from S7304 and prior to S8131, undo the jam nuts at the
chain tensioner bolts and using an allen head wrench, turn the adjustment bolts
counter-clockwise to lower the back end of the power pack frame. This will slacken
the idler chains and allow for removal. Models prior to this serial number will
require a 3/4" socket on the adjustment bolt head to lower the power pack frame.
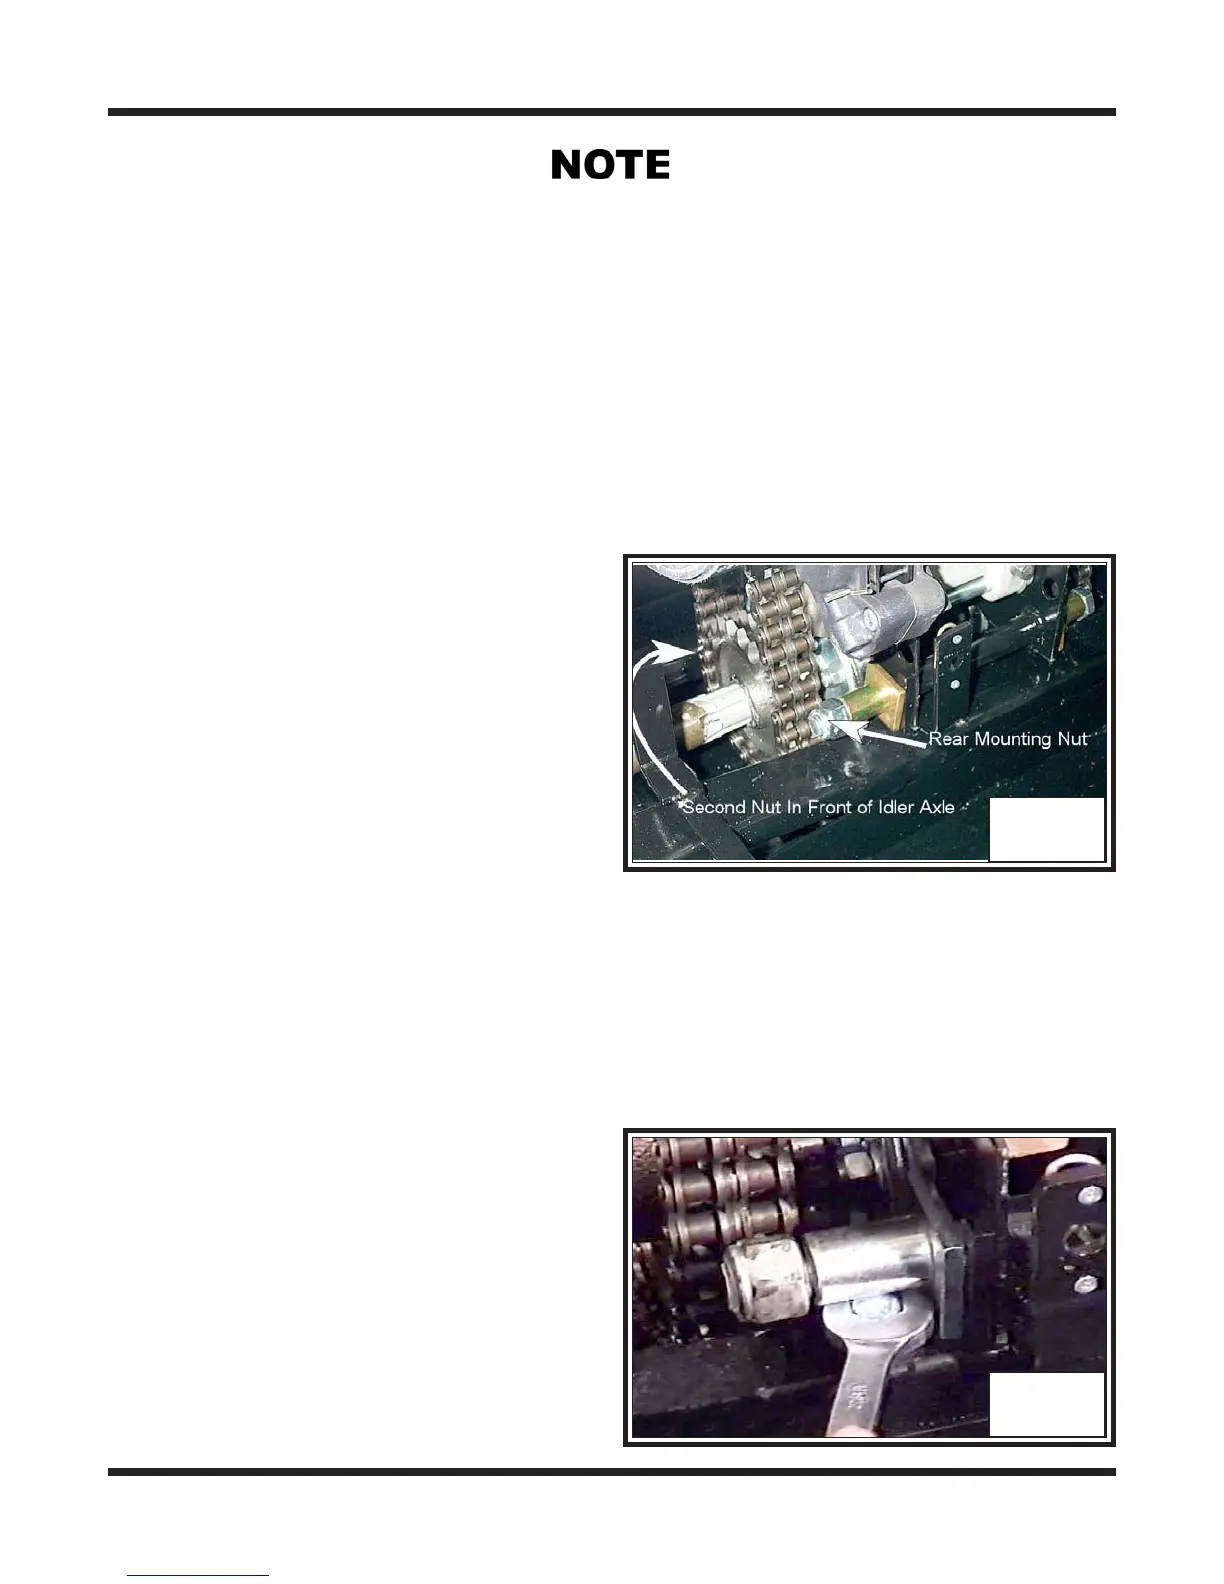
3. Next loosen off the idler chains.
On ARGOS manufactured from
SN7841, S8131 and all RB, CB, BF
& C vehicles, loosen the locknut in
front and behind the idler axles. These
are threaded to 2 mounting bolts in-
serted through the power pack frame
from right to left and attached at the
lower frame. Photo BR-63