Wheels, Axles & Chains Argo Service Manual
Ontario Drive & Gear Limited www.odg.com
PH.(519)- 662-2840 FAX (519)- 662-2421
WA-52
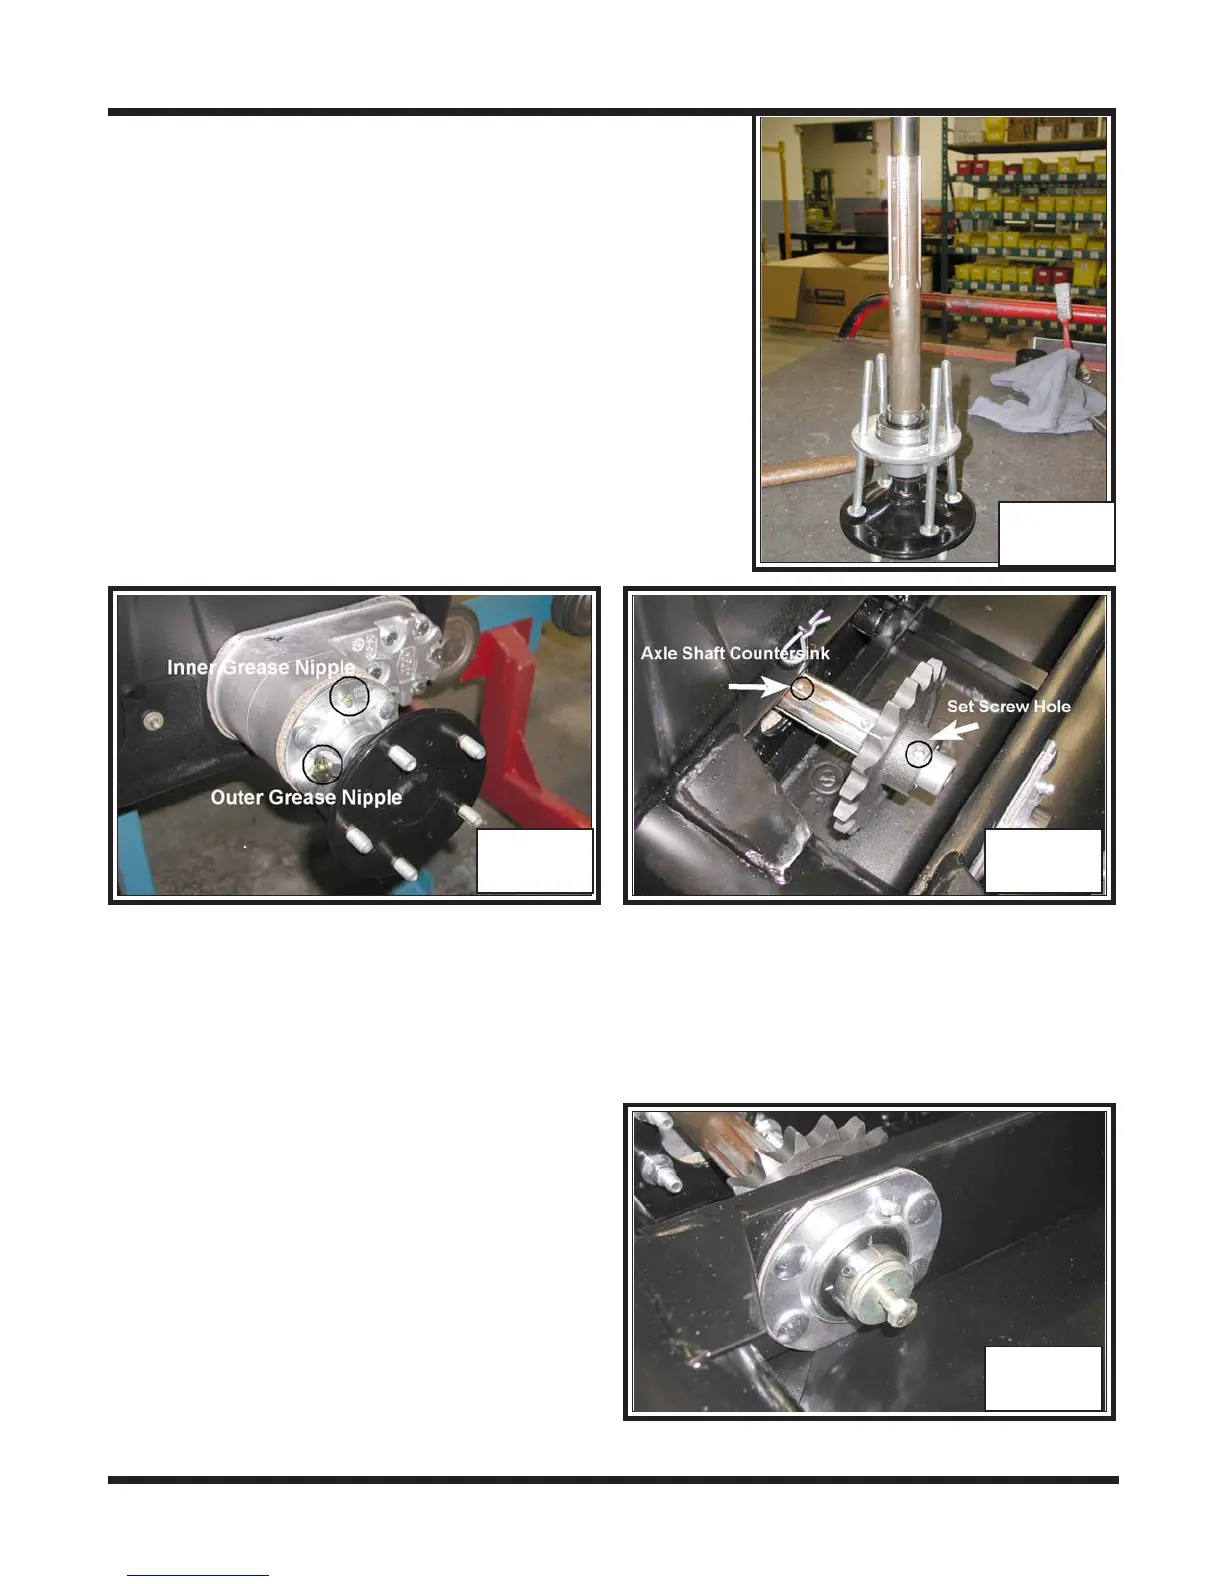
1. Assemble the axle as shown in Photo WA-127
2. Install the axle assembly into the lower body and
extension. Orient the greasable fittings so that the
outer grease fitting is at the 9 o'clock position, and
the inner one is at 12 o'clock. Photo WA-128
3. Locate the drive sprocket and slip it on to the axle
with the set screw hole facing to the inside. Align
the spline of the axle with the machined
countersinks, with the set screw hole in the drive
sprocket. Photo WA-129
IMPORTANT
Drive sprockets on front axles of all models are free floating and do not require set
screws to secure them to the axle shaft.
WA-00
4. Align the end of the axle, with the inner
bearing. Push the axle the remaining
way and install the flange hardware.
5. Tighten down the hardware of both in-
ner and outer bearing flanges. Torque
to specifications.
6. Install the bolt and flat washers to the
end of the axle. Apply blue 242
LOCTITE to the threads of the bolt and
torque to specifications. Photo WA-130
7. Install the drive chains.
WA-130
WA-128 WA-129
WA-127