Wheels, Axles & Chains Argo Service Manual
Ontario Drive & Gear Limited www.odg.com
PH.(519)- 662-2840 FAX (519)- 662-2421
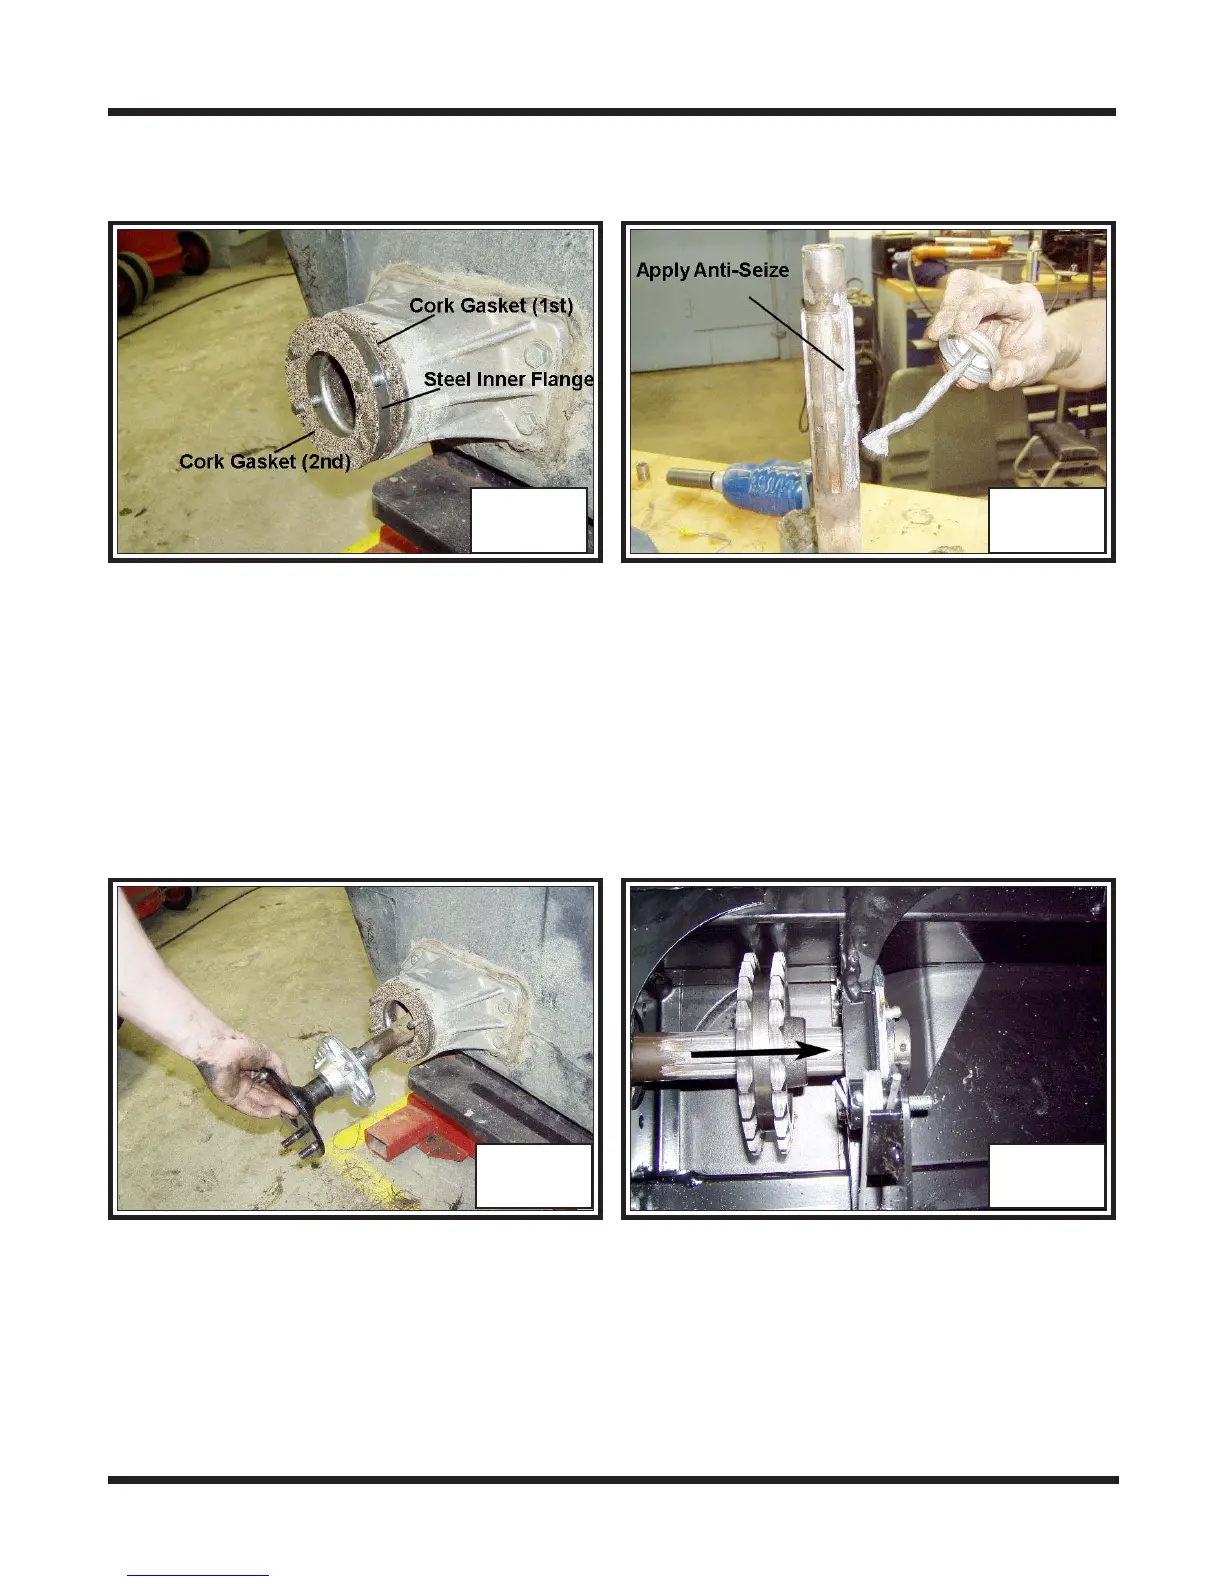
6. Install a cork gasket at the front aluminum axle extension followed by a steel inner
flange and second cork gasket. Photo WA-12
WA-12 WA-13
7. Apply some anti-seize compound to the spline area of the axle shaft. Photo WA-13
8. Slip the axle assembly into the front bearing extension. Photo WA-14 On the inside
of the vehicle, prepare to install the front sprocket as the axle is pushed through to
the inner bearing.
IMPORTANT
The front axle sprocket is a "floater" and requires no set screws. Orient the
sprocket with the larger shoulder facing towards the inside of the vehicle. Photo WA-
15
WA-15WA-14
9. Align the mounting holes of the greasable flange with the studs of the aluminum
bearing extension and place into position up tight against the cork gasket. Photo
WA-16
10. Install flat washers to the studs. Photo WA-17
WA-53A