Argo Service Manual Fuel System
Ontario Drive & Gear Limited www.odg.com
PH.(519)- 662-2840 FAX (519)- 662-2421
FS-5
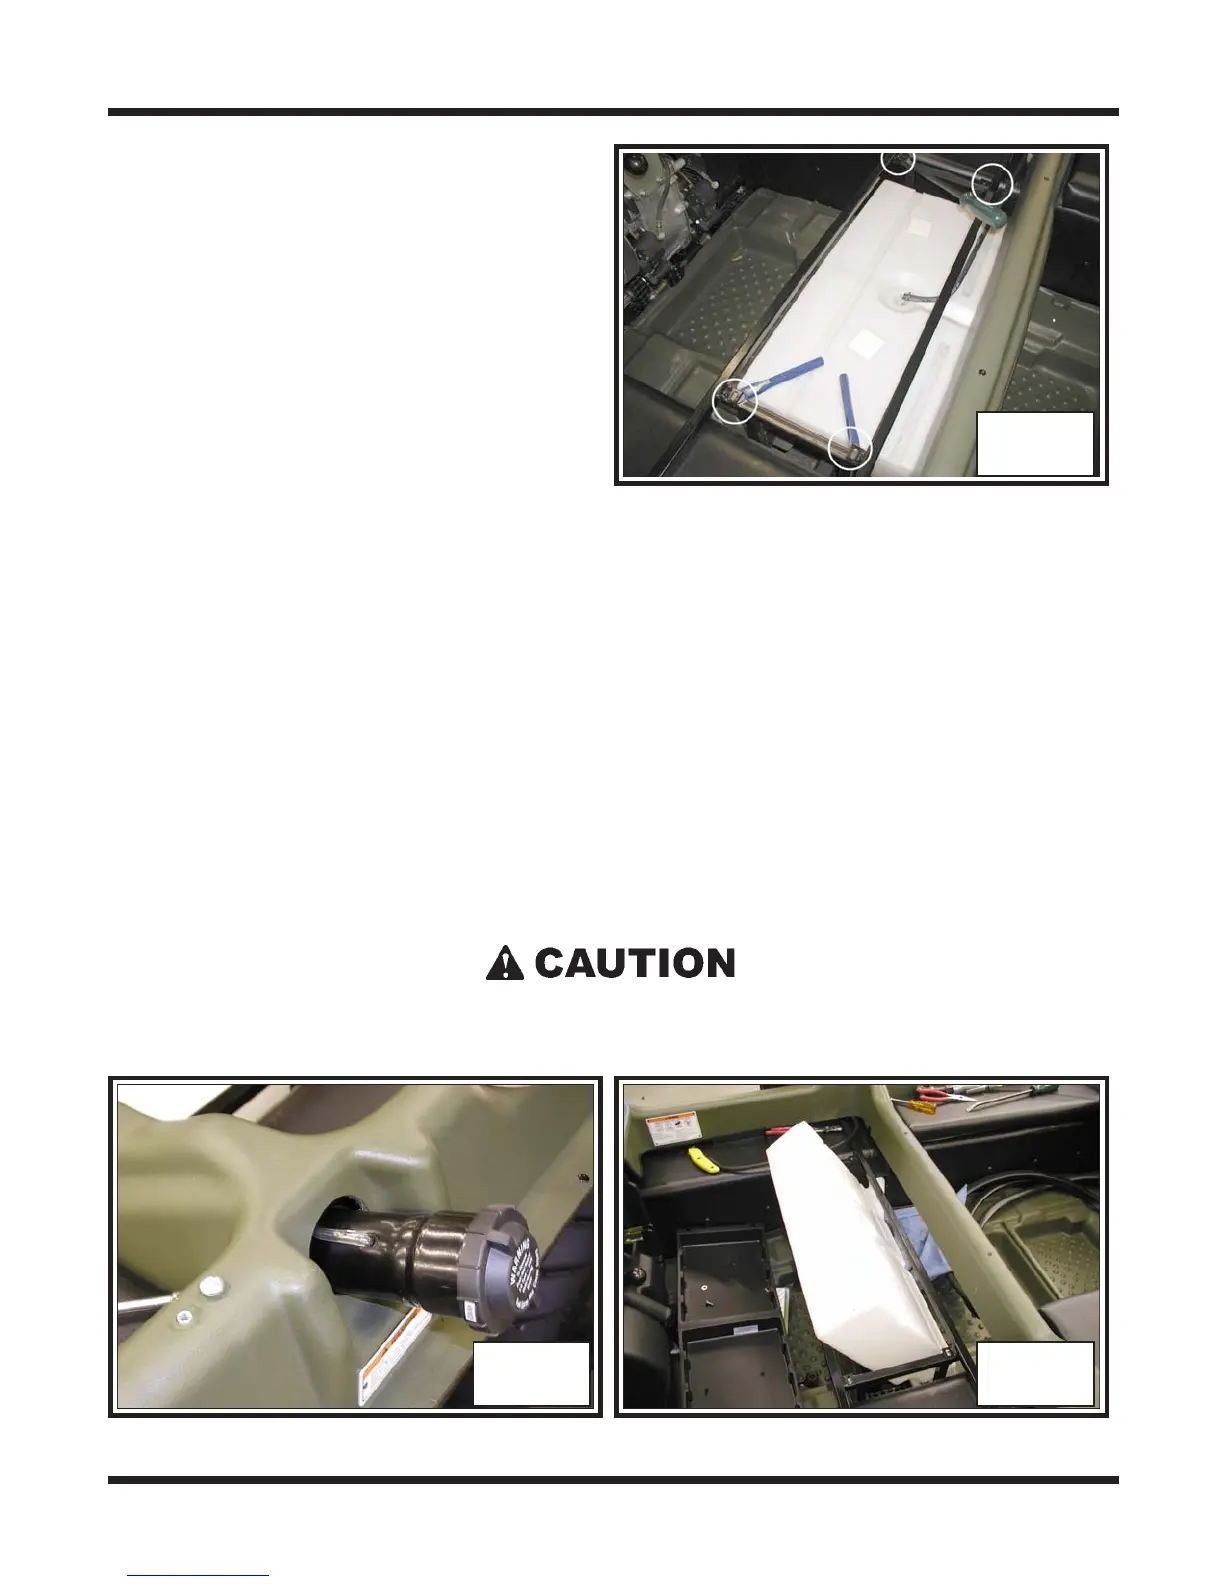
7. Undo the gear clamp securing the filler hose at the fuel tank neck and pull the filler
neckassembly free of the tank. Pull the assembly from the tank at the fuel cap.
Photo FS-4
Ensure that the vent tube does not pull out from the filler neck and that it is not
kinked in any way when the filler neck assembly is reassembled to the new tank.
8. Pull the fuel tank up through the seat frame assembly and free of the vehicle.
Photo FS-5
IMPORIMPOR
IMPORIMPOR
IMPOR
TT
TT
T
ANTANT
ANTANT
ANT
Depending on the design of the fuel tank,
earlier models may require that the tank
be removed from the vehicle by pulling it
from the seat frame into the rear
compartment. The tank will need to be
raised high enough for the sediment bowl
to clear the seat frame assembly below.
To provide enough clearance, shim the
seat support at the 4 corners where the
storage tray fasteners were removed. Photo FS-3
FS-3
FS-4 FS-5
9. Unthread the fuel pickup tube from the tank and discard.
IMPORIMPOR
IMPORIMPOR
IMPOR
TT
TT
T
ANTANT
ANTANT
ANT
The filler necks of vehicles manufactured prior to CB14963, RB14945, BF10092,
SN10111 & S10112, may not be pulled through the upper body filler hole as shown
below. Filler necks in these earlier models have a small metal vent tube welded to
the filler neck, to which the vent tube is crimped. Pull the tank from the vehicle
along with the filler neck assembly until the vent line is visible and can be
disconnected from the filler neck tube