CHAPTER 3 FLYING THE EFD1000 C3 PRO PFD
Page 3-10
091-00019-001 REV B
Page 3-11
091-00019-001 REV BEFD1000 C3 Pro PFD Pilot’s Guide
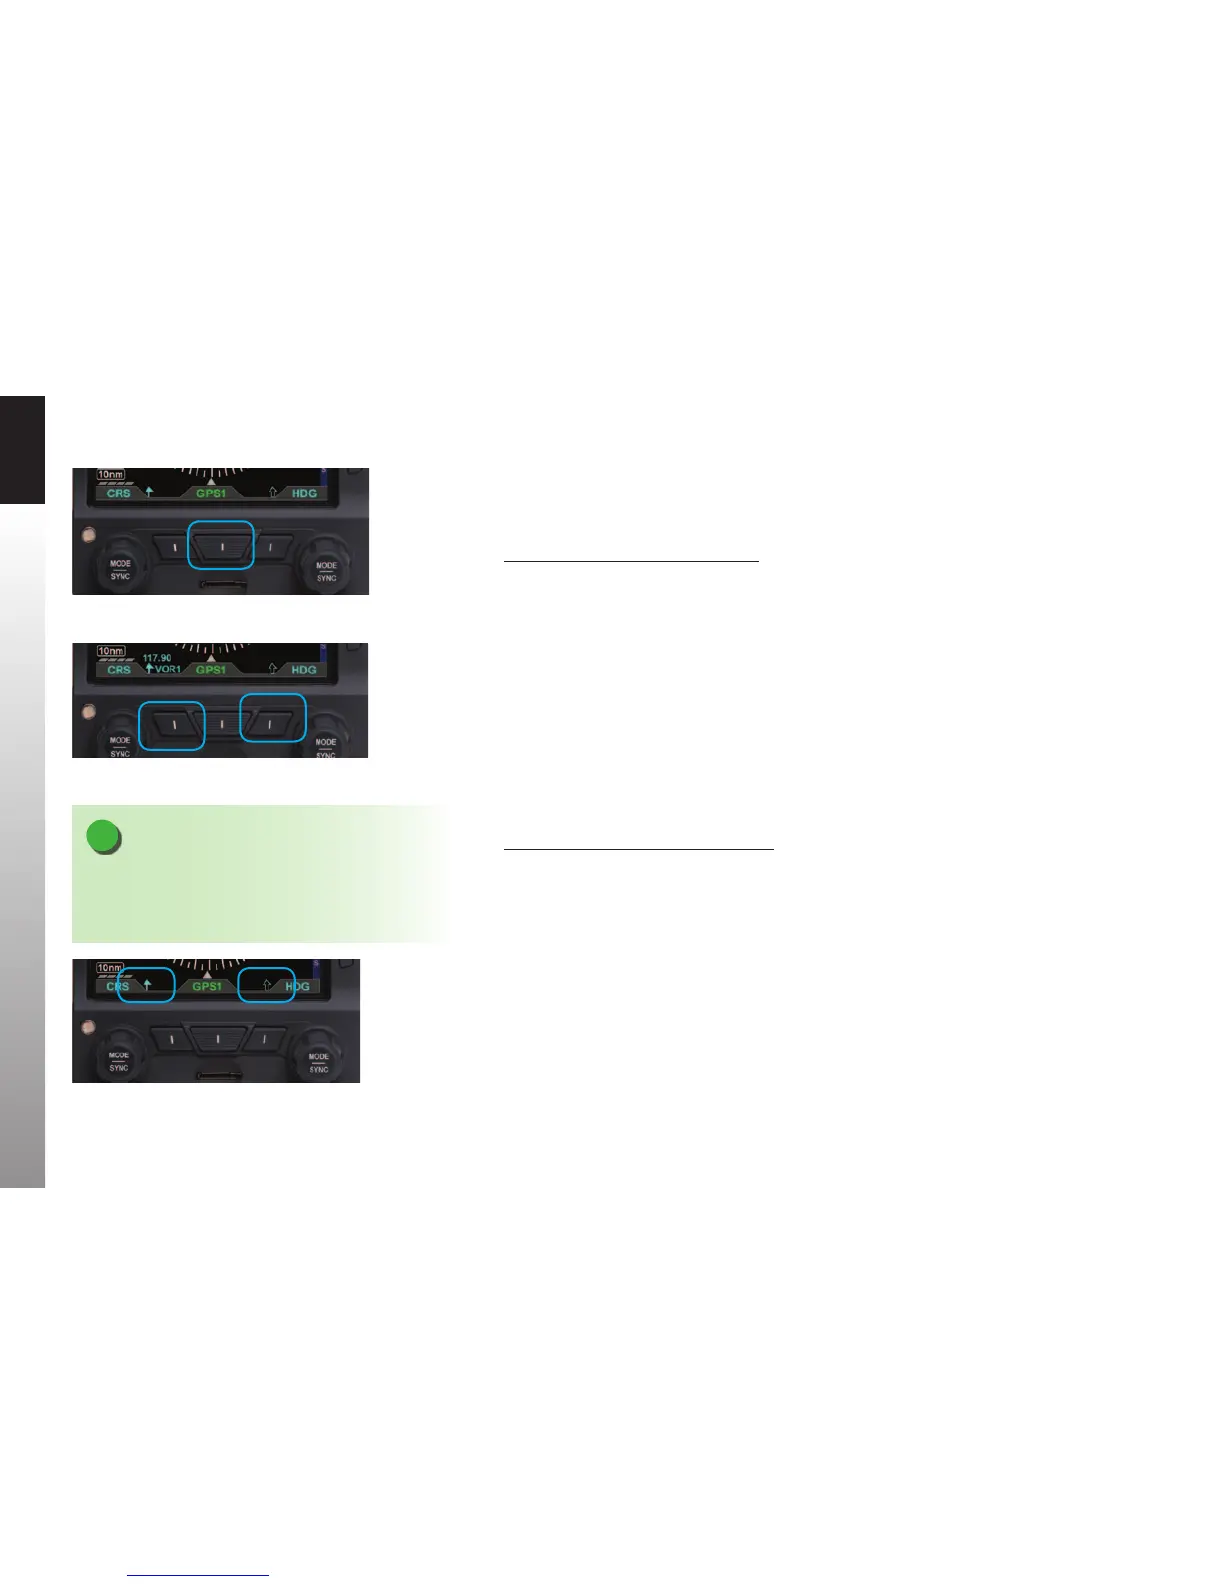
Select GPS1 as the CDI Navigation Source. Because we have enabled Auto Course
Select, the Course Pointer automatically slews to 261º (the initial course from the airport
to the rst x on the LARGO2 departure, ABQ VOR).
Select the CDI Navigation Source
• Press the CDI Navigation Source Select Button (Figure 3-10) until the desired
navigation source is shown above the Button (in this case, GPS1).
For a traditional RMI view, we could use our two Bearing Pointers to monitor our
passing the ABQ VOR and then intercepting the course to ZUN. We’d use the left,
Single-Line Bearing Pointer Source Select Button to select VOR1 (ABQ), and use the right
Double-Line Bearing Pointer Source Select Button to select VOR2 (ZUN). Since the ZUN
VOR is too far away to receive on the ground at Albuquerque, VLOC2 will be shown with
a red line through it above the Double Bearing Pointer Source Select Button, and the
Double-Line Bearing Pointer will not be displayed. But we know that the station will
be received, and the pointer will be shown, by the time we climb to our initial cruise
altitude.
Select Bearing Pointer Nav Sources
• Press the Lower Left Button (Single-Line Bearing Pointer) or the Lower Right
Button (Double-Line Bearing Pointer) until the desired navigation source is
shown above the Button (Figure 3-11).
For even better situational awareness, we choose to display the map of our ight plan
legs and waypoints. We press the MAP Hot Key to bring up the Basemap. We use the
Range Control Buttons to select the 20nm range, which will give a good perspective for
intercepting the course to ZUN. Our initial ight plan leg, from the airport to the ABQ
VOR, is shown in magenta, with subsequent legs and waypoints shown in white.
Figure 3-10
CDI Navigation Source Selection Button
Figure 3-11
Bearing Pointer Nav Source Select Buttons
Figure 3-12
No Bearing Pointer Sources Selected
NOTE
When no source is selected, only the Bearing
Pointer icon is shown above the applicable Button
(Figure3-12).