Wall mounting Avaya J100 Series IP Phones
About this task
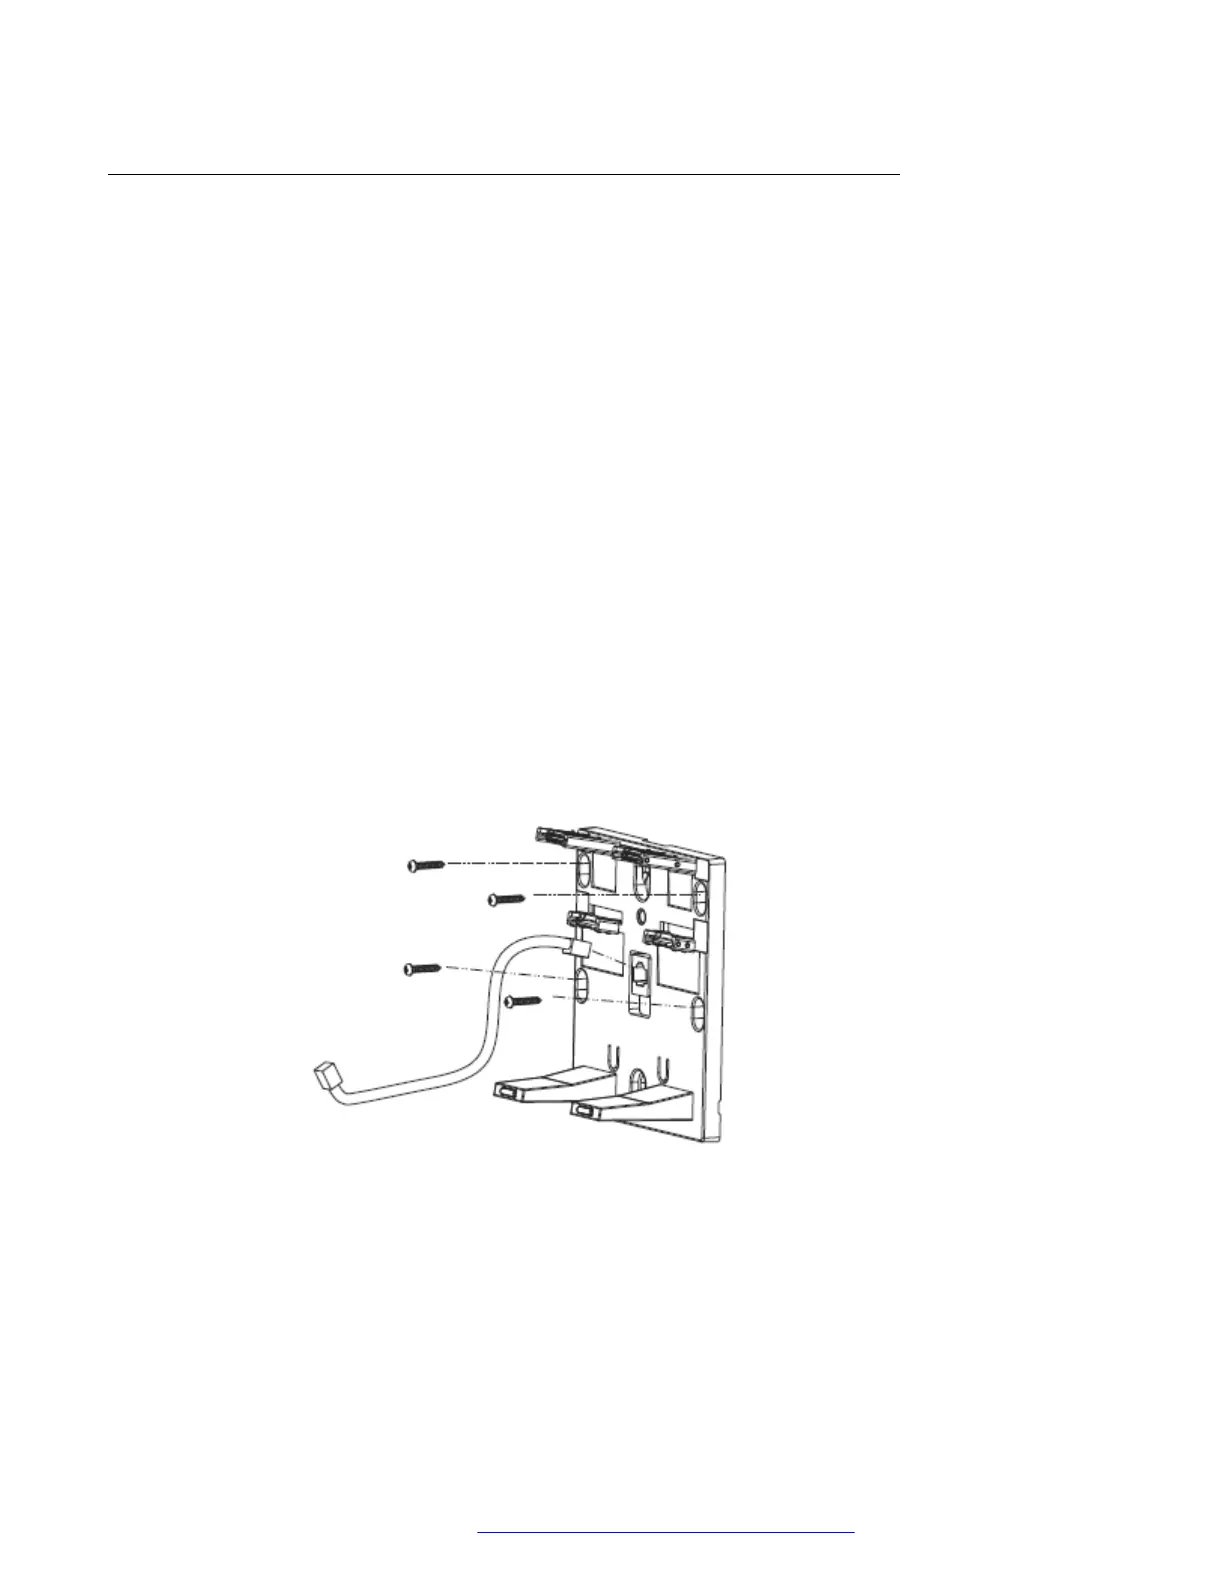
The wall mounting procedure for all Avaya J100 Series IP Phones is similar. Wall mounting
brackets look different for Avaya J169/J179 IP Phone and Avaya J129 IP Phone.
You can order the kit separately, using the part numbers that correspond to the phone model. For
example, the part number of the wall mount bracket is 700512707. The procedure describes the
wall mounting procedure with illustrations as reference.
The following procedure describes Avaya J100 Series IP Phones wall mounting with typical
illustrations provided as reference.
Before you begin
Obtain the following items:
• Wall mounting kit that contains a wall mount bracket, and an Ethernet cable.
• Four #8 screws. The screws are not provided with the wall mounting kit.
Procedure
1. Do one of the following:
• Place the bracket on the wall, drill holes, and then affix the #8 screws.
• If there is a pre-installed wall plate, place the wall mount bracket over the wall plate. In
this case, you do not need the screws.
Phone installation
December 2018 Installing and Administering Avaya J100 Series IP Phones 28
Comments on this document? infodev@avaya.com
 Loading...


