Chapter 5: Running Samples Manually 97
4 Remove the FITC tube and place the PE control tube on the SIP; click Pause
and then Restart.
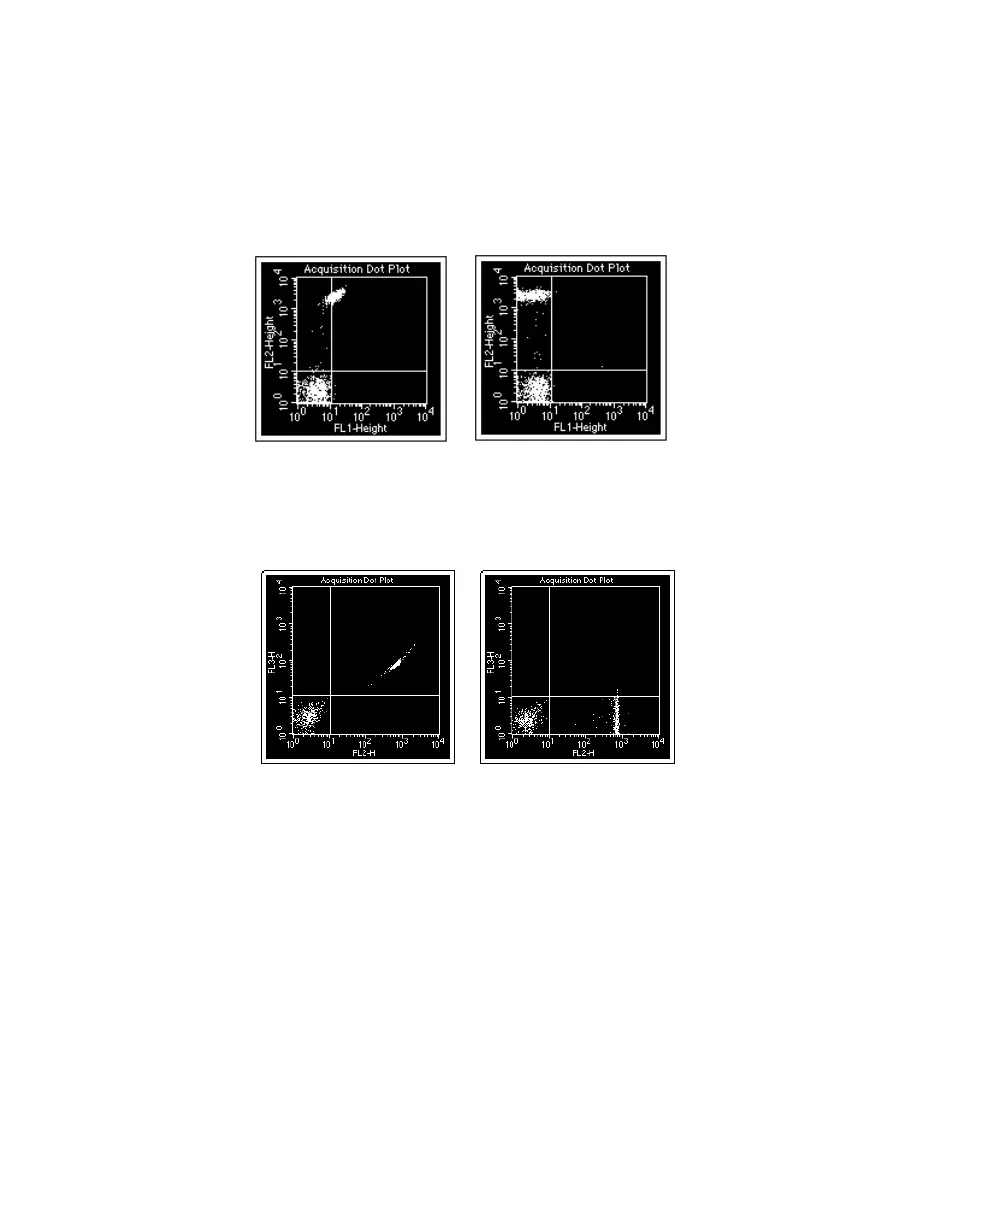
5 If necessary, adjust FL1–%FL2 to place PE-positive events in the upper-left
quadrant of the FL1 vs FL2 plot.
6 If necessary, adjust FL3–%FL2 to place PE-positive events in the lower-
right quadrant of the FL2 vs FL3 plot.
7 Remove the PE tube and place the PerCP control tube on the SIP; click
Pause and then Restart.
8 If necessary, adjust FL2–%FL3 to place PerCP-positive events in the upper-
left quadrant of the FL2 vs FL3 plot.
It should be 0.0% because PerCP usually does not emit within a range that
overlaps into the FL2 detector.
9 If necessary, adjust FL4–%FL3 to place PerCP-positive events in the lower-
right quadrant of the FL3 vs FL4 plot.
unadjusted adjusted
unadjusted adjusted