2-274
Cisco ONS 15454 Troubleshooting Guide, R8.5
November 2009
Chapter 2 Alarm Troubleshooting
2.9.4 Physical Card Reseating, Resetting, and Replacement
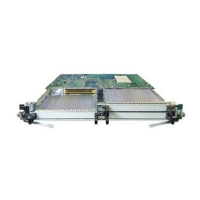
Step 4 Slide the replacement card into the slot along the guide rails.
Step 5 Close the ejectors.
Physically Replace an In-Service Cross-Connect Card
Caution The cross-connect reseat could be service-affecting. Refer to the “2.9.2 Protection Switching, Lock
Initiation, and Clearing” section on page 2-262 for traffic-switching procedures prior to completing this
procedure.
Note This procedure is placed in the chapter as a quick guide for the user’s convenience. A more detailed
procedure is located in the “Maintain the Node” chapter of the Cisco ONS 15454 Procedure Guide.
When you replace a card with the identical type of card, you do not need to make any changes to the
database.
Step 1 Determine the active cross-connect card (XCVT/XC10G/XC-VXC-10G). The ACT/SBY LED of the
active card is green. The ACT/SBY LED of the standby card is amber.
Note You can also place the cursor over the card graphic to display a popup identifying the card as
active or standby.
Step 2 Switch the active cross-connect card to standby:
a. In the node view, click the Maintenance > Cross-Connect tabs.
b. Under Cross Connect Cards, choose Switch.
c. Click Yes in the Confirm Switch dialog box.
Note After the active cross-connect card becomes standby, the original standby slot becomes active.
This causes the ACT/SBY LED to become green on the former standby card.
Step 3 Physically remove the new standby cross-connect card from the ONS 15454.
Note An improper removal (IMPROPRMVL) alarm is raised when a card reseat is performed, unless
the card is first deleted in Cisco Transport Controller (CTC). The alarm clears after the card is
replaced.
Step 4 Insert the replacement cross-connect card into the empty slot.
The replacement card boots up and becomes ready for service after approximately one minute.
 Loading...


