Operator’s Manual: Standard 360a Model Y (360y) Label Applicator
2
LABEL SETUP
After the applicator is mounted and in the correct
orientation, it can be set up. Labels need to be put on
and threaded through the applicator, sensors need to be
setup, and the applicator needs to be tested to ensure it
is correctly dispensing labels.
Threading Labels
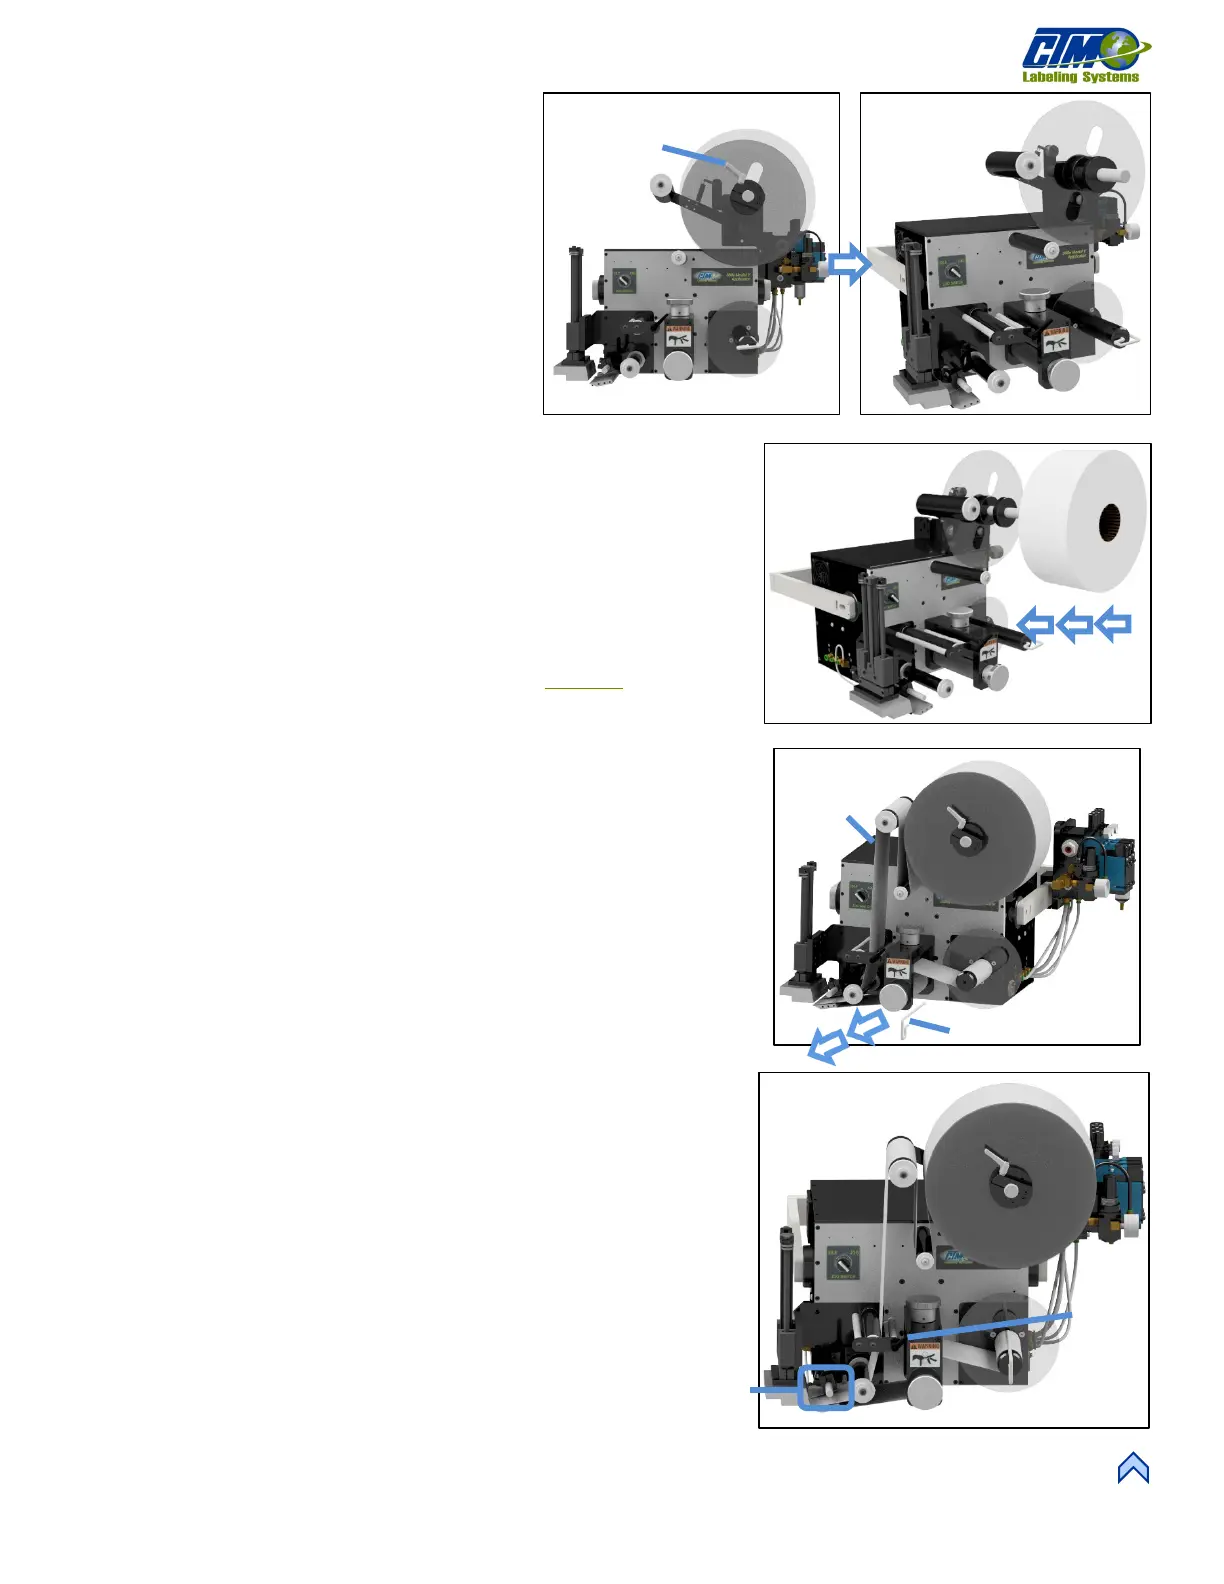
1. Turn the handle on the outer unwind disk [1A]
and remove it [1B].
2. Ensure the inner unwind disk is at least 1¼ in.
away from the applicator faceplate.
3. Slide a roll of labels over the unwind hubs and push against the inside disk
[2].
4. Ensure the labels are face up as they come off the unwind. A core support
can be used for wider rolls of labels. Replace the outer disk and lock it into
place.
5. Remove the rewind pin [3A] and remove approximately 3 feet of labels
[3B] from the liner on the leading part of the label roll.
6. Thread labels through the applicator by following the proper web path
diagram. Web path diagrams can be found on our website
.
a. When going through the nip and drive rollers turn the knob on
top of the nip assembly counterclockwise (CCW) to “open” the
two rollers.
b. If the applicator is an air blow or tamp ensure the web goes
between the peel edge and air assist tube.
7. Lay the label liner over the pin slot and replace the pin so it is holding label
liner against rewind mandrel.
8. Align guide collars (if any) with the unwind assembly.
NOTE: Guide collars are commonly
used for smaller width labels to keep the web liner in line with the roll of
labels on the unwind.
9. Turn the nip roller assembly clockwise (CW) to “Close” it so it is touching
the drive roller.
10. Ensure the label tension brush is holding pressure against the web liner.
Turn the lever on the tension brush assembly to adjust if needed [4A].
11. Ensure the spring block assembly is in the center of the label and is
applying slight pressure to the top of the labels [4B].
12. Run multiple labels so that any tracking issues are corrected.
A
B
[1] Removing Outer Unwind Disk
[3] Rewind Pin and Labels
A
[4] Tenshion Brush Lever and Spring Block Assembly