Operator’s Manual: Standard 360a Model Y (360y) Label Applicator
33
Corner Wrap Setup
A Corner Wrap setup has a Swing Tamp nose with a valve bank that can control low pressure. This means that the Swing Tamp arm
swings out to meet the product and then low pressure allows the product to push the swing arm out of the way as the label is applied.
Below is the proper sequence.
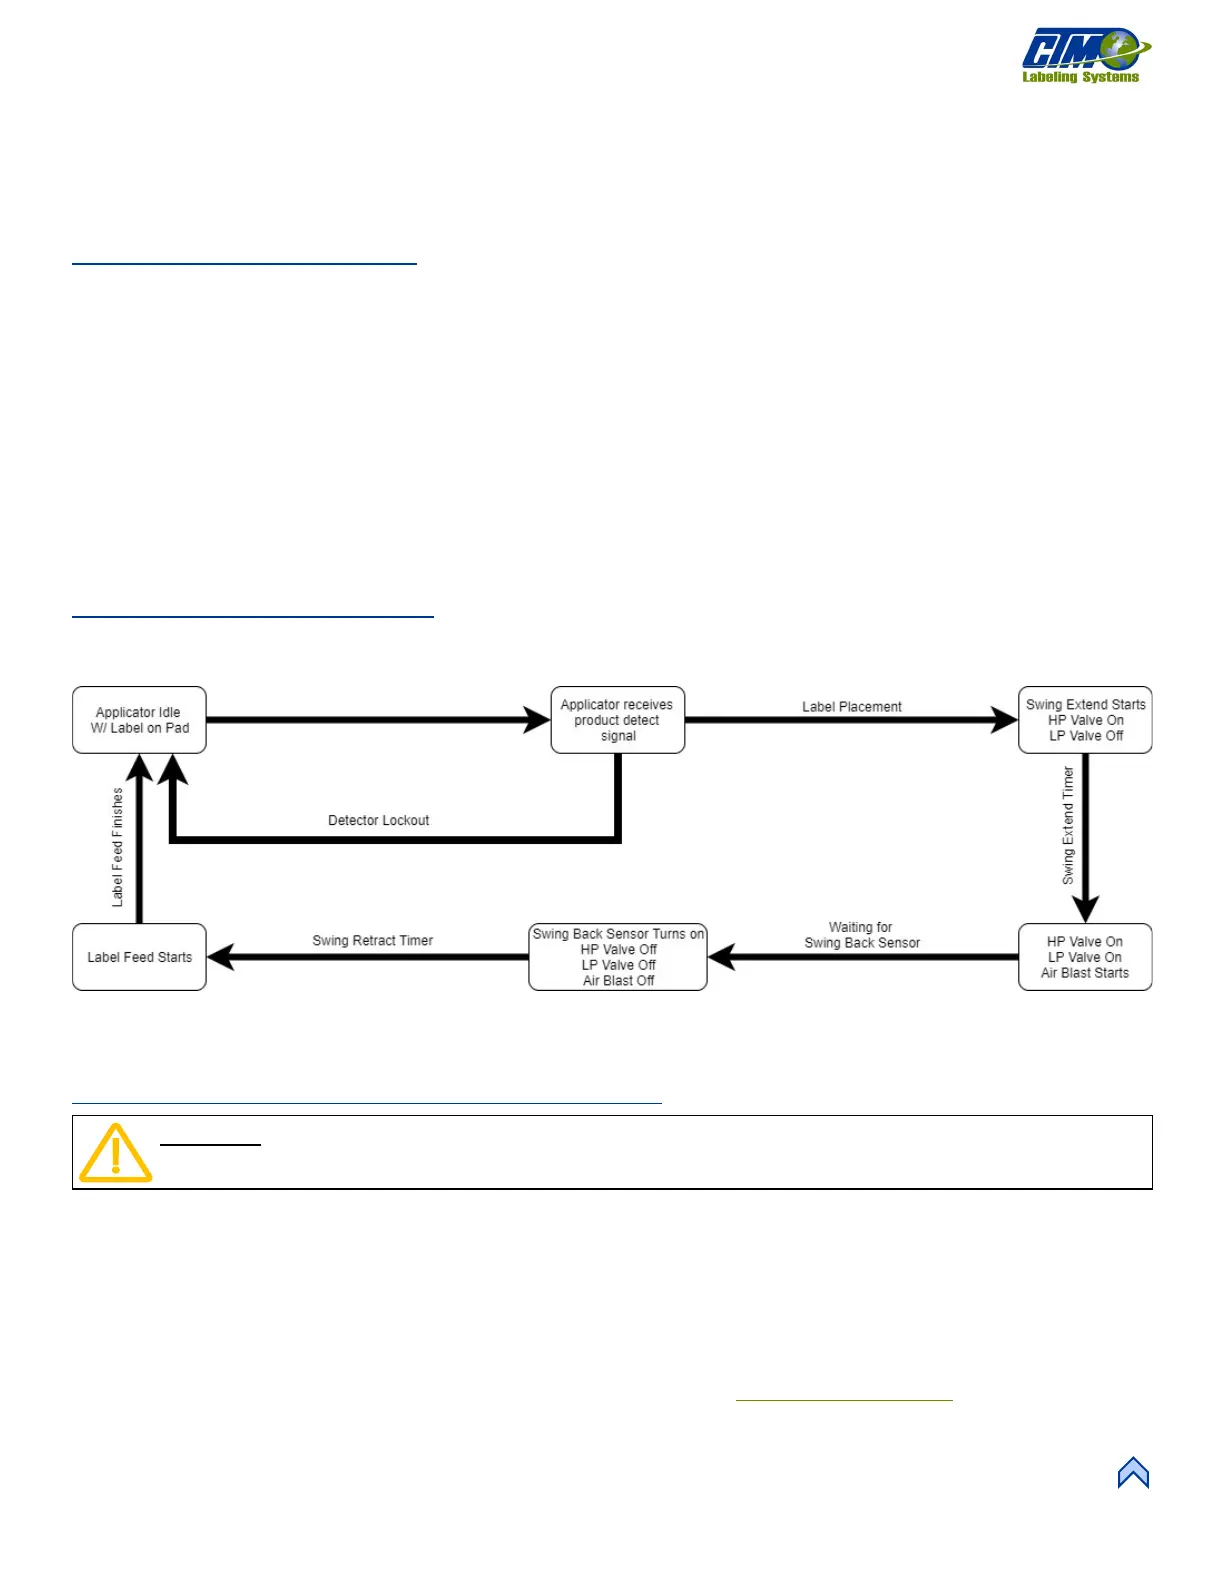
Corner Wrap Sequence
1. Applicator is online, and a label is on the pad.
2. Applicator receives a produce detect signal and waits the label placement distance or time.
3. Tamp arm swings out in front of the product using the high-power (HP) swing valve.
4. At the end of the swing extend time, the air blast and low-power (LP) swing valves turn on to apply a label to the leading
panel of the product.
5. The product contacts the label pad at roughly the same time that the LP swing valve turns on.
6. The swing arm remains extended at low pressure as the product pushes it out of its path.
7. When the product passes in front of the swing back sensor, the HP swing, low-power swing, and blow valves turn off and the
swing retract time is started.
8. When the swing retract time is complete, the next label is dispensed.
Corner Wrap Flow Chart
Figure [85] depicts the cycle of a corner wrap. Any step that has multiple arrows into it means the timer / distances run concurrently
and must all be complete before continuing.
NOTE: If swing home and retract sensors are installed, they will override the swing home and retract timers.
Corner Wrap General Setup Procedures
1. Set the Label Stop value to position the label at or slightly back from the peel edge to ensure the applicator works properly.
Adjust by starting at the Main Menu and tapping Setup Menu > Label Setup Menu and tap on the current Label Stop
Value to change.
2. Adjust the shock stops and actuator hard stops on the tamp arm, so the label feeds out in contact with the label pad.
a. If the pad is too high, the label will not land consistently on the pad.
b. If the label pad is too low, the label will dispense into the back of the pad and jam.
Most of this adjustment is done with the peel edge and is discussed in the Tamp Applicator Setup
section of the manual.
CAUTION: To avoid injury, ensure the applicator is OFFLINE for the following adjustments.
[84] Corner Wrap Flow Chart
 Loading...