Maintenance Manual: Standard 360a Model Y (360y) Label Applicator
10
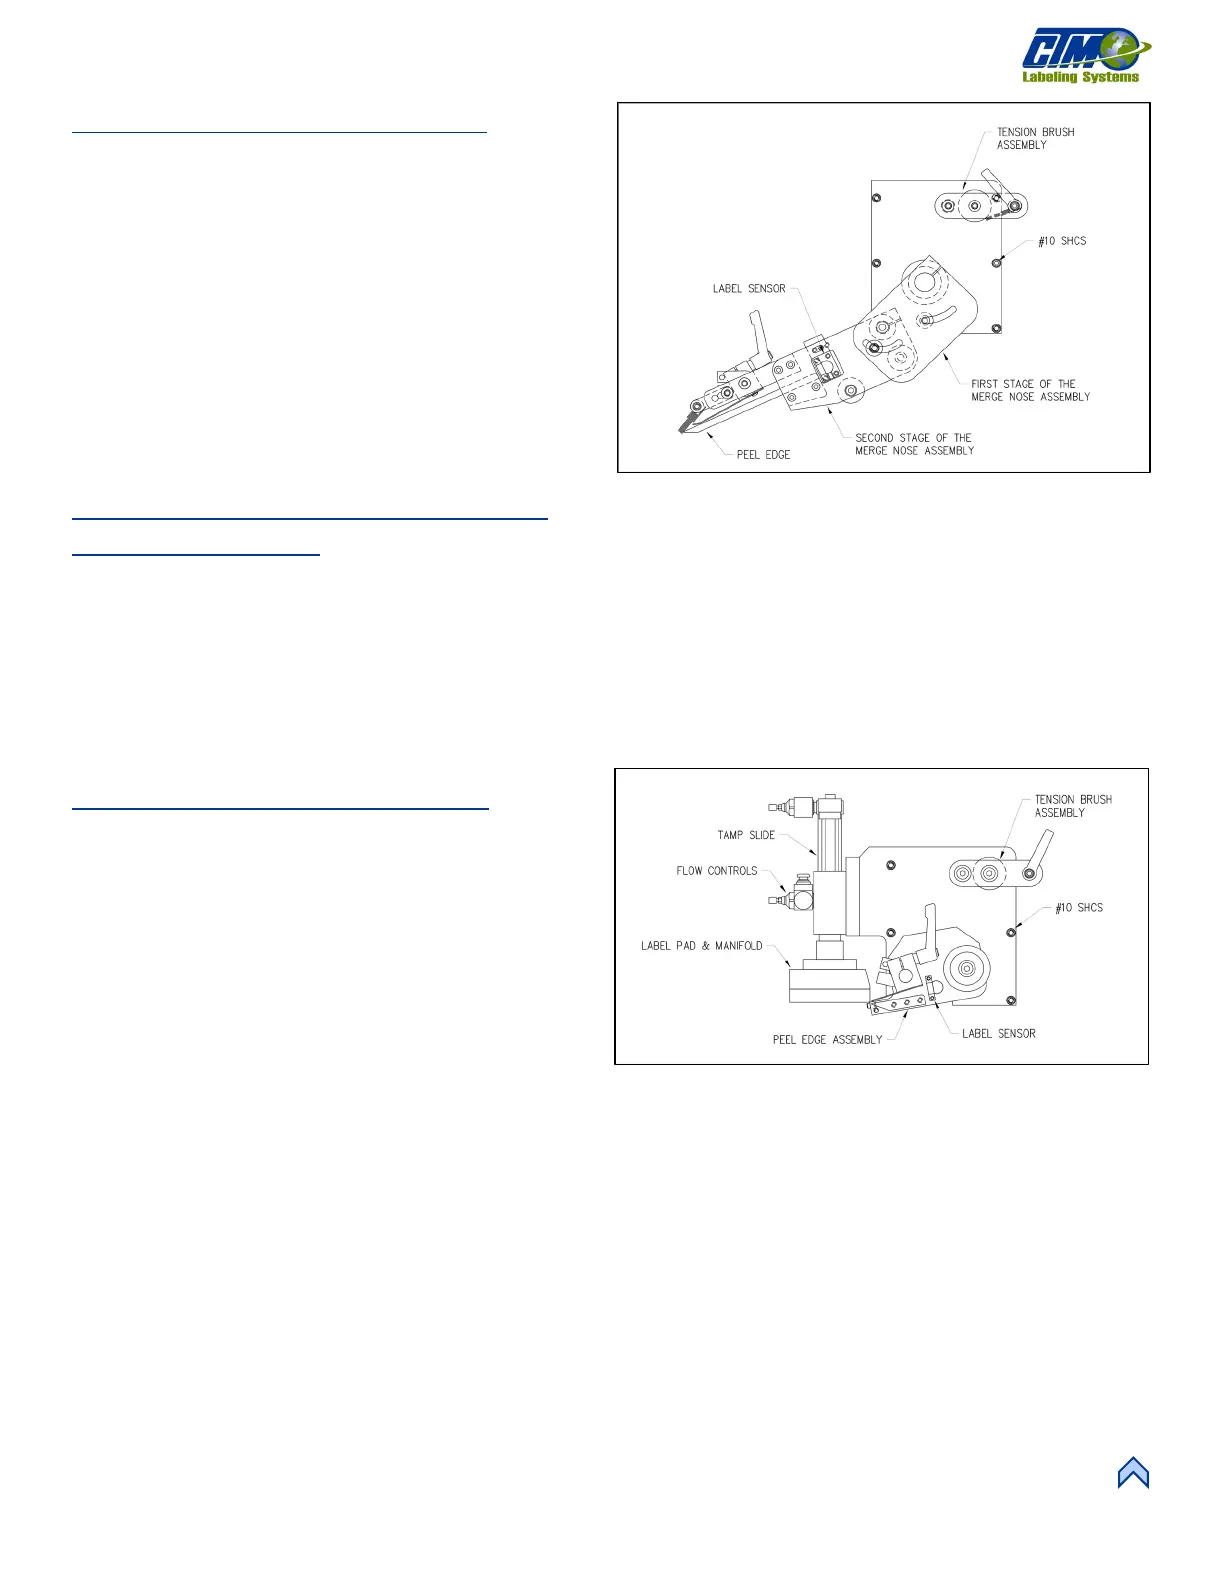
Merge Nose Assembly Removal
1. Take off the back stainless cover of the applicator.
2. Disconnect the fiber optic cables from the label sensor
mounted on top of the power supply.
3. Open the top cover on the sensor and slide the cinching
mechanism located on the right side of the sensor
housing upward. Gently remove the two fiber cables
from the sensor.
4. Cut the zip ties securing the bolt-on zip tie mounts and
gently pull the fiber optic cable out of the wiring clamps
and through the holes in the fiber optic mounting plate.
5. Loosen the screws to move the nose out of the way to
get to all the #10 screws to remove the whole nose
assembly.
Tamp Nose Assembly and RVB Nose
Assembly Removal
1. Take off the back stainless cover of the applicator.
2. Open the top cover on the sensor and slide the cinching mechanism located on the right side of the sensor housing upward.
Gently remove the two fiber cables from the sensor.
3. Cut the zip ties securing the bolt-on zip tie mounts and gently pull the fiber optic cable out of the wiring clamps and through
the holes in the fiber optic mounting plate.
4. Loosen the screws on the peel edge assembly to get to the #10 screws securing the Tamp Nose assembly.
5. Remove the #10 screws to remove the Tamp assembly.
Nose Assembly Changeover
When changing the nose assembly to the opposite hand
dispense, all parts are first transferred to the opposite side of the
mounting plate. Then the entire nose assembly is rotated 180°
and remounted to the opposite side of the applicator.
1. Remove the peel edge assembly from the nose
assembly mounting plate.
a. On a merge applicator, note the position of the
bronze washers between the mounting plate
and the peel edge assembly.
2. Change the applicator peel edge assembly to the
opposite hand dispense (See Blow/Tamp Peel Edge
Changeover below.)
3. Re-mount the peel edge assembly to the opposite side of the nose assembly mounting plate.
a. On a merge applicator, re-install the bronze washers between the peel edge assembly and the mounting plate.
4. If the applicator is an air blow, change the blow box grid/fan to the opposite hand dispense (See Blow Box Assembly
Changeover below.)
5. If the applicator is a tamp, change the tamp assembly to the opposite hand dispense (See Tamp Assembly Changeover
below.)
6. Remove the tension brush assembly and reassemble on the opposite side of the nose mounting plate.