Maintenance Manual: Standard 360a Model Y (360y) Label Applicator
12
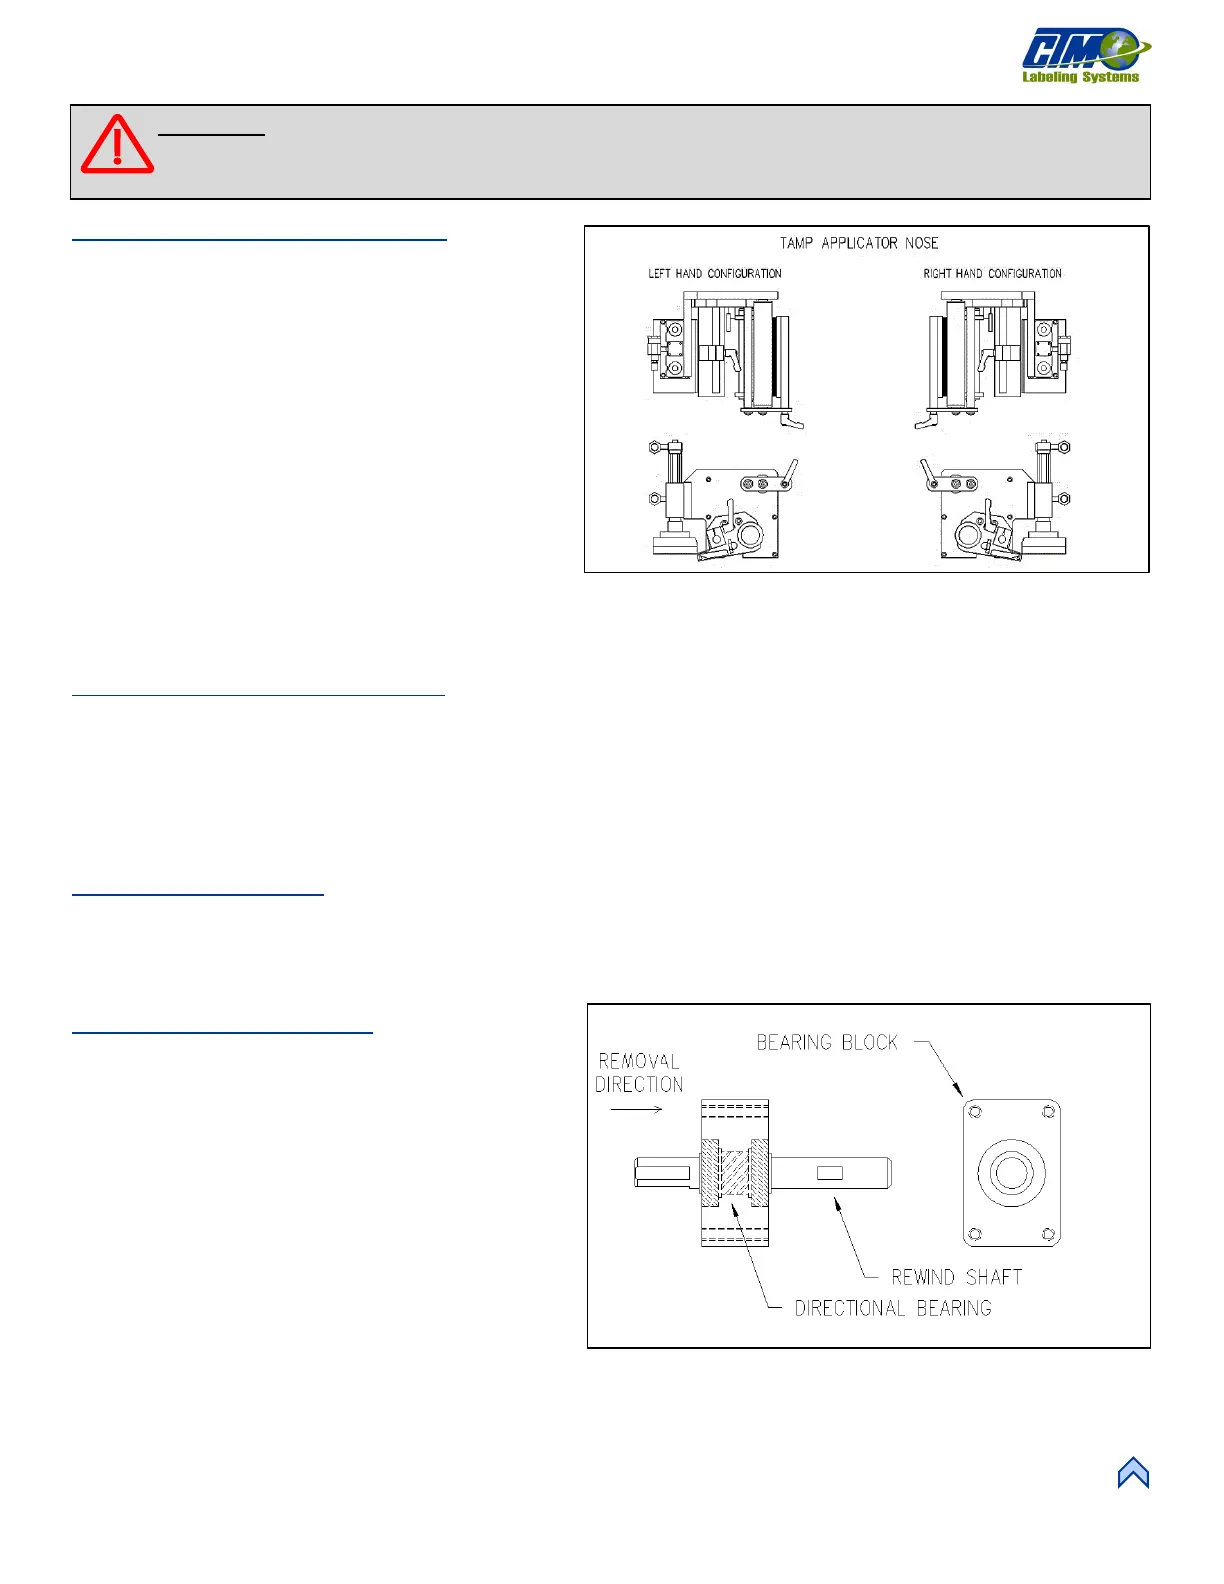
Tamp Peel Edge Changeover
1. Remove the label sensor from the peel edge
assembly and remount on the opposite side.
2. Make sure that the fiber cables are threaded through
the holes from the opposite side. The open end of
the U-shaped sensor should face towards the inside.
3. Remove the guide rollers and remount to the
opposite side of the peel edge mounting plate.
4. Remove the peel edge and remount to the opposite
side of the mounting plate using the tapped holes on
the other end of the peel edge. Ensure the beveled
edge is down and facing the same direction as it was
originally.
5. Remove the label tension spring mounting bar and
remount on the opposite side. The tension spring
and the adjustment stop must be reversed on the mounting bar as well.
6. Remove the air assist tube and insert through the opposite side of the mounting plate and re-attach.
Tamp Assembly Changeover
1. Disconnect the air hoses for the tamp assembly at the applicator housing.
2. Remove the tamp assembly mounting plate from the nose assembly mounting plate.
3. Remove the two screws holding the tamp air cylinder to its mounting plate.
4. Mount the tamp air cylinder to the opposite side of the tamp assembly mounting plate.
5. Re-attach the tamp assembly mounting plate to the opposite side of the nose assembly mounting plate.
Rewind Removal
1. Remove the belt connecting the rewind clutch to the motor.
2. Remove the rewind mandrel from its drive shaft.
3. Remove the six #10 screws that hold the rewind mounting plate to the housing.
Rewind Changeover
1. Remove the bearing block that is mounted to the
rewind transition plate.
2. Remove the pulley from the shaft and note its
position relative to the end of the shaft.
3. Remove the snap ring from the pulley side of the
assembly and push the rewind shaft out through the
mandrel side.
NOTE: The shaft diameter on the mandrel side is
larger than it is on the pulley side. Do not
attempt to force the shaft out through the
pulley side!
4. Re-install the shaft on the opposite side of the
bearing block and replace the snap ring.
NOTE: The shaft can only rotate in one direction due to a directional bearing in the bearing block.
5. Install the pulley on the shaft in the same position as it was previously.
6. Re-mount bearing block to the opposite side of the transition plate.
[24] Tamp Nose and Peel Edge
[25] Rewind Shaft and Bering Block
WARNING: Disconnect air and power to the applicator BEFORE performing the following procedures. Injury
from moving parts and/or electrical shock may occur.