User Interface
146
DX8210 Barcode Scanner
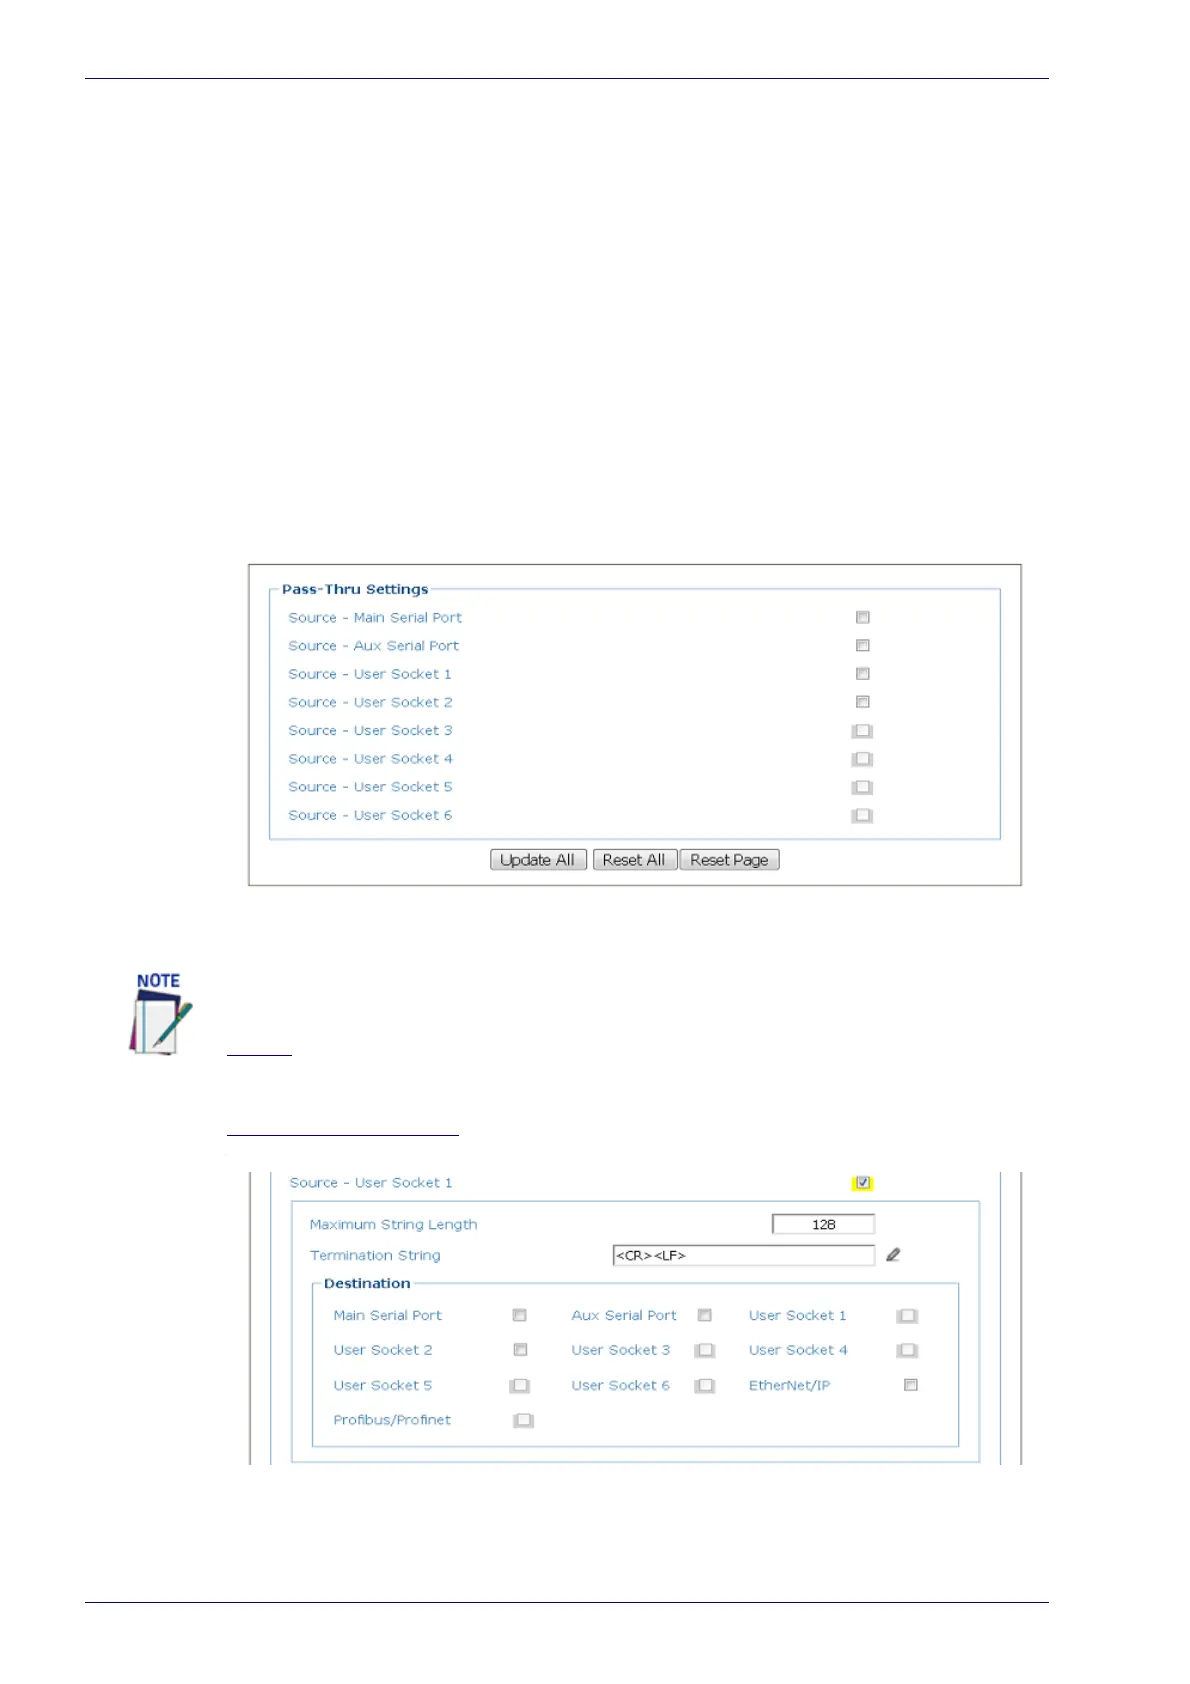
Messaging | Pass-Thru
Use the Pass-Thru window to pass a message received on ANY port (serial or
user socket connection) to any other port(s).
Applications can also be implemented to connect
a device such as a hand-held
reader to any serial or network port for additional manual code reading capabil-
ity.
When using Pass-Thru mode, follow these programming notes:
• When using serial ports - Program receiving port same way regarding baud
rate, data bits
, stop bits and parity to the device sending the data.
• The Termination string must be configured in the same way
as the message
terminator on the device sending the data. The terminator will be forwarded
with the message.
To edit the Pass-Thru settings:
1. In the menu under Modify Settings, navigate
to Global Settings | Messaging
| Pass-Thru. The Pass-Thru window opens.
2. Enter the appropriate information in the form as described below:
Source
Select the check box(es) following the Main Serial Port, Aux Serial Port, or
numbered User Socket you wish to modify.
Maximum String Length
Enter the maximum length of the expected string to be received. If the string is
longer than the one expected, it will be discarded.
The User Socket must be enabled in Ethernet > User Sockets for it to be available in
this menu.

 Loading...