Note:
The connector kit for the Han® K 4/4 contains a choice of 5 dierent rubber inserts
that are suitable for the cables with various outside diameters. Select the most
suitable rubber insert for the size of cable that is to be used.
3. Pass the cable through the cable gland and hood. Cables must be bare-ended
without ferrules to ensure correct clamping in the connector block.
4. Before starng the assembly, use the hex (allen) key specied in the appropriate
gure to ensure that all the axial cones of the connector insert(s) are screwed fully
downward to completely open the contact chambers.
5.
Carefully remove the cable insulaon to the exact dimension specied in the
appropriate gure. Do not twist the cable strands.
6.
Referring to the appropriate gure to idenfy the connecons, insert each wire
completely into the contact chamber unl the copper strands reach the boom.
Keep the cable in posion while applying the recommended ghtening torque.
7.
Fit the earth (ground) wire to the protecve earth connecon.
Note:
The protecve earth connecon on the Han® 100 A and Han® 200 A connectors is
on the hinged frame. It may be necessary to use one of the cable shoes (supplied)
to t the earth (ground) wire. Choose the most appropriate shoe for the size of
cable that is to be used.
8. Screw the connector insert into the hood (using the hinged frame for the Han®
100 A and Han® 200 A axial screw modules) and then ghten the cable gland.
9. If required, t the coding pins to the connector block as shown in the appropriate
gure.
Note:
Harng (the manufacturer of the connector) states that aer inial assembly, the
recommended ghtening torque must only be reapplied once to avoid the damage
to the individual cable strands.
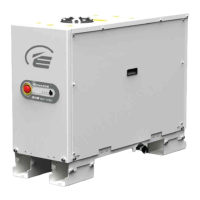
10.
The dry pumping system has an electrical connector locking mechanism - there are
two dierent types ed depending on pump variant.
For the locking mechanism for all GXS160, GXS250 and GXS450 dry pumping systems,
refer to Figure: Electrical connector locking mechanism for the GXS160, GXS250 and
GXS450 systems.
This locking mechanism requires the use of a suitable screwdriver to release. Refer to
Figure: Electrical connector locking mechanism for the GXS160, GXS250 and GXS450
systems. The dry pumping system is supplied with a protecve cover (item 5) ed and
the locking mechanism (item 1) may be applied. The protecve cover is held in a place
by two locking levers. Follow these instrucons to t the electrical supply cable:
▪
Slacken o the locking screw (item 3) by few turns to loosen the locking
mechanism if necessary.
▪
Move the locking mechanism (item 1) to the le as far as possible, then li it so
that it rotates around the pivot screw (item 2) and clears the le hand lever (item
4).
Page 40
M58800880_H - Installaon
 Loading...