EPSON AcuLaser C1100 Revision B
DISASSEMBLY AND ASSEMBLY PH ASSY 335
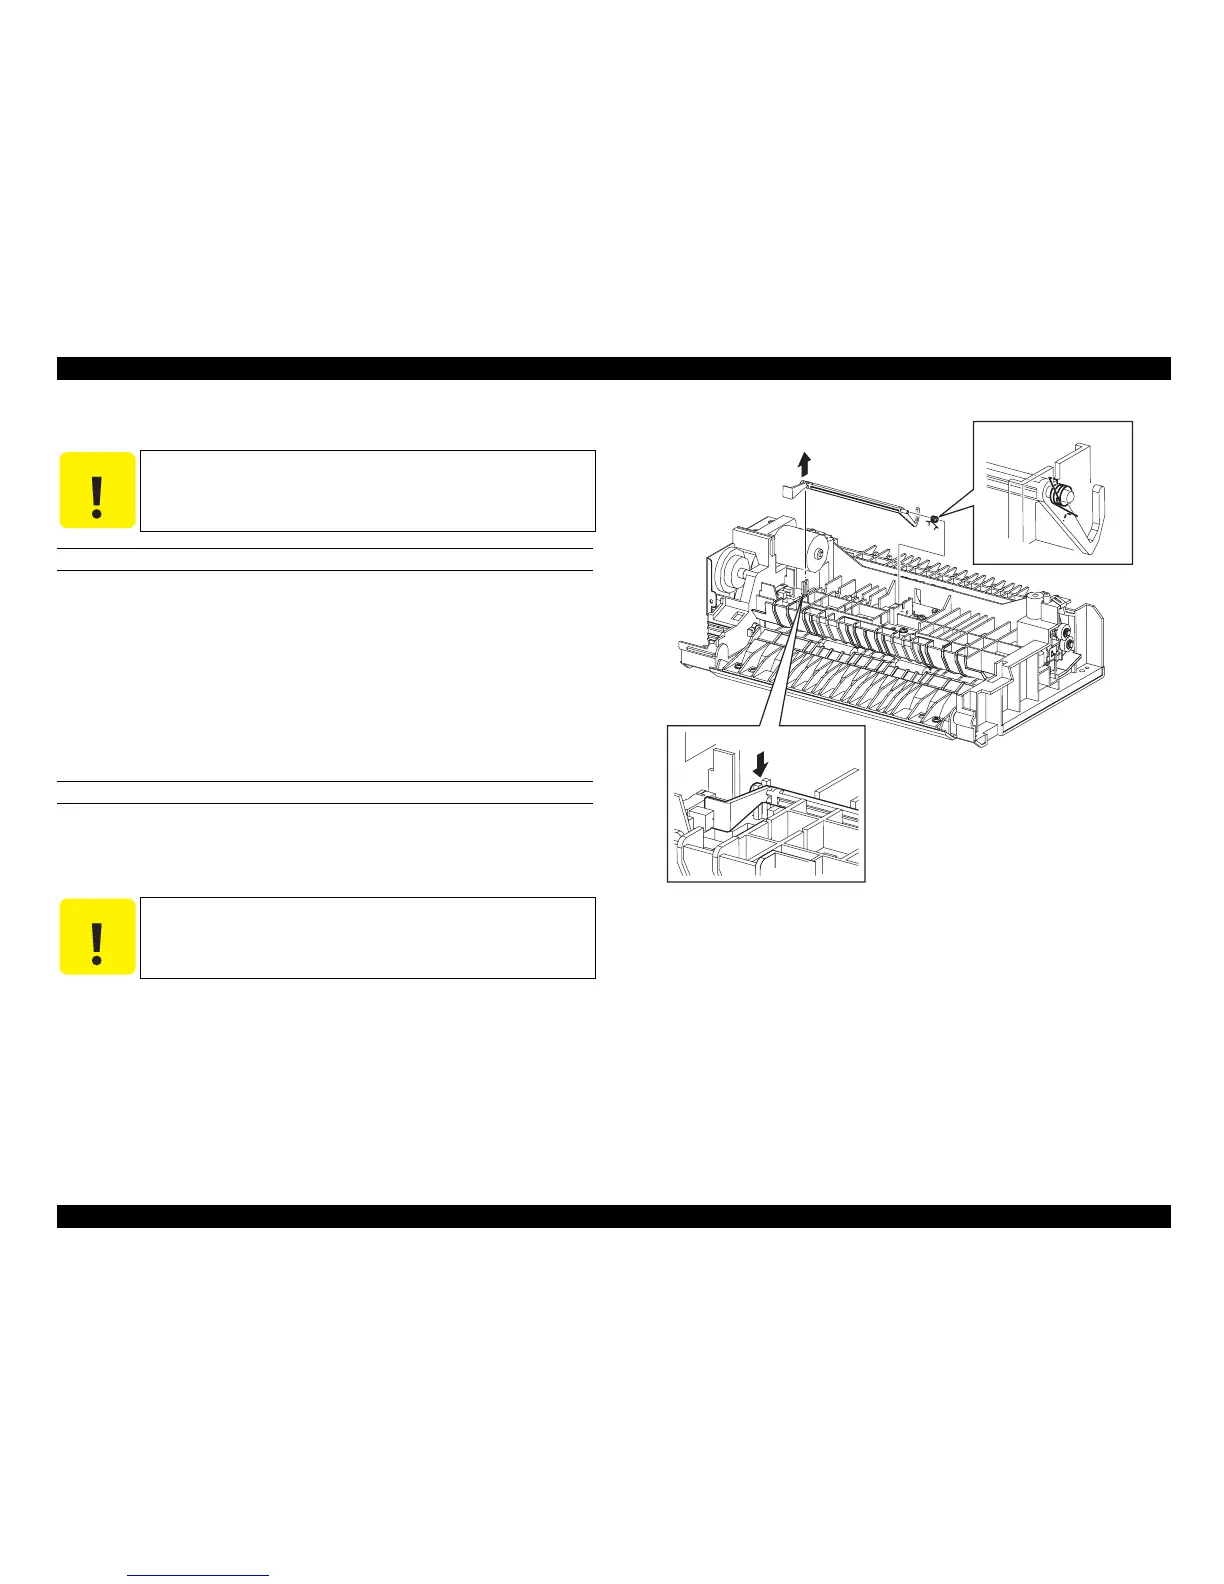
4.4.10 ACTUATOR-REGI
REMOVAL
1. Remove FRAME ASSY-PH. (p.327)
2. Remove the left-side shaft on ACTUATOR-REGI from the hook on FRAME
ASSY-PH.
3. Draw out the right-side shaft on ACTUATOR-REGI from the hole on FRAME
ASSY-PH, and remove ACTUATOR-REGI together with SPRING-ACTUATOR.
4. Remove SPRING-ACTUATOR from ACTUATOR-REGI.
REINSTALLATION
1. Attach SPRING-ACTUATOR to ACTUATOR-REGI.
2. Insert the right-side shaft on ACTUATOR-REGI into the hole on FRAME ASSY-
PH, and hook SPRING-ACTUATOR onto the notch on FRAME ASSY-PH.
3. Fasten the left-side shaft on ACTUATOR-REGI by the hook on FRAME ASSY-
PH.
4. Attach FRAME ASSY-PH. (p.327)
Figure 4-51. Removal of ACTUATOR-REGI
C A U T I O N
Step numbers with [ ] in the figure indicate the step of
reinstallation.
C A U T I O N
SPRING-ACTUATOR must be hooked firmly on ACTUATOR-
REGI and FRAME ASSY-PH.
Leg_Sec03_064FA
CAUTION
2)
3)
4)
[3)]

 Loading...


