EPSON AcuLaser C1100 Revision B
DISASSEMBLY AND ASSEMBLY DEVE 383
4.8.6 HOUSING ASSY-DEVE K, HOUSING ASSY-
DEVE Y, HOUSING ASSY-DEVE M, HOUSING
ASSY-DEVE C
REMOVAL
1. Remove the Toner Cartridge.
2. Remove COVER ASSY RH. (p.301)
3. Remove COVER ASSY TOP. (p.283)
4. Remove 2ND BTR ASSY. (p.348)
5. Remove FRAME ASSY-PH. (p.327)
6. Remove BCR CLN XERO ASSY. (p.373)
7. Remove SENSOR TR-0. (p.361)
8. Remove GUIDE CRU ASSY AD. (p.367)
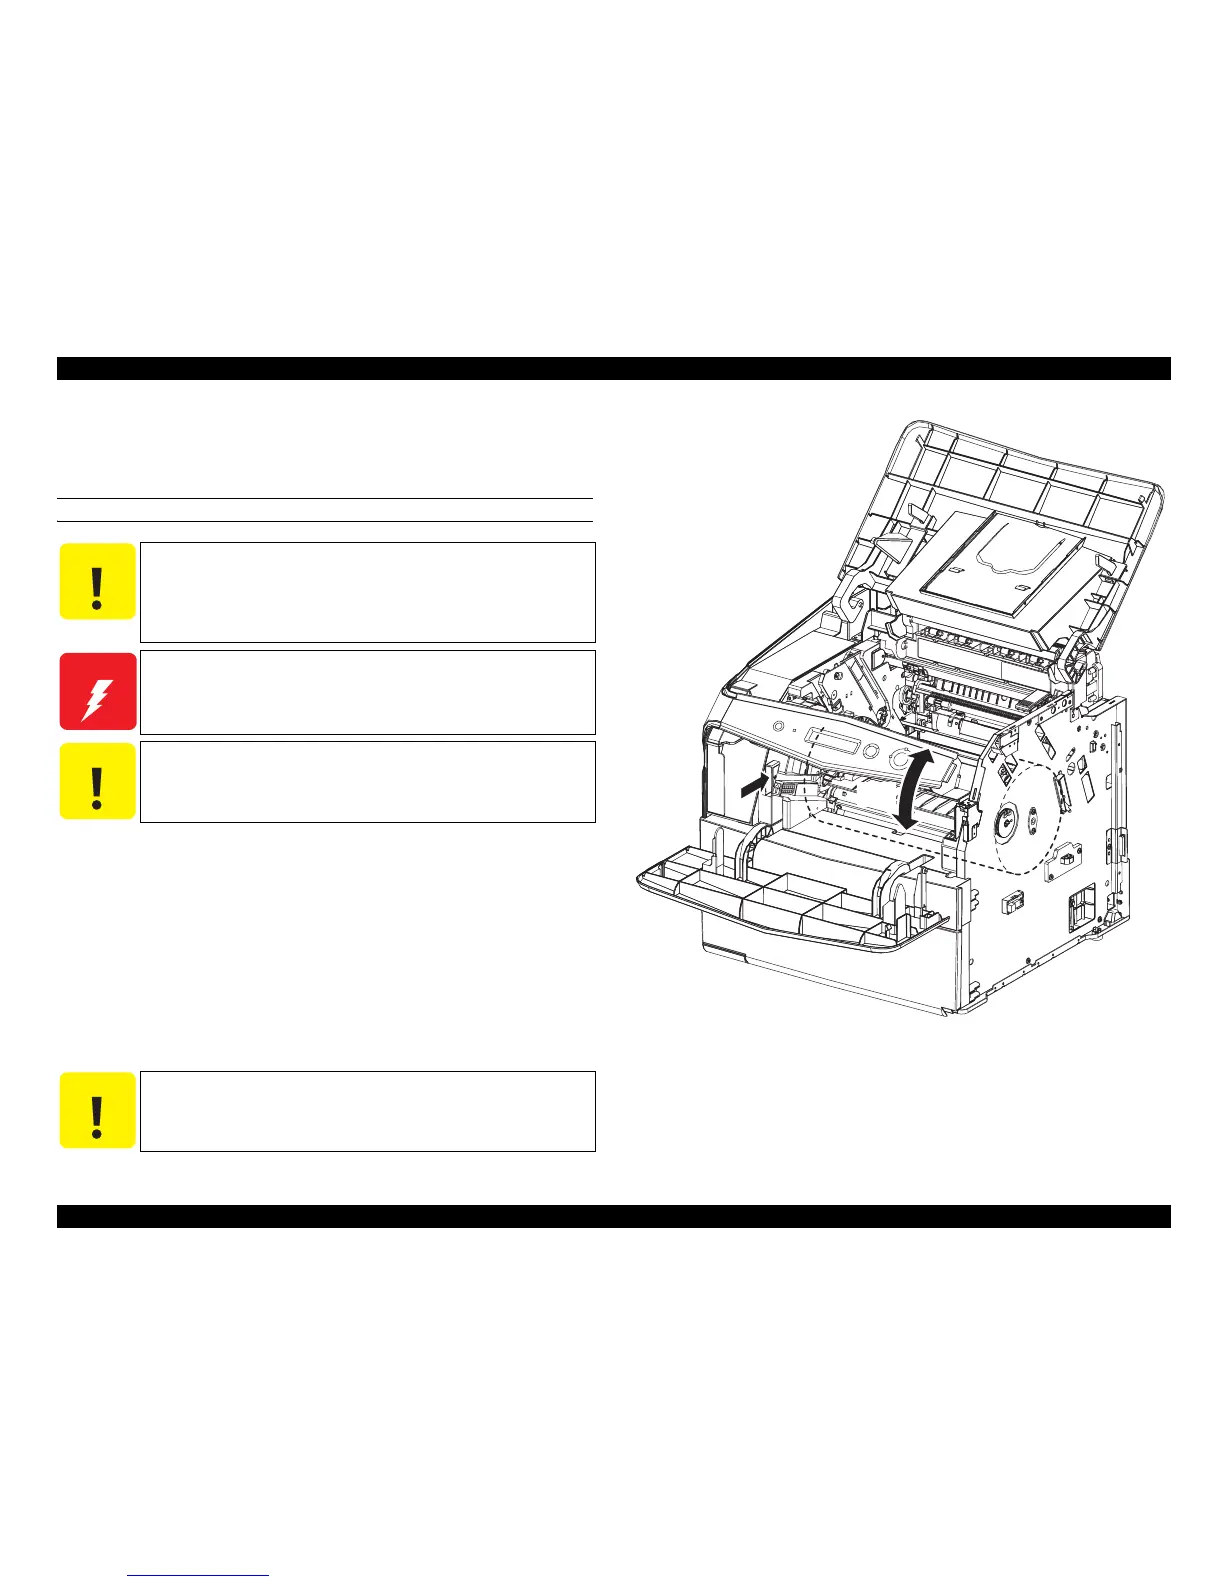
9. Press LATCH ROTARY on LATCH ASSY-ROTARY to release the latch, turn
FRAME ASSY-ROTARY by hand, and move HOUSING ASSY-DEVE to a
position where is easy to work.
Figure 4-93. Removal of HOUSING ASSY-DEVE (1)
C A U T I O N
When removing the Toner Cartridge, put several sheets of
copy paper on COVER FRONT ASSY U and other parts to
prevent them from getting dirty.
Before removing HOUSING ASSY-DEVE, be sure to wipe off
any residual toner on it.
W A R N I N G
Do not vacuum off spilled toner using an usual vacuum cleaner
because there is a possibility of taking fire.
C A U T I O N
When wiping off the residual toner on HOUSING ASSY-DEVE,
take care to prevent any toner from static cling to the sensors on
HOUSING ASSY-DEVE.
C A U T I O N
After moving HOUSING ASSY-DEVE, make sure that FRAME
ASSY-ROTARY is firmly locked by LATCH ROTARY.
Leg_Sec03_094EB
9)-1
9)-2

 Loading...


