EPSON AcuLaser C1100 Revision B
DISASSEMBLY AND ASSEMBLY 500 PAPER CASSETTE & 500 PAPER FEEDER 464
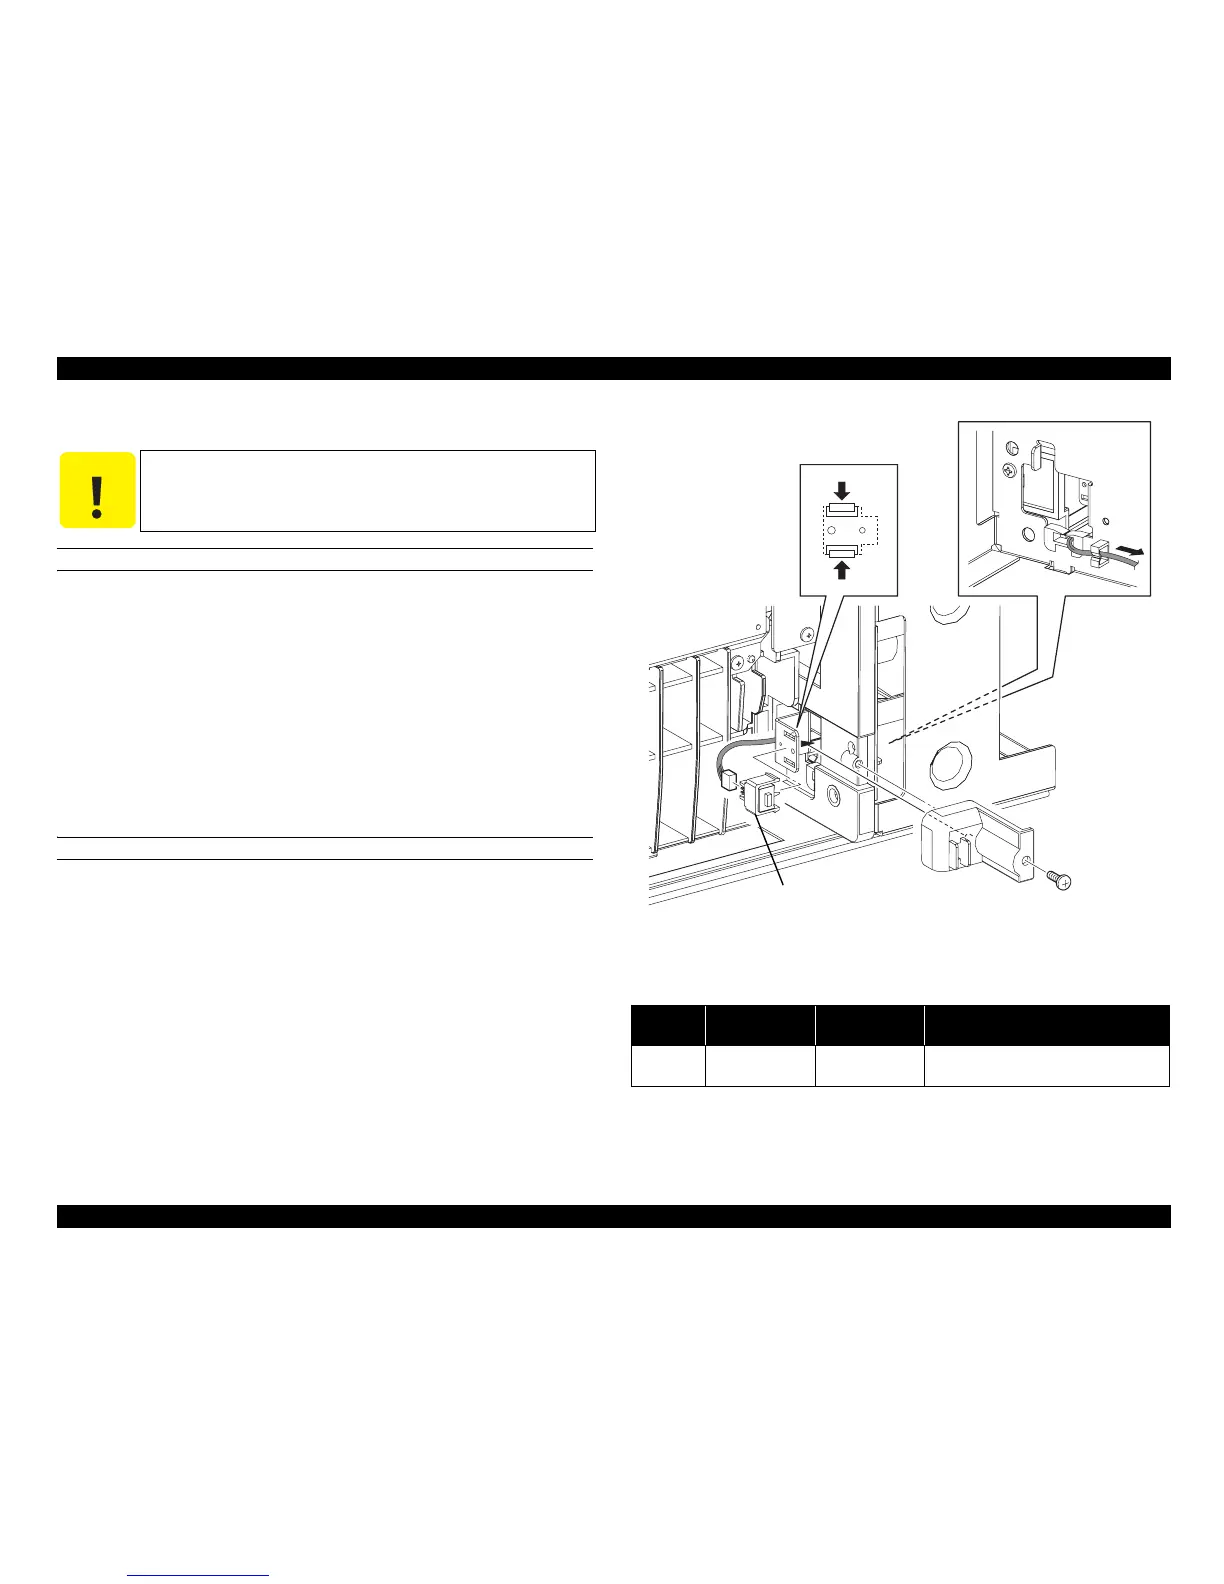
4.13.18 SWITCH FEEDER DOOR
REMOVAL
1. Remove CHUTE FDR ASSY 500. (p.454)
2. Remove COVER LEFT 500. (p.453)
3. Remove the screw (silver, tapping, 8 mm) fastening CAP FEEDER to 500 PAPER
FEEDER ASSY.
4. Remove CAP FEEDER from 500 PAPER FEEDER ASSY.
5. Unhook the 2 hooks fastening SWITCH FEEDER DOOR to 500 PAPER
FEEDER ASSY, and remove SWITCH FEEDER DOOR.
6. Disconnect connector (P/J121) from SWITCH FEEDER DOOR.
REINSTALLATION
1. Connect connector (P/J121) to SWITCH FEEDER DOOR.
2. Match the hook on SWITCH FEEDER DOOR with the attachment position, and
attach to 500 PAPER FEEDER ASSY.
3. Pull the harness of the connector on SWITCH FEEDER DOOR from the outside
of 500 PAPER FEEDER ASSY, and take up any slack from the harness on the
SWITCH FEEDER DOOR side.
4. Match the boss on CAP FEEDER with the hole on 500 PAPER FEEDER ASSY,
and attach CAP FEEDER.
5. Fasten CAP FEEDER to 500 PAPER FEEDER ASSY with the screw (silver,
tapping, 8 mm).
6. Attach COVER LEFT 500. (p.453)
7. Attach CHUTE FDR ASSY 500. (p.454)
Figure 4-164. Removal of SWITCH FEEDER DOOR
C A U T I O N
Step numbers with [ ] in the figure indicate the step during
attachment.
Table 4-17. Symptoms when the connector is loose
Connector
No.
Panel Indication Symptom
Error Caused by Connector
Disconnection
P/J121 G Open
Printing is not
possible.
Paper Feeder Rear Cover is open.
Leg_Sec03_028FA
6)
5)-1
5)-2
4)
3)
[3)]