EPSON AcuLaser C1100 Revision B
DISASSEMBLY AND ASSEMBLY DUPLEX 442
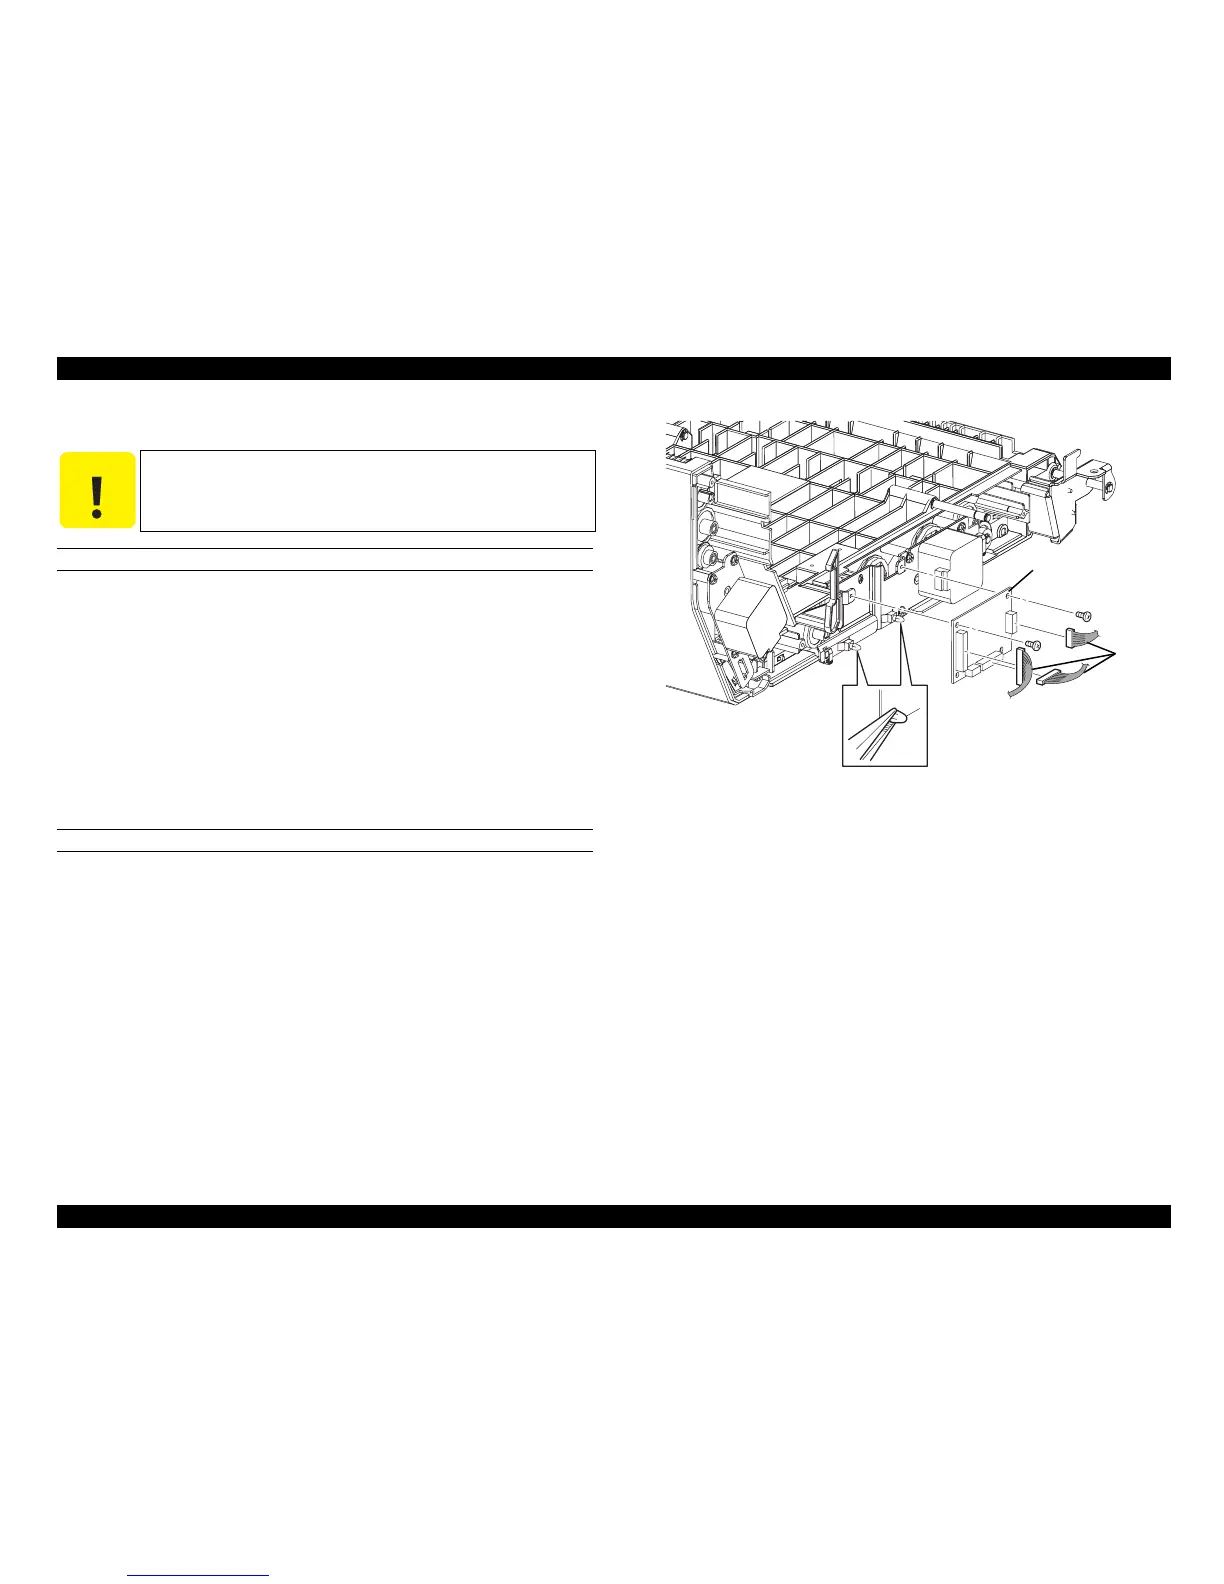
4.12.25 PWBA DUP-L
REMOVAL
1. Remove DUPLEX ASSY. (p.412)
2. Remove COVER-L DUP. (p.414)
3. Disconnect connector (P/J442), connector (P/J443) and connector (P/J444) from
PWBA DUP-L.
4. Remove the 2 screws (silver, tapping, 5mm) fastening PWBA DUP-L to DUPLEX
ASSY.
5. Unhook the hook on SUPPORT PWB fastening PWBA DUP-L to DUPLEX
ASSY, and remove PWBA DUP-L.
REINSTALLATION
1. Attach PWBA DUP-L to DUPLEX ASSY, and fasten by the hook on SUPPORT
PWB.
2. Fasten PWBA DUP-L to DUPLEX ASSY with the 2 screws (silver, 5mm).
3. Connect connector (P/J442), connector (P/J443) and connector (P/J444) to PWBA
DUP-L.
4. Attach COVER-L DUP. (p.414)
5. Attach DUPLEX ASSY. (p.412)
Figure 4-142. Removal of PWBA DUP-L
C A U T I O N
Avoid staticky places such as on a carpet especially when removing
or inserting a Board. Before starting work with the Board, make
sure to touch metallic portion of the printer connected to the earth
to let your body come out free of static electricity.
Leg_Sec03_139FA
5)-2
3)
4)
4)
5)-1

 Loading...


