EPSON AcuLaser M2000D/M2000DN/M2010D/M2010DN Revision B
DISASSEMBLY AND ASSEMBLY Main Unit Disassembly/Reassembly 102
Confidential
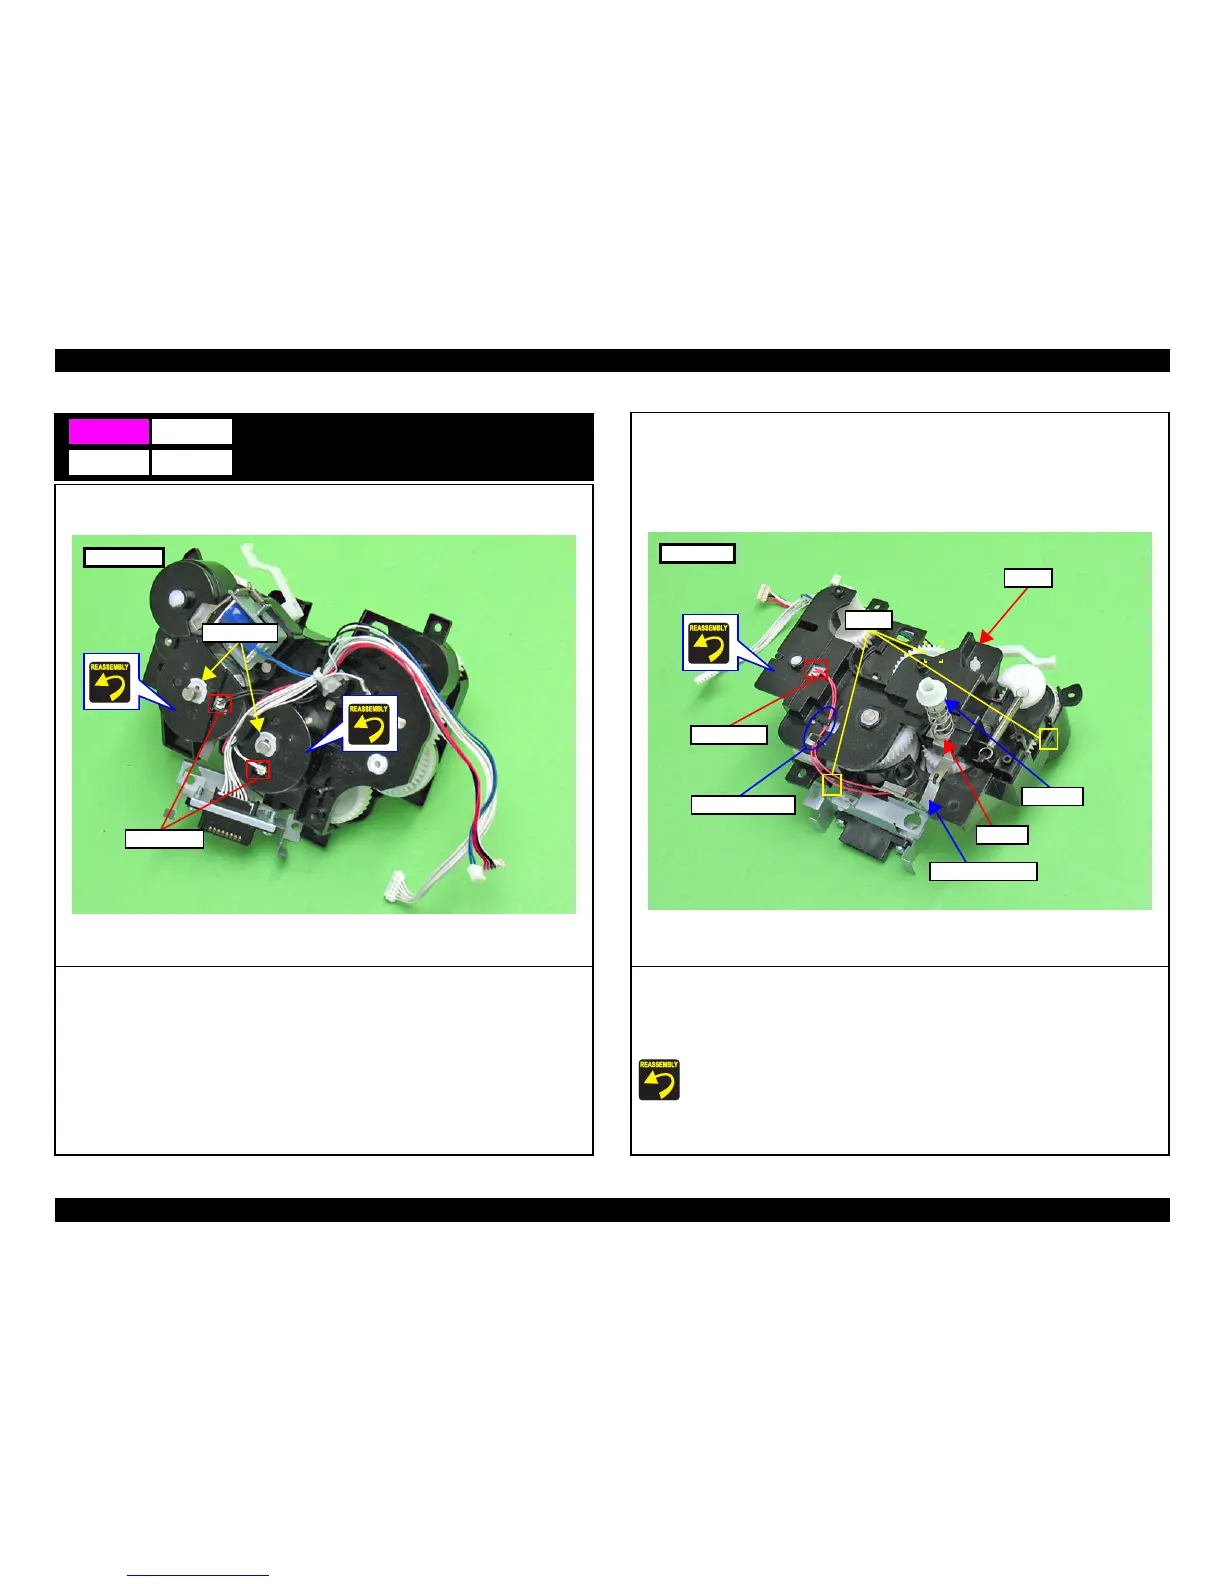
Registration Clutch / Paper Feed Clutch /
Developing Clutch
1. Disconnect the two connectors.
2. Remove the two Resin Rings.
A5
Resin Rings
Connectors
Front side
W
B
3. Disconnect the connector, and release the cable from the cable retainers.
4. Disengage the hook and remove the bushing.
5. Remove the spring and the Grounding Plate.
6. Disengage the three hooks and remove the cover.
Make sure that the connector connected to the clutch is fitted into the cutout.
When connecting the connectors, make sure to match the cable color with the color
indicated on the cover. (R = Red, B = Black, W = White)
Back side
Connector
Bushing
Spring
Grounding Plate
Hooks
R
Cover
Cable Retainers