5. Replacing the Motors Part 2: Maintenance
124
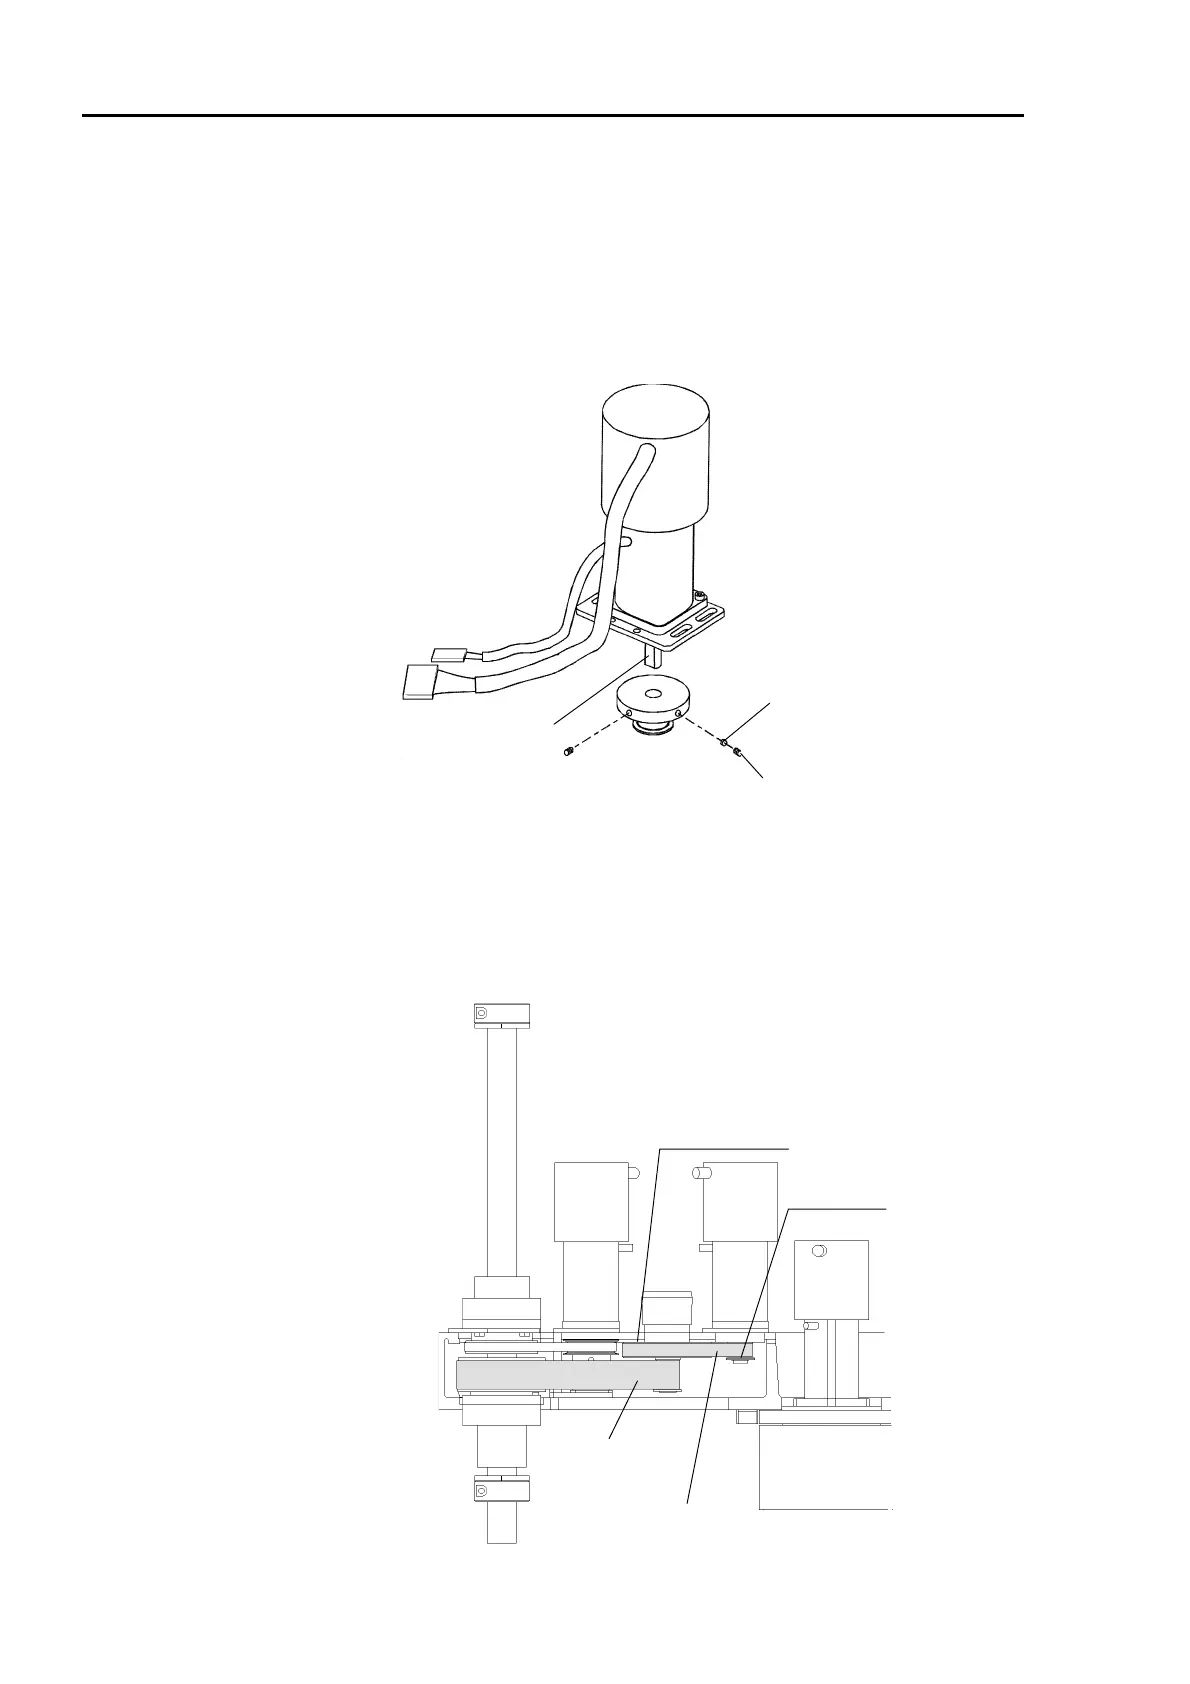
Installation : Joint #4
(1) Attach the new motor onto the motor plate with two bolts (M4×8).
(2) Secure the pulley to the motor shaft with two flat point setscrews (M4
×
8). Match the
end face of the pulley to the end face of the motor shaft. One of the setscrews should
touch the flat face in the motor shaft perpendicularly. Insert a bush to the other
setscrew hole and tighten the screw so as not to scratch the motor shaft.
Bush
M4
×
8 flat point setscrew
Flat face
(3) Place the Joint #4 motor unit in Arm #2. The motor cables should be facing Joint #3.
(4) Fit the U1 belt around the large U2 and U1 pulleys. Ensure that the gear grooves of
the belt and pulleys engage properly. Be careful not to slip the belts from the pulleys
while maintaining proper interval between the units.
Joint #4 U1 belt
U1 pulley
Joint #4 U2 belt
Large U2 pulley
 Loading...


