Configuring IP Multicast Protocols
December 2000 18 - 51
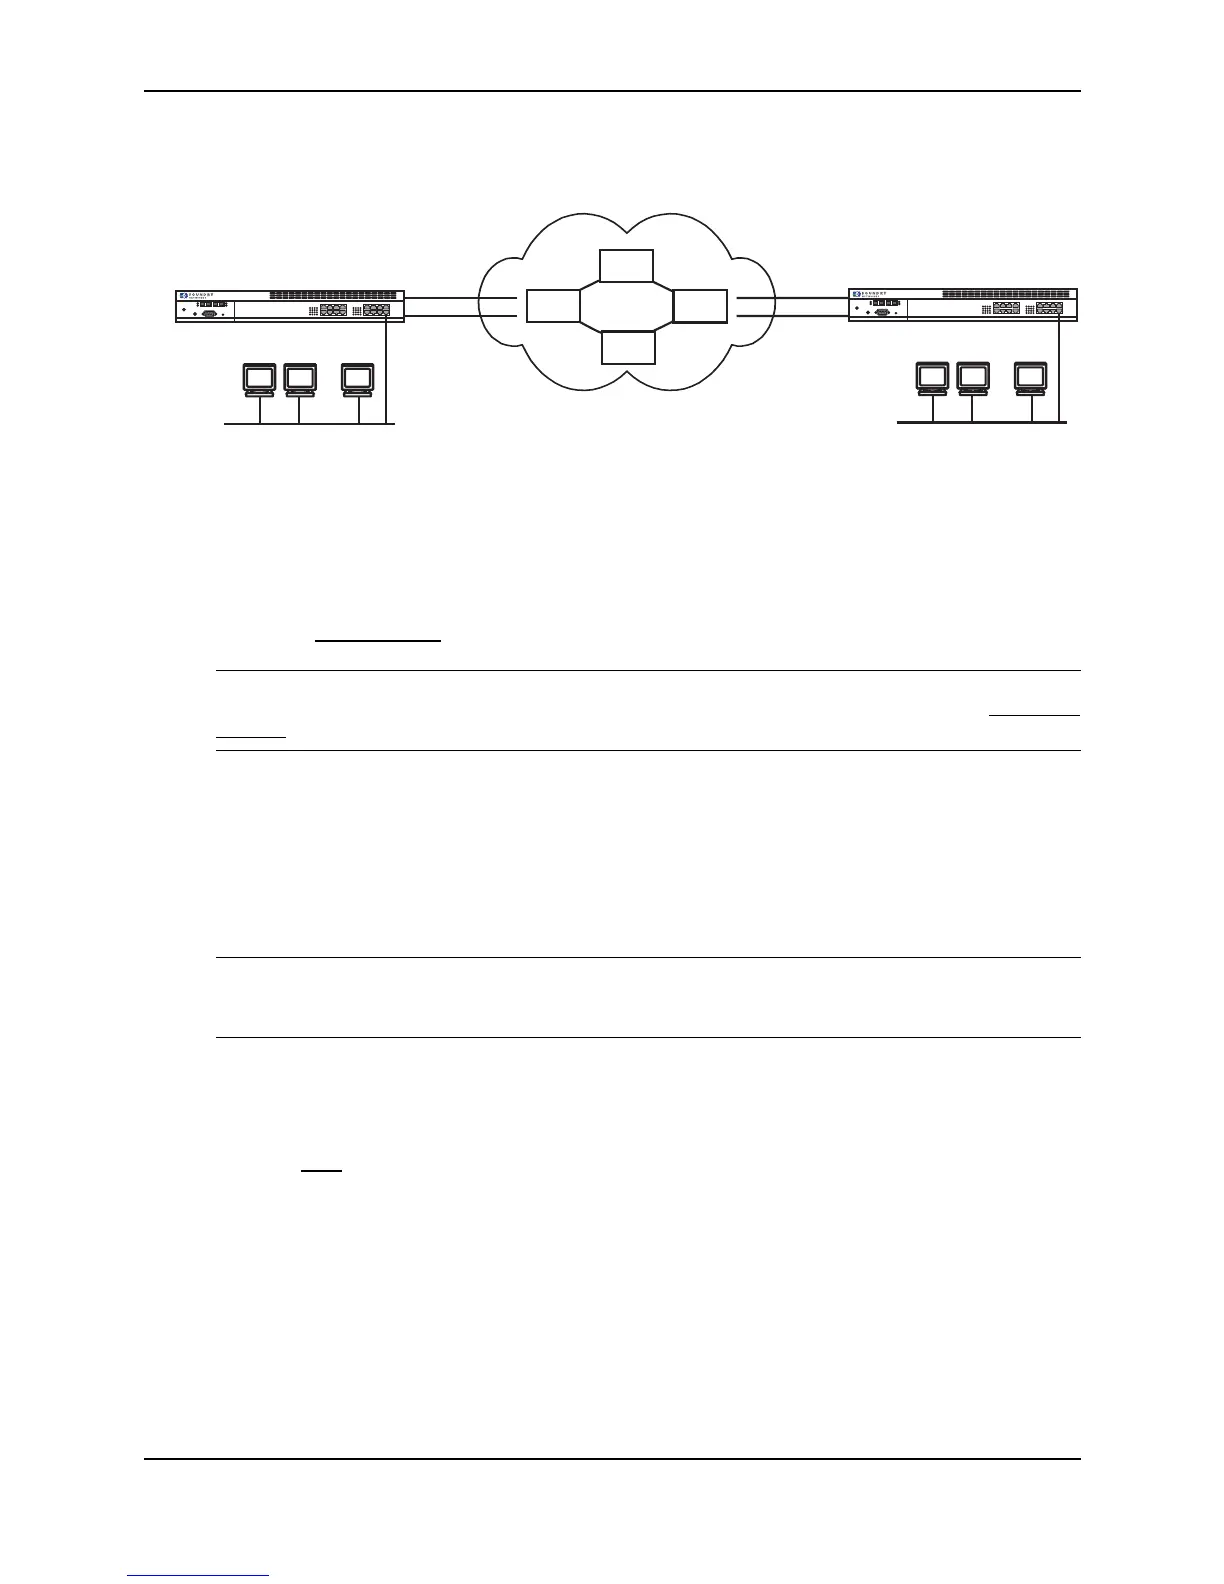
Figure 18.7 IP in IP tunneling on multicast packets in a unicast network
USING THE WEB MANAGEMENT INTERFACE
1. Log on to the device using a valid user name and password for read-write access.
2. Click on the plus sign next to Configure in the tree view to expand the list of configuration options.
3. Click on the plus sign next to DVMRP in the tree view to expand the list of DVMRP option links.
4. Click on the Virtual Interface
link to display the DVMRP Interface configuration panel.
NOTE: If the device already has DVMRP interfaces, a table listing the interfaces is displayed. Click the
Modify button to the right of the row describing an interface to change its configuration, or click the Add Virtual
Interface link to display the DVMRP Interface configuration panel.
5. Select the interface type. You can select Subnet or Tunnel. In this case, select Tunnel.
6. Select the IP address of the interface being configured from the Local Address pulldown menu.
7. Enter the IP address of the destination interface, the end point of the IP Tunnel, in the Remote Address field.
IP tunneling must also be enabled and defined on the destination router interface as well.
8. Modify the time to live threshold (TTL) if necessary. The TTL defines the minimum value required in a packet
in order for the packet to be forwarded out the interface.
NOTE: For example, if the TTL for an interface is set at 10, it means that only those packets with a TTL
value of 10 or more will be forwarded. Likewise, if an interface is configured with a TTL Threshold value of 1,
all packets received on that interface will be forwarded. Possible values are 1 – 64. The default value is 1.
9. Click Enable or Disable next to Advertise Local to enable or disable the feature.
10. Click Enable or Disable next to Encapsulation to enable or disable the feature.
11. Click the Add button to save the change to the device’s running-config file.
12. Select the Save
link at the bottom of the dialog. Select Yes when prompted to save the configuration change
to the startup-config file on the device’s flash memory.
13. Repeat the steps above on the router that has the interface on the remote end of the IP tunnel.
Link
Activity
Link
Activity
Power
Console
Link
Activity
Link
Activity
Power
Console
Router
Router
Router
Router
IP TunnelIP Tunnel IP Tunnel
Mulitcast Capable Router
NetIron
Non-Multicast Capable
Routers
192.58.4.1 192.3.45.6
Router A
Router B
Mulitcast Capable Router
NetIron
...
Group
Member
Group
Member
Group
Member
...
Group
Member
Group
Member
Group
Member