Installing a Foundry Layer 2 Switch or Layer 3 Switch
December 2000 2 - 5
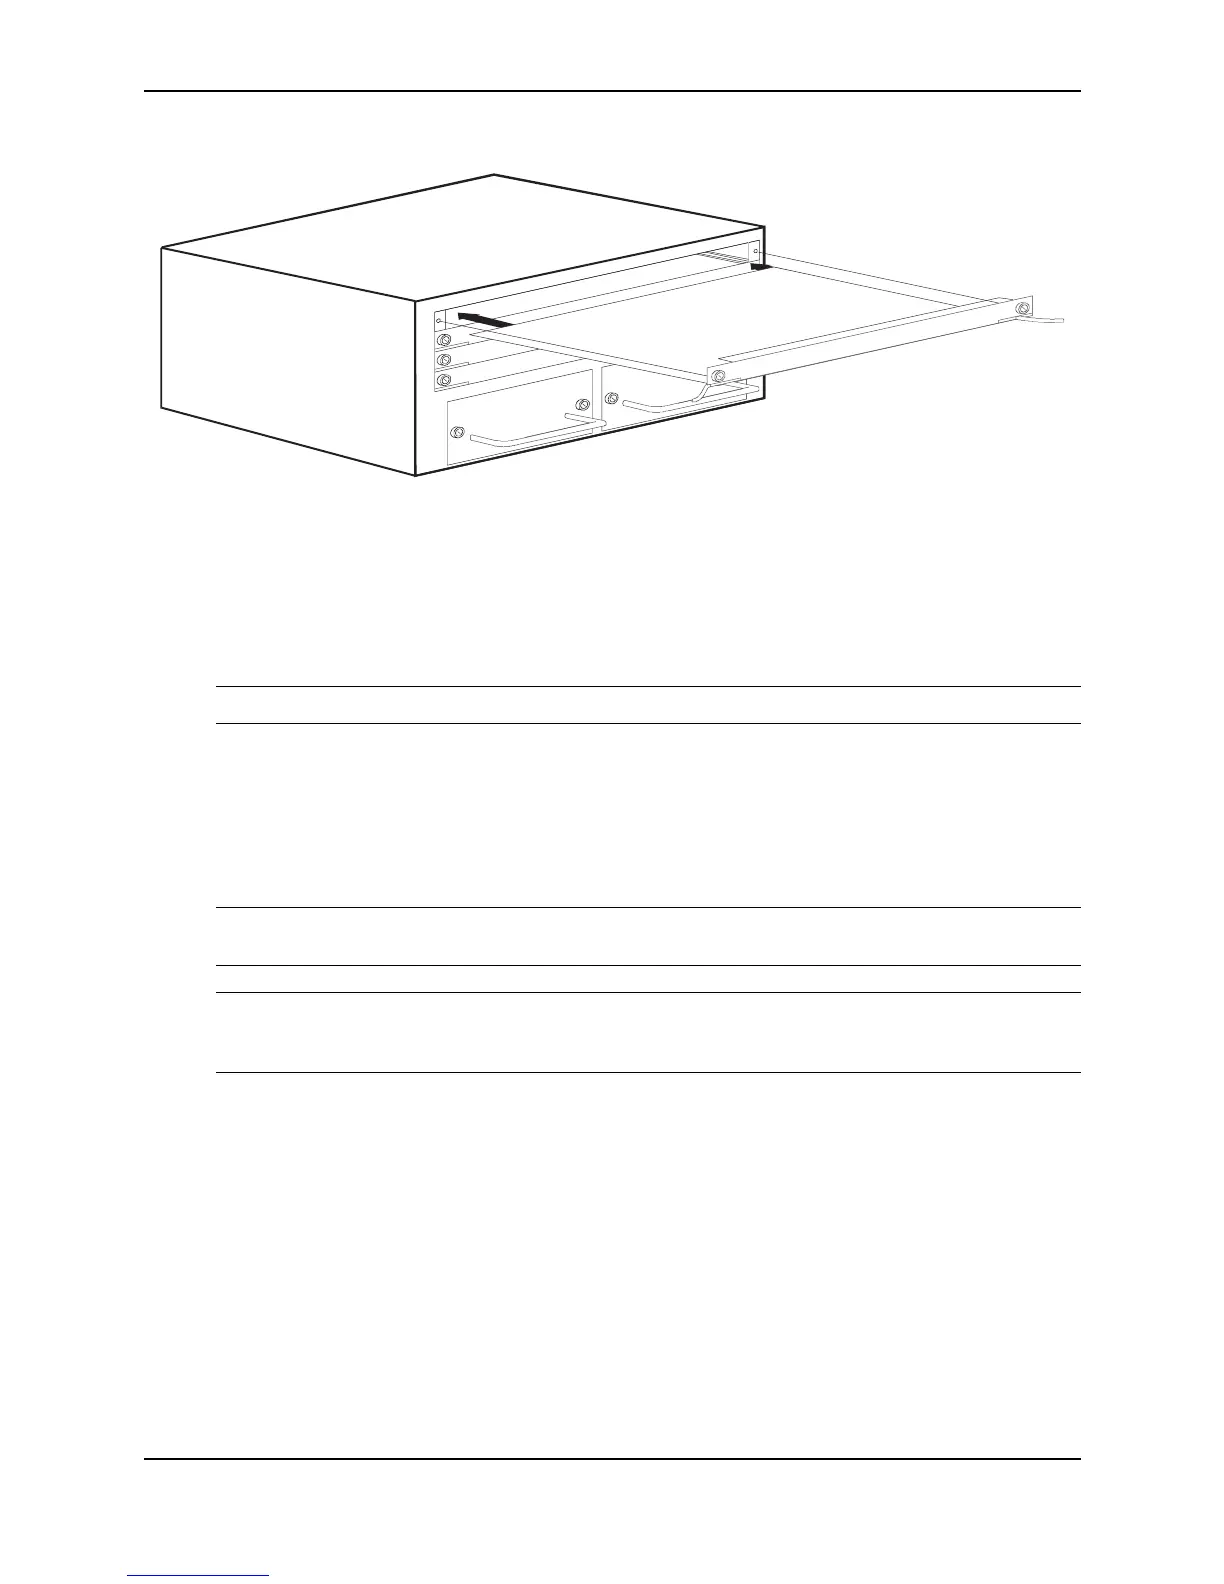
Figure 2.1 Installing a module
Removing Modules
To remove a module from the chassis, do the following:
1. Put on an ESD wrist strap and attach the clip end to a metal surface (such as an equipment rack) to act as
ground.
WARNING: To avoid risk of shock, do not attach the clip end to the air flow panel of the power supply.
2. Loosen the two screws on the ends of the module.
3. Pull the card ejectors towards you, and away from the module front panel. The card will unseat from the
backplane.
4. Pull the module out of the chassis and place in an anti-static bag for storage.
5. Cover the slot with the blank face plate that shipped with the chassis.
CAUTION: If you remove a module and do not replace it, cover the slot opening with one of the blank plates
you received with the device to provide additional safety and airflow for the system.
NOTE: Modules can be installed and removed when the unit is powered on (hot swap). You do not need to
power the system down. You do not need to change the slot’s configuration unless you plan to insert a
different type of module. See “Swapping Modules (Chassis devices only)” on page 2-31.